Learn how to tailor massive models to specific tasks with this comprehensive, deep dive into the modern LLM ecosystem. You will progress from the core foundations of supervised fine-tuning to advanced alignment techniques like RLHF and DPO, ensuring your models are both capable and helpful. Through hands-on practice with the Hugging Face ecosystem and high-performance tools like Unsloth and Axolotl, you’ll gain the technical edge needed to implement parameter-efficient strategies like LoRA and QLoRA.
Code: https://github.com/sunnysavita10/Complete-LLM-Finetuning
Course developed by @sunnysavita10
❤️ Support for this channel comes from our friends at Scrimba – the coding platform that's reinvented interactive learning: https://scrimba.com/freecodecamp
⭐️ Chapters ⭐️
- 00:00:00 Introduction & Course Syllabus
- 00:03:42 LLM Training Pipeline Overview
- 00:05:01 Parameter Level Fine-Tuning: Full vs. Partial
- 00:07:22 Partial Fine-Tuning: Old School vs. Advanced Methods
- 00:10:07 Parameter Efficient Fine-Tuning (PEFT): LoRa & QLoRa
- 00:13:01 Advanced PEFT Techniques: DoRA, IA3, & BitFit
- 00:17:34 Data Level Fine-Tuning: Instructional vs. Non-Instructional
- 00:19:55 Preference Based Learning: RLHF & DPO
- 00:24:25 Deep Dive: Unsupervised Pre-training (Self-Supervised Learning)
- 00:30:45 Deep Dive: Non-Instructional Fine-Tuning & Domain Adaptation
- 00:40:48 Data Preparation for Non-Instructional Fine-Tuning
- 00:42:51 Deep Dive: Instructional Fine-Tuning & Chatbot Creation
- 00:47:57 Deep Dive: Preference Alignment with Human Feedback
- 00:50:38 Family-wise LLM Breakdown: Llama, GPT, Gemini, & DeepSeek
- 00:55:23 Practical Setup: Essential Libraries & GPU Connection
- 01:08:56 Working with Pre-built vs. Custom Custom Data Sets
- 01:21:02 Model Selection, Tokenization, & Padding Explained
- 01:26:11 Defining Training Arguments: Epochs, Learning Rate, & Batch Size
- 01:32:38 Executing Fine-Tuning with LoRa
- 01:42:35 Post-Training: Model Prediction & Inferencing
- 01:45:15 Part 2: Comprehensive Guide to Instructional Fine-Tuning
- 02:16:32 Loading & Unzipping Previous Training Checkpoints
- 02:30:13 Masking Labels for Improved Instructional Responses
- 02:40:02 Part 3: Preference Alignment & DPO Training
- 02:56:07 Preference Optimization Techniques: RLHF, RL AIF, & DPO
- 03:02:40 DPO Intuition: Understanding the Training Loss Formula
- 03:07:44 Practical DPO Implementation & Avoiding LoRa Stacking
- 03:37:30 Introduction to the Llama Factory Project
- 03:51:09 Setup & Setting up Llama Factory via GitHub
- 04:03:19 Using Llama Factory Web UI: Selecting Models & Data
- 04:29:44 Training via CLI: Configuration via YAML Files
- 04:37:55 Unsloth Framework: Achieving 2x Faster Training
- 04:57:33 Inside Unsloth: Custom Kernels & Memory Efficiency
- 05:14:14 Practical Walkthrough: Fine-Tuning with Unsloth
- 05:32:08 Enterprise Fine-Tuning via OpenAI API
- 05:48:06 Preparing & Validating JSONL Data for OpenAI
- 06:21:55 Creating and Monitoring OpenAI Fine-Tuning Jobs
- 06:52:20 Google Cloud Vertex AI: Fine-Tuning Gemini Models
- 07:22:41 Data Management in Google Cloud Storage Buckets
- 08:31:01 Embedding Fine-Tuning Masterclass
- 08:38:40 Multimodal AI: Image, Video, & Audio Modalities
- 09:13:48 Vision Transformer (ViT) Architecture Deep Dive
- 09:58:48 Keyword Search vs. Semantic Similarity
- 11:24:45 Step-by-Step: The Modern Text Embedding Process
🎉 Thanks to our Champion and Sponsor supporters:
👾 @omerhattapoglu1158
👾 @goddardtan
👾 @akihayashi6629
👾 @kikilogsin
👾 @anthonycampbell2148
👾 @tobymiller7790
👾 @rajibdassharma497
👾 @CloudVirtualizationEnthusiast
👾 @adilsoncarlosvianacarlos
👾 @martinmacchia1564
👾 @ulisesmoralez4160
👾 @_Oscar_
👾 @jedi-or-sith2728
👾 @justinhual1290
--
Learn to code for free and get a developer job: https://www.freecodecamp.org
Read hundreds of articles on programming: https://freecodecamp.org/news
Оглавление (44 сегментов)
Introduction & Course Syllabus
Learn to tailor massive models to specific tasks with this comprehensive deep dive into the modern LLM ecosystem. You will progress from the core foundations of supervised fine-tuning to advanced alignment techniques like RLHF and DPO, ensuring your models are both capable and helpful. Through hands-on practice with the hugging face ecosystem and high performance tools like unsloth and axelottle, you'll gain the technical edge needed to implement parameter efficient strategies like Laura and Qura. Sunonny Sevita developed this course. — LLM fine-tuning is a very important part of the generative AI. Uh guys, if you truly want to understand the internal working mechanism of a large language model or if you really want to perform well in your AI or ML interview, then you should definitely know about the LLM fine-tuning. Uh so guys, if you are looking for well structured and organized course on LLM fine-tuning, then this course is for you. Now inside this course we are going to cover everything from basic to advanc. So first guys uh let me show you the complete syllabus of this entire course. Now inside this course guys we are going to discuss about the supervised finetuning. We'll understand all the fundamental concept of the supervised finetuning along with the end to end practical. So I will show you this supervised fine-tuning on the instruction data set as well as over the non-instruction data set. Then guys we'll understand about the preference alignment. So we'll understand how we can align the preferences AI uh human preferences to the AI model. We'll see the complete theory as well as the practical. Then we'll come to the different framework like hugging face, llama factory, unsloth, axelottal. We'll implement our solution in each and every framework and we'll see the differences that what is the main differences between all these framework. Then guys uh we'll uh cover the SLM fine-tuning, multimodel finetuning and even embedding finetuning. Now here guys we are going to see everything with the end to end practical implementation. So this is not just going to be a theoretical session. So here I will show you each and everything uh in terms of practical. Uh so guys uh if you don't know about me then uh my uh name is Sunonny Savvita. Uh I have 7 year of working experience in the field of data science and generative AI. from past 3 year I am uh deeply uh working with this finetuning rag and the AI agentric system uh during my experience I worked with the different domains like pharma finance or FMCG there I implemented lots of many use cases for the enterprises uh so guys if you don't know about me uh you can uh feel free to check out my profile you can uh follow me over the LinkedIn in or you can check out my YouTube channel where I am regularly updating a content related to the rag finetuning and agentic AI. So yeah uh without delay now uh let's start with the video finetuning guys. So guys before starting with the LLM finetuning uh we'll have to
LLM Training Pipeline Overview
understand the training pipeline of the large language model. So first we'll take a walk through of the LLM training pipeline along with the example and then only I will come to the finetuning okay the practical and all. So guys we're talking about the LLM. So we can choose any LLM. Let's suppose if I am showing you the finetuning with the llama you can choose any other LLM. Okay the code base would be similar. You just need to change the model ID. Okay, from wherever we are going to pick the model, you just need to pick the any other model, any other different model. Okay, according to your requirement. Now guys, so we're talking about the LM training pipeline. So there is three stage. The very first stage is called the unsupervised pre-training. unsupervised pre training. Now this is also called selfsupervised learning. Okay. Self-supervised learning. Now the second stage is called SFT. Okay. This is very much important.
Parameter Level Fine-Tuning: Full vs. Partial
SFT. Now what's the full form of this SFT? It is called supervised fine tuning. Okay. Now if we're talking about the supervised fine tuning so on a data level sorry on a uh parameter level we can divide into two part. The first is called. So let me write over here on parameter level. Okay. So on parameter level we can divide into two part. The first is called full finetuning. Okay. And the second is called partial finetuning. Second is called as let me write over here partial fine tuning. So we're talking about the full fine tuning. Now here we are going to train all the parameter. Okay. So if we are uh talking about this full fine tuning. So we are going to train all the parameter. Now if you're talking about the parameter guys, so parameter is nothing. It is weight and the biases. Okay. Now guys uh whenever we're talking about the f full finetuning so this full finetuning okay full or supervised finetuning it is required more memory okay it's required huge GPU memory okay and it's required multiGPU setup also multiGPU setup if the data is very huge Okay, huge, if the model is very huge, in that case it will be required the multiGPU setup. So we avoid this full fine tuning. Now the second technique is called the partial fine tuning. Okay, so let's understand
Partial Fine-Tuning: Old School vs. Advanced Methods
about it. So we're talking about the partial finetuning. So again there is two method. Okay, two method of it. So one is old school method. Now inside this old school method what we are doing you know so we are just going to be freeze the freeze all layer and train last output layer. Okay. Now the second one. The second what we can do now here freeze some starting layer. Freeze some starting layer and retrain. Okay. So here it's not train it's a retrain retrain. Okay. Now here is also retrain some last layer. Okay. So this particular technique generally we followed in the CNN based architecture right CNN based model or in a early stage LLM also. So in the early stage LLM like let me write over here early stage LLM early stage LLM like B okay bot T5 right T5 or Bart so this was the early stage LLM so inside these particular model we have followed this technique right but in a large language model whatever large language model we are seeing see guys now one more thing if we if I'm saying Large language model. Now what does it mean? So large language model means the model which was built on top of the transformer. Okay. So all the large language model are following this transformer architecture in packet. Okay. If you don't know about the transformer guys uh soon I will create one video on top of it and for sure you will understand. Now guys uh the second technique okay which is not a old school technique uh which is a latest technique. So that is called let me write over here PF okay PF P E FT
now what does it mean PF means PFT is called parameter efficient finetuning okay parameter efficient finetuning now inside this parameter efficient finetuning we are not going to be train all the parameter of the model Instead of that we are going to be train some uh specific parameter right so let me write couple of techniques name over here and in the future we'll discuss in a detail uh now guys uh let me write one very popular name under this p which is called lora okay I think you heard about this lora right uh so we have one quantized version of the lora if we are going to be use the quantiz model so which is that is called qlora okay now Q is representing to the quantization. Okay, this Now, now why we do the contisation? What we do in the contigation? You can check out with my previous video. Let me highlight some points over here. So in the quantise model, we use the lower precision model. Now what is the lower precision? Okay, each and everything I shown inside that particular video in the previous video you can check out over there. Now this quantized model is a me memory efficient model. Okay, so using this quantized model we can do the memory efficient loading. Okay. So quantized model is a lowest precision model. Uh if it is a lower precision model then we can uh simply load into the memory. Okay. uh we can do the memory efficient loading and all. So that's a benefit of the quantiz model. So Lora is one of the technique okay and if we can extend right if we are going to be use the quantiz model so that is called the Qura. Now we're talking about the PFT guys. Okay. So this PFT right this parameter efficient finetuning this might work on a single GPU as well. Right? So here I can write uh this PF technique this might work with single GPU and a smaller VM. is smaller VR. Okay. Now guys, this p this lora is not one only one and only the technique. Okay. We have some other technique also. So let me write the name of those specific technique right which I found apart from this lora and definitely in this finetuning series we are going to discuss that. So the second technique which is called dora. Okay I'll come to this dora. Maybe many of you hear
Advanced PEFT Techniques: DoRA, IA3, & BitFit
this name first time. The second technique is called sorry the third technique is called the adapter. Okay. Uh adapter layers. So adapter layers is also inspired from the Lora only. We are going to be append some uh layer. Okay. In the uh existing block of the transformer. Okay. So which is called the adaptive layer. So Dora and the adapter layer is also couple of technique. Okay. which we can use instead of the LoRa. Now we have some other technique. So let me write the fourth name over here which is called a bit fit. Okay, bit fit. So this is also parameter efficient finetuning and it is getting very popular and I'll show you the research paper of it. Now the fifth technique uh which is I A3. Okay, I'll show you what is this I A3. This is also parameter efficient finetuning. Now apart from that uh let me write couple of more names. So prefix tuning it's also uh one more technique uh for sure I'll show you this also. Okay then the next is prompt tuning. Okay prompt tuning uh it might not be a part of the pft but uh yeah I kept it over here and I'll show you the use of this prompt tuning as well. But guys uh this LoRa is not one and only PEF technique which is parameter efficient finetuning where we are not going to be training the entire parameter of the model. Parameter means what? Weights and biases. Okay. Uh instead of that we are going to train only couple of parameter only subset of parameter. So LoRa, Dora, adapter, layers, bitfit, IA3, prefix tuning these are some technique, these are some pep technique and for sure in our finetuning playlist we are going to discuss all these technique. Okay. Now let me show you the research paper of it. So if you're talking about the IIA3s. So guys here you can see the very good blog on this IA3 over the hugging face itself. So the full form of this I3 is infused adapter by inhabiting and amplifying inner activation. So the name seems very complicated guys but yeah we can implement it by program by the code and all and uh that will not be very difficult. So it is part of the lora itself to improve the lora actually we use this IA3 and again it is a part of the pept that's why I kept under the pept itself because we are using it to improve the lora itself. Yes, for sure. Loa is very important and the base for everything is the LoRa. L O R A. Okay. Now, uh here guys, you can see the research paper of it. You can check out the research paper. Even uh I'll show you that when I will discuss it. This is specifically this IA3 and all. Now, here is a bit fit guys. See this is the research paper of the bit simple parameter efficient finetuning for the transform based mass language model. Okay. So, we can uh use this bit also. Again this is not very popular but yeah we can look into it. If you are doing some experiment you can go through with it. Otherwise you can do everything from the lora uh from the i3 from the dora and the uh this one basically one more is there let me show you. So here is a dora guys right? So what is the full form of the dora weight decomposition low rank adaption right? So this is the form of the lora itself. Uh now here again it's a lower low rank adaption for the large language model. Right? So let me highlight uh the points. Now let me summarize all the thing. If we're talking about the uh partial finetuning we are just taking subset of the parameter. Uh let me mention over here subset of the parameter. Okay. Subset of all parameter. Okay. So these are couple of technique. First is Lora. If we are taking quantine model over there then it is called QRA then dora then adapter layers yes this was the technique adapter layer bit we uh we can avoid this as well but yeah IA3 we can pick up this prefix tuning it is also important okay I'll come to this I'll show you that prompt tuning is also again one of the technique okay now this was based on the parameter on a parameter level now guys if we're talking about on a data level so let me uh talk about the data level as And for sure I'll discuss that. Okay. So here I'm going to write on data level on
Data Level Fine-Tuning: Instructional vs. Non-Instructional
on data level. So on data level guys we can divide into two part based on the data preparation. If I'm saying data level means what? Based on the data preparation. Okay. the data preparation. The first is called non-instruction finetuning. Okay, non instructional fine tuning and the second is called instructional finetuning. Right? So maybe you heard this term many times instructional finetuning but I think you were not aware about this instructional finetuning now again uh this is a part of the SFT right so if we're talking about this is very very important guys right so we can divide into two part first on parameter level again inside the parameter level full fine tuning where we required huge uh memory and the multiGPU setup up. So generally we avoid it. Second is called the partial finetuning. Again we can divide into two method. One is a old school method where we are going to be freeze the layer and then train the rest of the layer and then we have a advanced technique. Okay which is called the PFT. Now under the PEP guys you will find the lower door adapter layers bit IA3 prefix tuning prompt tuning. Now guys on a data level also when whenever we are going to prepare the data right for the finetuning for the supervised finetuning so again we can divide into the two part first is a non-instructional finetuning and the second is the instruction finetuning so this is all about the SFT right now the third term which is called alignment with the human feedback okay or which is also called the preferencebased learning. So let me do one thing. Let me cut this thing from here. Uh this is also I will show you this is example of the unsupervised learning and all. I'll show you that. First of all let me keep it over here this entire thing. Okay. And let me write about the RLHF. So guys the third
Preference Based Learning: RLHF & DPO
stage which is called preference based. Okay. alignment with the with the human feedback. Right? Feedback. This is also called the preference based learning. Okay. Now guys uh here what we are doing we are aligning the response. Okay we are doing alignment of the responses. Now this responses actually this particular responses is being generated from the LLM. Okay. Now guys, if we're talking about this preference based learning, so there was two method. The first is called the RLHF. Now this RLHF, the full form of this RLHF is reinforcement learning through the human feedback. Now this particular technique was based on this algorithm PO. Now what is the full form of the PPO? Preference uh proximal preference optimization. Okay. Proximal preference optimization. Now this particular techniques guys, okay, this PPU actually it comes under the reinforcement learning. Okay. So that's why this is called RLHF which was used by the open AI. Okay. AI for the preference based learning right I hope now you got it now the second is the popular technique right now we are we all are using that and even I will show you the practical of it that is called the DPO now what is the full form of the DPO is direct preference optimization Okay, direct preference optimization. Now here guys, this is supervised learning. I'll show you the data set of it. So in the data set you will find out question then the response okay and feedback of the response whether the response is positive whether it is negative something like this okay so guys this is the complete stage of the LLM training pipe plan. So first is called the unsupervised pre-training. Now the second is called the SFT supervised finetuning and I explain the complete supervised finetuning graph which is very much important for us. And the third one okay after training the model after generating a response now based on that response again we are going to be train our model right that is called preference based learning or uh that is also called the align alignment of the responses the llm generated responses okay now let's see couple of examples so I here I kept the example of the pre-trading what is the objective of it what kind of data we are using then I kept for the normal finetune tuning that I kept the for the instruction fine tuning for the RLHF and all and what kind of technique you can use and here I kept one more like example okay which is LLM w LLM wise llama GPT mistril okay the name of the LLMs basically so first what was the name when it was unsupervised train then while the supervised finetuning then after the preference based alignment and all right so all the example I kept now let's uh take a look onto this. So first let's start with the pre-training which is also called self-supervised learning.
Deep Dive: Unsupervised Pre-training (Self-Supervised Learning)
Now guys this pre-training is also called the unsupervised pre-training or self-supervised learning. Now why it is called the unsupervised pre-training because uh in the data actually we don't have a label uh and why it is called the self-supervised learning because the label is being created automatically. Okay. The next word itself will be the label okay in the data. So guys uh what is the source of the data whenever we are doing this unsupervised pre-training. Now see uh whatever model you are seeing whether it's a llama mist GPT deepseek cloud based model like sonet opus okay gemini so this all the model initially have been trained on a very huge amount of data okay now this data could be from the documentation it research paper uh this could be the uh common crawl data from the internet okay Wikipedia encyclopedia data books okay like different books not even in English even uh in the different other languages right now guys uh because of that right so see initially actually we have to train our model on a very huge amount of data as I given you the example of the different model they all did this kind of training now this training itself is a bottleneck means because every country every company not having this much of data first of all right now for training okay for training our model if I'm saying model means transformer based model for training the transformer based model on a very huge amount of data we required a very huge infrastructure huge GPU infrastructure huge memory processor right so that is very money consuming and the time consuming thing okay every country every company cannot afford it that's why many of the company companies are not able to train their own specific speific large language model you can see grog again it's from the USA okay uh meta again from the USA deepseek from the China right 90% model from the US itself and it is being trained by those company which is already having the access of the entire internet data right so this stage is a initial stage now why this stage is required because using this unsupervised speed training or self-supervised learning we can teach our model general knowledge how it can understand the language okay the grammar of that language so to develop the learning of the model okay to develop the core intelligence of the model this particular stage is required now what is the objective we are talking about the technical objective so the technical objective is next token prediction this is called the language modeling okay we are doing it on a huge amount of data on a large scale of data because of this language modeling is called the large language modeling. This LLM word actually it came from here itself. Getting my point guys? Right now guys uh here what you will get after this particular training what you will get? You will get a base model actually. Right. For example, llama base, mist base, GPD base, deep sea, jimny right now if you want to if you want a uh like the a model which can do the conversation like a human. So again you will have to do the finetuning the instruction finetuning which is the next step that comes under SFT. Okay, if you want to make your model chat enabled, right? So for that you will have you'll have to do the instructional instruction fine-tuning, right? And if you want to align your model to the hum based on the human feedback, then you will have to do the follow the third step which is called the DPO. Okay, direct preference optimization. And you will have to uh align the responses of the uh you will have to align the response of the LLM based on the human preference. Getting my point right? So guys uh here if you want to perform the pre-training so we required this uh source we required the data from the huge sources. Okay. Uh in short I can say the data from the internet itself. What is the objective of it to predict the next token? Okay. This called the language modeling. We are doing it on a huge amount of data which is called a large language modeling. Okay. The NLM word came from here itself. Now what is the result of it? The result basically the you will get a base model. Okay for example llama base mpd GPD base deep sake base gemini base and all. I'll give you more example don't worry. Uh even I can show you over the hugging face itself. So if you will go with the hugging face and if you will check with this meta repository. So here you will find out a different model. Now see this model this particular model is a base model okay llama 213b now on the other hand if you will see this model okay llama 27b chat see this model is not a base model because uh after performing the pre-training again this model have been fine- tuned for the chatting right now I can show you the other model so if you will check with the lama repository just go with the first page now here check so metal lama 38b instruct Right. So this model is not a base model because this model actually have been pre-trained and then it has been trained on some instruction. Right? So this is also not a base model. Now likewise you can check the different model. So which is a base one which is not a base in the name itself you will get it. See this model is a base model. Now why this is a base model? Because see llama 3. 18P it it has not been trained further for any instruction for any chatting kind of a stuff. Okay. So I hope you got the meaning of the base model right now. Why we are doing it? So that we can develop the core understanding of the model in terms of the language, grammar. Okay, we can develop the uh general knowledge of the model. But guys after doing this pre-training is still my model ls to follow the instruction to maintain the specific tone in whatever tone basically we want to be train our model to produce the structure answer and all. Okay. So for that only what we do we perform the supervised finetuning.
Deep Dive: Non-Instructional Fine-Tuning & Domain Adaptation
Now if we are doing supervised finetuning guys so as I told you we can divide into two part. The first is called the normal finetuning this one and the second is called the instruction finetuning. Okay instruction finetuning. Now why when we do the instruction finetuning? So whenever we want to convert our model into the assistant okay chatbot means uh it can do the chats like a human okay conversation in that case we do the instruction fine-tuning right now let's say we got the we have train our data on a huge amount of data we got a base model right so what we do guys we do the non instruction finetuning which is also called the normal finetuning right and the second is the instructional finetuning okay guys if we're talking about the chat GPT so chad GPT have skipped this particular stage this normal finetuning means domain specific finetuning domain adoption finetuning what they have done they have trained their model on a very huge amount of data for developing a general knowledge and for making it enable like a human conversation okay they did the instruction finetuning now they have done the instruction finetuning on board uh okay on the Reddit data on the Cura data stag or flow data GitHub issues right open forum community forum right where we have like question and answer right on top of that data they have fine- tuned the model okay now guys when this normal finetuning means non-instructional finetuning is required I can give you the example of it so let's understand it over here so let's say you have trained one model. Okay, I can take example of the llama. Let's say you have trained one model, llama model. Now this model is a base model. Okay, I think you got to know what is a base model. Now guys, this particular model you want to train for your own domain. Let's say you are this is a base model. Okay. Now guys, this particular model you want to train for your domain. Let's say your domain is a farmer. One farmer company right let's a sun farmer want to train their own model okay so they are not going to be train it from a scratch okay this farmer company let's say sun farmer they are not going to be trained not from scratch Okay, s c r a t c h right they're not going to be train it from a sketch what they are doing they're just going to be take a base model okay let's say s lama 13b okay they're taking this particular model they are going to be trained for the farmer domain so they have a domain specific data domain is specific ific data. Okay. Now on this domain specific data again they will train which model DMA 13PB model. Getting my point guys so this particular training see this domain specific data let's say this is available in PDF. Now if we're talking about the instruction finetuning so in the instruction finetuning the data will be available in a question and answer format. So we would be having question and answer or you can say input and output format. Input and output format or you can say like in the uh instruction in instruction and response format. Okay, in any of these format the data will be available. But here the data is available in PDF. Let's say txt file. The data is available in any other file. Okay, in any other file format. So what we'll do? So here we are not doing instruction finetuning. Instead of that we are picking up this data this PDF data, txt data or data in any other format. This is a plain text. Okay. Now from this data itself what we'll do again uh like we'll uh we'll train our base model okay on top of which data on top of this plane data. Now how the data is being prepared I will show you that okay from this plane data I will again what I will do I will train my base model and now this base model right llama 13B model this will be my domain specific model domain specific model okay now if I want to fine-tune this model further for the conversation Okay. Or for generating a text the structured text and all then I can do the instruction finetuning. Okay. Now why we finetuning? Why we are doing it? So that we can generate the structure output. Okay. So let's say we are asking some question to this llama llama, right? So it needs to be generate the answer. But here it know the domain specific knowledge but still it is lacking to generate the structure answer. Okay, it is generating answer but we want to be more refined. We want a specific answer with respect to this specific question. So what I'll do I will perform the instruction fine-tuning where I would be having the data in such a way. Okay. In which way? in question and answer format, in input and output format, in instruction and the response format. I'll show you the example with that your understanding will be more clear. So guys that's what I was saying if we talking about the supervised fine-tuning we can divide into the two part one see we have a base model let's say this is my base model. So we have a domain specific data okay that is a plain text in PDF txt or any other file format we can take that and again we can train our model. Now this model is have this model have been trained on a noninstructional data. Okay, which is the plain text or something. Right now what is the aim? Why we are training this model over here? So that we can basically give the domain specific knowledge to my model. Now further if I want to generate a structure output then what I will do? I will train my model on the question and answer data. This particular data for the domain itself this particular data will have to prepare by myself. Okay. For the domain chat GPT took the Reddit data, CURA data, open forum data and all. If we are if you are in the specific if we are doing it for the specific organization so this particular data will have to create by ourself right and then further what I will do after the instruction finetuning I will do the preference based tuning okay which is also called DP or RLHF okay human feedback right human uh training retraining based on the human feedback Okay, preference based tuning or preference based alignment anything you can say and DPO is a technique of it so that my model will be aligned properly in whatever way the end user want the output I hope you are getting the entire chronology now okay so guys uh here you can see uh if we're talking about the non I don't worry I'll show the example and all if we're talking about the non normal finetuning okay this is for what this is for the domain adaption Right now data set what data set could be the plain text. Okay. It could be the company document. Now use case making LLM domain expert. Okay. In any sort of a area like medical, legal, finance, e-commerce, whatever. Now what is the goal of it? To improve the model understanding and knowledge with respect to any domain. Okay. Or to adapt that particular language. Now what is the output style? Produce text continuously. Not necessary capable for following instruction. Means if we are asking any question for sure it's going to be generated text but the text could would be aligned with my question would be the structure one it might not be because here again we are developing a knowledge the domain specific knowledge of the model okay meaning the model learning is the aesthetical distribution of the text not question answering behavior. So again we are not going to be train our model for such question answer. We are going to be develop the domain specific knowledge of the model. Okay and I'll show you this thing practically. So what is the example? So example let's say this is a text. Okay how the data set will look like. So I kept like one paragraph over here. So Sunonny Savvita here where AI meets unstoppable passion. Okay this is bear not here. uh where AI meet unstoppable patient turning code creativity and courage into the legacy teaching thousand to uh to master AI one video at a time not a not just a creator mentor visionary and a job maker don't chase opportunity build them right so this is the like a small text which I written right now over here you can see how the data will be created right for the for this uh non-instructional finetuning non instructional fine tuning. Okay. So let's suppose this
Data Preparation for Non-Instructional Fine-Tuning
particular data you got from any PDF, right? So let's suppose you got uh this particular data from any PDF. Now how the data will be created for the non-instructional finetuning, right? Non-instructional finetuning. Now see Sunny would be there. So savvita would be the output. Sunonny savvita will be the uh will be the input. Now this particular character will be the output. You can clean the data. See later on I clean the data. So that's why this character is not there. Sunny savvita will be there. Then where would be the output? Sunonny savvita where will be the input? AI will be the output. Sunny savvita where will be the input meets AI meet. So this is meets unstoppable. So passion will be unable passion. Right? So this turning will be the output. Now guys here you can see we are what how we are preparing a data. So data in such a way so that we can predict the next token. Okay next token means we got a model. Okay base model. Now let's say if I want to be train this base model on our own data on our own text data this text data in a PDF this text data belong to any specific domain right. So what I'll do I'll prepare my data in such a way in this particular way. Now guys what is this data actually it is representing to the self-supervised training only self-supervised learning only. Okay we have performed the unsupervised pre-training. Let's say I got one general knowledge based model. Now if I want to be trained for my own industry specific data I can follow this step and this is called the noninstructional fine-tuning. The data could be available in a PDF. We can get a text. We can again retrain the model and we'll be getting a domain specific model. Right? I hope this is clear. I'll show you with the practical this entire thing. Even the instruction fine-tuning and the RLHF means the DPU technique. Okay? On the same model. Same model guys. Right now let's see the instruction finetuning.
Deep Dive: Instructional Fine-Tuning & Chatbot Creation
So guys uh in the instruction finetuning right which is again part of the SFT itself. So data set follow instruction in the response format. Okay. Uh don't worry I'll show you that uh how it looks like uh because I kept each and every type of data right from the hugging phase itself. I kept the several data uh so non-instructional f fin fine-tuned data then instruction finetune data set then preference alignment tuning data set. So this data set I just kept to show you how the data could be look like. Okay. The instruction finetune data and the normal data and then the preference alignment data. Now uh here so the data set follow instruction and the response format. Uh what is the use case? The use case to build the chatbot because the chatbot uh we required the uh model which can do the human conversation humanlike conversational. Okay. So for building a chatbot or I can say for building the conversational AI we always required the instruction finetuning on top of the LLM. So let's say we have a base LLM. Now this base LLM for performing the conversational for building a conversational AI or to build a chatbot what we'll do the instruction finetuning. This is pretty much important. Now in between even though we are again training this base model on some domain specific data with some uh domain this domain uh this uh base LLM on some domain specific data with the non instructional finetune okay with the non-instructional finetune finetuning uh data right but if I want to convert my model into chatbot the conversational AI into the QA system right uh the definitely we require This instruction fine turate now goal to teach the model to the human based instruction right human like conversation uh now output style so direct helpful and structure answer is structure answer more reasoning based answer chat GP is a best example of it they did the uh instruction finetuning of the base model they didn't uh see they did the uh like b they did the unsupervised pre-tuning on a very huge amount of data they taught the model to the general knowledge and then they perform the instruction finetuning. But this stage is for us, for you and me, for a specific company guys. Okay, if I want to avoid this particular step, okay, if I don't want to train my base LLM, if I want to pick do the domain specific tuning, so this step is for me. And if I want to be convert my model, okay, into the conversational model, then this particular stage is required. Anyhow, now what is the data example? So see this is the data example which I mentioned. So here would be the instruction example what mitochondria does in one sentence. Now see mitochondria generate energy for the cell through the respiration. Okay. So we ask the question in this spe for this uh specific answer and it has generated this specific answer right if I don't want to generate any extra thing any other thing that's why this particular fine-tuning is required right now meaning the model learns produce direct question answer okay uh and it learns how to generate the structure answer based on the given instruction question now common data set so these are the common data set which you can see over the hugging face itself I'll show you in some time. Now how chat GPT have performed the instruction finetuning on which data they have done. So they have done on the revit conversation on the cura on the stack overflow uh conversation stack exchange conversation right GitHub issues discussion right open forum uh and the community board like hugging face kegel I'm just uh saying with respect to the coding as of now but yeah it could be any open forum committee forum and all okay so like the uh in the comment itself we are doing a discussion with respect to any specific post right so that uh data also could be possible right so hugging sorry chat GPT the openi picked this particular data for the instruction finetuning of the chat GPD model of the GPD model which have been used under the chat GPD application okay now guys uh what is a combo means if we are going to be train our own model so what could be the strategy could be first we can uh do the normal finetuning okay to adapt the model on your specific domain and after that what we can do so first we can do the non normal finetuning and after that we can do the instructional finetuning okay and with this particular strategy my model will become the beast means my model can generate a output according to our requirement okay now the last step is called the alignment with the human feedback so for that uh
Deep Dive: Preference Alignment with Human Feedback
so here you will find out data so in which way the data will be available so pair of response racked by the human okay means human is ranking the response whether it's good or not whether it's a positive negative something like that now for that we have RLF technique DPO technique RLif technique but guys this technique is a very basic and useful so we'll go with this particular technique but when I will explain DPU in the detail definitely I'll give you the glimpse of this technique as well okay this uh this technique RLF and this RA RLif reinforcement learning from the AI feedback I'll discuss about this as well now what is the goal of it to go to make the model polite, safe, helpful and aligned with the human value. Now, LLM has generated an answer that's fine. But human is liking this answer or not. Okay? particular answer or not. We don't know about it, right? So, what we'll do, we'll again perform the training. training using this DPO technique. Again, it's a supervised training only. And I will show you how the data looks like. So, I kept some of example over here. GPD4 pre-trained GPT supervised finetuning okay with like there's a instructional finetuning and then RLHF gymning also SFT RLF and then multimodel alignment okay deepseek also they have trained in the same way okay all the step they have followed now uh chat GPD right uh for the GPT how they have collected this uh human feedback data so they have collected from the log okay from the chat GP user log means whatever answer is being generated whether a user is giving thumbs up or thumbs down. Okay. So that particular log they were capturing and that was a data right. So collected with the user consent and anomalization. Okay. So whatever user is giving the feedback okay based on that particular data they have filtered. Okay. And again on top of that data they have retrained the model. Right. So likewise they have captured the data for the chat GPT uh for building the chat GPT. Okay. For training the GPD model in the human feedback. Now this particular example I kept for the uh GPT model itself for the chat GPT but in our case we'll have to collect our own data. We are going to build a chatbot like this okay on our own LLM right so I hope guys this thing is also clear. Now let's see some family wise breakdown llama jimna and all and then basically I will go with the different data set and first we'll start with the non-instructional finetuning okay and in the next video I will show you the instructional finetuning so here I kept the uh family wise breakdown means uh I kept the different
family of the model like llama GPT mist deepse and gemini so let's uh look into all these three stage of the training with respect to this model. So stage one uh let's say llama pre-train on trillions of token uh the data would be the common crawl data books coding and all then in the next stage we perform the sft supervised fine-tuning so we have made this llama to chat now if you want to make it uh to the human uh we want to align with the human responses right so we did the third we have performed the third stage okay uh then uh public wise so meta released both base and the chat variant right so You can choose base or chat. Uh the chat model basically it's aligned already. Okay. Uh means they have performed the insection fine tuning as well as they have aligned with the human feedback. Now if talking about the GPT so GPT3 which was released in 2020 it is a pre-trained model only. Then instruct GPT they have released in 21. You can check out with this particular model. They have performed the SFT means instructional finetuning as well as the RLHF. Then in uh 2022 and 23 they have released the GP3. 5 and 4 heavily aligned with RLHF and safety filters. Okay. And again it was a instruction fine-tuned model. Then GP model are closed source. So you don't get base over here means uh you cannot get this particular model. Uh because it is closed source they are just giving the API directly use the model. If you want to fine-tune on your own data if you want to perform the instruction finetune that is possible. Okay I'll discuss that. Now Mr. Wise same thing. So Mistl 7B is a base model 7 this particular model was released in 23. Then uh X uh 8 X7B model. This is a mixture of expert again it's a base model which again released in 23 itself. Then instruction version of the model this model was released. You can check out with the repository of the mist. Then some model also all with the RLHF and DPO. Okay you will get inside the repository itself. Open weight release means we can also use the base model as well as the instruct model directly and we can fine-tune for our own requirement. Okay. Deep seek again on a same in a same way. So they have released the base model pre-trained model. Okay. In all the variants then they have released the deepse code model okay which is trained on the code data SF it was the SF training maybe it was the instruction finetuning training. Then they have released the R1. Okay, this was again aligned with the human feedback right now. Open baits is available. Uh it is a China's big open-source push. Uh for sure you can download this model from the hugging face itself. Jimny again same thing right. So this was the family wise breakdown guys and similar to that you'll get the cloud based model right opus sonet and all and yes they have also trained in the same manner. So unsupervised pre-tuning then domain specific finetuning non-instructional then uh specific finetuning instruction finetuning and then RLHF. Okay, these are four stages. Let me revise all this thing over here. First is what? So first is the unsupervised pre-tuning. Okay, unsupervised pre-tuning UFT. The second is SFT supervised finetuning. Again two part of it non-instructional finetuning data on D on this data and then instructional fine-tuned data then third is reinforcement sorry uh preference alignment preference based learning on human feedback okay on human feedback. Now we're talking about the GPD model the chat GPD product you are seeing okay or any other uh product which have been released by any other company. So they have performed the unsupervised pre-training then they have performed the supervised finetuning means in instruction finetuning and then uh this preference based alignment. Now if you are doing for our own company so we cannot okay if we train the model from scratch it is not possible so what we'll do we'll pick the base model we will train what we'll train it on our non-instruction fine-tuned data if I want a structure output in that case I will go ahead with the instruction finetuning okay first this then this and then if I want to be aligned with the human answers then I will perform the uh preferencebased alignment okay through the human feedback okay so here I will go ahead with the DPO technique right so this is the entire summary of this theory now we'll see the practical guys now for the practical guys I created
Google collab notebook and you can see the title of the notebook noninstruction pre-train LLM fine-tuning on a domain specific data set Okay. So, let's connect to the GPU. Uh, now here you need to change uh to the runtime. If you haven't changed, then change to the GPU and then save it. Uh, you can purchase the Google Collab Pro if you want the uh if you want some premium GPUs like Alo GPUs. Okay. Uh, you can work with it after purchasing the Google Collab Pro. Uh, I don't have Google Collab Pro right now. So, that's why I'm working with the free uh GPU itself. So I written the title I connected with my GPU. Now let's start with the practical. Now uh first of all guys let me show you the data set. So here is my data set. So this data set is belong to the pharma domain. Okay this is the dummy data set. Uh here I just have one page because I just have to show you how to fine-tune our model. pre-trained model on top of the domain specific data set uh which can reside in any PDF any document. Okay. So this is the plain text only. You can see uh here we don't have any sort of a uh CSV. We don't have any sort of a column right now. Okay. We just have plain text. So we'll transform this particular data okay into the appropriate format and then we'll pass it to the model. So this our main name. Now uh here for performing the practical guys I'm going to use the uh hugging face. So let me uh show you the library. what a library we're going to use uh for training. So uh here guys we are going to use transformeral library. Uh we're going to use the data set library. Okay. Uh then accelerate. Accelerate we are not using because this library is for the multiGPU setup. Uh but yeah we'll install it because some dependency onto this accelerate. Then we'll use the bits and okay this is for the loading the quantiz model. Then PEF library it is for the LoRa configuration right. So LoRa perfect steering adapter everything we can do using this PFT library. Now you can see the further detail of this library. So who has created this library? Hugging face only created this transformer library. Same data set library been created by the hugging face. Then X-ray library also This bits and bytes library is created by this specific guy Tim determ. Uh so this uh library is available under the hugging face. Okay. This bits and byes uh you can directly uh install it from the hugging face itself. Now uh p library it is also created by the hugging face. Okay. Uh now the key research paper github and all you can search because it is a image or else what I will do I will give you in the description you can take from there itself. Now uh after that guys what we have to do we have to install all this library. So for installing this library this is the command pip install -ft bits and bytes transformer and accelerate. Okay. Now guys after installing it I required one more library. So the next library is the TRL. Okay. This TRL uh the full form of this TRL is transformer reinforcement learning. So for performing the supervised finetuning we required this TRL library. So let me install this also. Now we required one more library. So we required this pi mu PDF because my data is residing into the PDF. Okay. So we have to load the entire data from the PDF and for that we required this pi mu PDF library. Okay. So I hope till here everything is fine everything is clear. Now first of all guys let me show you how the different data looks like. Okay. So what I'm doing guys I am going to open sorry I'm going to copy and paste the different uh data set link over here. So first uh let me show you this non-instructional finetuning data set. So this data set actually it's a pre-built data set means already you will find out this data set over the hugging phase. Uh so you can uh look into the these data set and if you want to use this particular data set just for the practice okay or just to train any model you can directly take it from there. Okay. This is a pre-built data set which you will get from the hugging face itself. But guys in our case we are going to fine-tune on our own custom data. So this data set is not available over the hugging phase means this is the own we are assuming that this is our own enterprise data. company specific customized data. Okay. So we are going to be loaded from the period but uh already over the hugging phase you will find out so many data set non-instructional finetuning data set instruction finetuning data set and even the DPO data set. So what I'm doing I'm keeping some name over here. So here see guys these names are belong these names belong to the non-instruction finineetuning data set. Okay. Now likewise I can give you the instruction finetuning data set so that later on you can go through with it. So here is a link of it. Okay. Directly I kept the link of the instruction finetuning. I kept it in my notebook that's why I'm directly copy and pasting from there only. Then I have one more type of data set uh that is preference alignment data set. Okay. So let me show you that particular data set also. So here is the preference alignment uh data set. So uh if I'm going to show you see let me show you the data set how it looks like. If I'm going to show you this uh fine web data set okay I already open this link. See this is the data set. Uh it is available under this hugging face f repository. The data set name is fine web. Okay. So see uh inside this particular data you will find out this text column. So entire data has been divided into the multiple rows. Okay. And it is available under this text means the entire plain text okay it has been divided like this. So we have to prepare our own data. Okay this customized um data this PDF data into the same format. So let me show you the PDF data. This is the PDF data. It is a plain text right. So this was also the plain text but this particular data have been prepared like this to feed to the model. Okay. So we have to prepare our data PDF data into the same form. Now let me show you the another data. So this is one more data the pile pubmade abstract refined by data juicer. So guys this is uh this data set actually belong to the pharma research paper. Okay. Uh now uh here inside this text column you will find out the abstract of all the research paper right inside this particular column. Now this particular data is refined by this library data juicer library. Here you can see this uh data juicer library which is used to pre-process the data. Okay. That's why the name is like this. Uh the name is the pile pub abstract refined by data juicer. Now see inside this uh table you will find out this text column and under this text column you will find out the entire data into the multiple rows. Now the other column actually belong to the metadata. So you can ignore this particular column. Now while we are creating the data uh at that time you will get this particular column but yeah you can create again there is no use of it. Uh the main use of this text column only. Now uh let me show you one more data see here is one more data uh sky line. So inside this repository sky line 007 under this repository you will get this open webex data. So this data set see here you can read out the definition of this data. This is the open source replication of the webex data set from the openi means whatever data set have been used by the open it is a replication of that. Now this data set is very huge. Okay this data set was used to train the GP2 model. Now here you can see the size of the data set. So to total set is 55. 21 GB. It's very huge data set guys. Now here you can see the example. So under this text column only the data will be residing into the multiple chunks into the multiple rows. Okay. So there could be a table format or you can look into the means the data they can show you into the JSON format. Okay. But the column name would be the same text only. Okay. So we have to prepare our own data in a same format. Now let me show you the uh let me show you the other data set. So here uh I can open that uh data set. Where is the file? So here is a file guys. So what I'm doing guys I'm going to be open the other data set. Let me close it. Step by step I can open. Okay. So guys uh here uh in the instruction finetuning data set. I'm going to be open this particular data. Uh the data set name is what? Mental health counseling conversation. Now this is the instruction finetuning data set. Now here you will find out the context. Okay. And the responses. So this is the question right and here is the response of it. So the data you will find out in the form of instruction and the responses. Okay. So you can think in such a way this is the input this is the output. Okay. This is the question. This is the answer. This is the instruction. This is the response. This is the context. Anything you can say. Now I can show you the other data. See this is the next data. Alpaka uh this clean data. Now inside this data set also you will find out this output instruction. Okay. Output instruction input column is empty over here. Okay. Now you can look into the other data set. See open o rca data. So inside this particular data also what you will get guys you will get this system prompt question and the response. Right. So in every instruction finetuning in every instruction data set okay in every instruction finetuning data set you will get the question as well as the response of it. Now I can show you the preference alignment data. Okay. So this particular data was created by the anthropic public by the anthropics just for the practice or like how the DPO how the rein this preference alignment data looks like. Now inside this particular data you will find a two column. First is a chosen. So whatever uh whatever like answer is chosen by the AI and the rejected. Okay. Whatever answer is rejected by the AI. Now I can show you from the different repository. See here is So you can uh look you can check this ultra feedback bind preference clean. So inside this particular repository also you will get two column. One is prompt and second is chosen. Okay. And then another column you will get rejected. Okay. So chosen and rejected this will be the common column in every preference alignment tuning data set. So uh you can look into the other data set. See let me show you the last one also. So here is the last one. So guys inside this particular data also you will find the prompt uh initially region step chosen and then there will be one more column rejected column. Okay. So guys in every data set right which is belong to the preference alignment you will get the chosen as well as the rejected. Now I hope you got to know how the non-instructional data instruction data and the preference alignment data looks like. Now this data set is already given by the hugging face. Okay. So this is a pre-built data set right but guys we are not just doing the practice using this pre-built data set. Uh many YouTubers on many YouTube video you will find out this kind of tutorial. So we are doing on our own custom data set. So in this particular video I will show you with the non-instructional data. Okay. So this non-instructional data this text column we are going to be create from our PDF data itself. This is our PDF data. Okay. Now in the next video I will show you the instruction finetuning on the same data means we'll create a instruction uh data set from the same domain. Okay, the from the same kind of context to make our model more better and then uh the same model will train on the this preference alignment data. Okay, in the next video I will create one preference alignment data. Okay, and on top of that particular uh data we'll train the same model. So we took the uh we will we are going to take the base model. So first we'll train on this non-instructional finetuning data set which is our PDF. So here you can see uh this is my PDF. Okay. Now after that we'll uh train on this insection finetuning data set in the next video and then in the next video we'll look into this preference alignment data. I hope now everything is clear. So let's start with the practical. So first of all guys what we'll have to do we'll have to load our data set. Now before loading our own data set the custom data set let me show you uh let me show you the inbuilt data set. Okay. So how the inbuilt data set look like. So first let's load the pre-built data set. Now guys, I already written uh the code in the notepad. So I can directly copy and paste from there because I this code is prepared by me itself. So first of all, we'll have to import the data set. Okay. So from the data set guys, I'm going to import two thing. So let me import two thing over here. The first thing is a load data set and the second is the data set itself. Just a second. Let me check what is happening. Okay. So guys, here I loaded this uh here I imported this data set as well as this load data set. Now uh what we are doing guys? So here you can see we are going to load this tiny story from this particular repository. Okay, this data set actually again it is a uh non-instructional tuning data set. Okay, this one. So uh I can show you also. So I can just copy this particular name and I can paste it over here. Now here you see you will uh get the very first link right so just go through with this link and see here is a text column only the text column okay so this data set again have been divided into the multiple rows now what I'm doing this is a pre-built data set okay from the hugging face I just want to show you the how the data set look like so if I'm going to print this data set so what I'm doing I'm going to be right over here print data set now see how the data set look like so let me copy this data set and this variable I'm pasting over here okay So this is my variable. Now see uh so okay first of all we'll
Working with Pre-built vs. Custom Custom Data Sets
have to load it. This loading might take time. Uh okay it's loading fine. So see the data is loaded. Okay. So guys uh the data is loaded successfully. Now after that what I'll do I'll print the data set. See here is a variable uh here is a data set variable. Now inside this data set you will get the feature only one feature I have and see the number of rows. So how many rows we have? We have uh two lakh sorry 21 lakh 19,719 rows means almost 2 million rows. Okay. So guys uh but we are not going to use this data set. Instead of that we'll create our own data set. So let me show you couple of rows from here. So let's check with the first row. So here you will get the first row. See this is the first row. Now let me show you the second row. Okay. So here is my second row this one. Now if you want to check the last row of this data set so simply you can write over here minus one. See here is the last row. Okay. So guys uh this uh data set was a plain text and now this data set was divided into the multiple chunks. Okay multiple text chunk and under this text column you can see the data. Okay number of rows. Now we have to convert okay our PDF into the same format. If I want to train my the model on top of the PDF. Okay. So, we'll have to convert into the same format. So, how we can do it? So, first of all guys, we'll have to load the data. So, for loading the data, uh let me write a heading. Uh I will share this notebook. You can uh completely follow this notebook. Okay, I'll give the link in the description itself. So, here is what here is the uh here is the basically custom data. Okay, so you can see the heating heading. Now what I'm doing guys, I'm going to be import the fits library. This is from the pi mu PDF itself means uh in the back end it is using the pi mu PDF. This fits library we use to load the PDF. Now uh here I'm going to here I have created one function. My function name is what? Extract text from the PDF. Okay. So I will give the PDF path. I will uh take the text. I will load the text inside this particular uh list. Okay. I will open the path. I will iterate on top of the pages. Okay. I will collect the data from here and I will append inside the list. simple logic. Okay. And then I will return this particular list after completing the loading. So let me give the path. So here is my path content metformin dot PDF. Now once I'll run it guys. So what I'll be getting? I'll be getting a data. So here it is saying the data is not available because first we'll have to upload the data. If you're not going to upload the data guys, in that case you will get a same error. So please make sure that you are going to upload the data over here. Or else you can read it from the GitHub, uh drive, anywhere you can keep this data and you can read it. Now what I'm doing guys? So here uh let's try to read the data now. So see I got the PDF text. I can show you how the text looks like. So this is the text guys. The complete text which I'm able to get from the PDF itself. Now after that what I'll do I will uh divide the text into the chunks. Now this uh divide the chunk text into the chunk it is a hyperparameter. Okay. So this logic basically what we can do this logic we can decide how we are going to be divide our data into the chunks okay and what would be the size of the chunk right now I can give you couple of example so I kept for all of you now first of all guys see whenever we are going to load the data okay so this is the complete step which we need to follow uh as of now my data was not too much but uh if we are going to train our model from scratch okay or If we are going to do the non-instructional finetuning, so you need to follow the same step. So first you need to collect a data which we have already done. So see this is my data. Now after collecting a data guys, what we have to do? We have to cleaning the cleaning and filtering the data. Then we have to divide the data into this chunking. Okay, multiple chunks because we cannot give this entire data at the single go right to train my model. Uh then uh tokenization means we have to convert our data into the specific numerical ID. Okay. uh after the chunking so to every token into the given chunk one id one numerical ID will be assigned and then we are going to perform the training which is a next token prediction right so this entire step we have to follow now guys here I kept one more thing one more table so this table could be very much important so just try to read this particular table carefully so uh here I given the model name max to context window approx word how many words could be there and the command right so GPD1 model. So it was able to handle 512 token and there was approx 350 W. Now GPD2 1,000 token okay around 750 W GPD3 2,000 token 1. 5K W around uh GPD 3. 5 409K token around 3K W and if you're talking about GPD 440 so it is follow it is able to handle up to 1 lakh 28,000 token around 1 lakh W. Okay. Now over here guys you can see so whenever we are going to chunk the data okay so we have to keep something in our mind right so our model right how much uh basically token can handle and whenever we are going to be divide the data into the chunks okay so we can follow some regex pattern also means we can divide our data into the paragraph segment okay or a semantic chunk and all and then uh basically we can uh or else basically we can go ahead with the token length also So let's say if we are going to be train GPD4 kind of model so let's say we are going to be load the data the speed of data okay so we can give the bigger chunk to the GP4 model to retrain it to the finetuning it okay and similar at the time of the unsupervised tuning as well okay means the first step the initial stage okay now here guys you can see so this chunking we can do based on what based on this particular pattern see here I written based on the paragraph semantic chunking Right? We can write some reg x rule and all and then we can or else we can go ahead with the token length means how many tokens we can bear in the single chunk according to that also we can define the chunk or else we can take the both strategy okay so I written a function over here now see the function so split paragraph so first we'll take the pages okay this data now we are going to be split based on the line okay uh based on the new long line means the double line here you can see in the PDF itself uh so if you will look into the PDF so where it went here. So here you can see between this line and this line we have major gap right. So we are going to be divide our data into the based on this major line. Okay. So this is a rag X pattern. You can write any reg pattern. You can read out the chat GP GPT model research paper any other research paper. Right? How they have done the unsupervised pre-teening how they have divided a data into the chunks the entire text and all. Right? So it will also help you. Okay. But this is also a generic practice. Then what I'm doing I'm iterating on top of the chunk and if I'm saying over here if there is a 30 character more than 30 character then only I'm going to be append the chunk into this particular list. Okay. So whatever par whatever like uh whatever pages we have on we are iterating on top of the data okay and on the entire list then we are chunking based on this strategy if inside this chunk we have more than 30 character means what 10 to 12 token okay or 8 to 9 token so more than 30 character only then only we are going to append inside this particular paragraph okay so if I will run it guys now here you will see we are going to be split our data so here uh inside this particular variable I'll get my data split data now So uh see what I have the uh first chunk then second chunk okay then third chunk uh then here you can see the four chunk but guys the data should not be like this the data should be available uh into this particular form okay we should have this uh text column and under this text column the chunk should be present so what I'll do now I will map my data okay to the text column okay now here what I'm doing I'm iterating on top of the chunk and then I'm assigning it to this text column. So now how my data look like? So if I'll show you the data. So here see my data guys. We have this text. Okay. Now with every text one chunk is associated chunk text chunk text. Okay. Now what I'll do I will convert this particular data into the hugging face compatible data. So for that I have a data set library. Okay which I already imported. Now from here I will call this from list. Okay. From list. Now from this list itself. So here you can see this is a list only now right. So I will pass this data to the list. Okay. And now what I'll do I'll keep it inside the variable. Let's say my variable name is data set. Okay. Now see my hugging face compatible data is ready. So if I will show you this data set. So how the data set look like? See feature text. Okay. Under this text we have a multiple chunks. Okay. And here number of rows is four. So if you will look into the pre-built data guys uh this was my pre-built data. Uh if you will look into my pre-built data. So this was a pre-built data which I loaded from the hugging page. In a same way we are able to convert our data. See here is my data. So now you can check the first row, second row, whatever row you can check. So let's say if I'm going to be check the first row, okay, I will simply put the zero. So uh here you will be able to get the first row. Likewise you can get the second row. Okay. So in total we have fourth row. So guys uh in whatever way I was having my pre-built data, the data was already available over the arguing phase. Now I'm able to convert my data set into the same format. Okay, my custom data set. So this all the technique all the pre-processing step you will have to follow with respect to your plain text. Now coming to the next part. So the next thing is basically we have to select the model. So first of all let me create the multiple cells. Okay. Now here we'll have to select the model. So let me make a heading. So the heading is let's select the model. So guys model wise what I'm doing I'm going to be select very tiny model because I cannot bear the expensive the large model inside with this particular GPU with this particular memory we required more BRAM and all. So uh if you have Google C Google Collab Pro access or you have more BAM then you can try out with this particular model. I'm using this model tiny from the tiny llama repository. So tiny llama 1 1. 1b intermediate step 1431k 3t. Okay. Now, what does it mean? What is the meaning of this uh line? So, I I written a meaning of this line over here. See, so the checkpoint is from the tiny llama model. Okay. Which train up to 1. 54 million step over 300 sorry 3 million to 3 trillion tokens capture midway before the final converge. So guys, this particular model is a tiny llama model. Uh this model trained till this particular step. Okay, around 14 lakh step. Okay, on top of this much of token. So I'm using this model to train uh I I'm using this as a base model. This is my base model guys. Okay, this model is not being trained on any instruction data or not on any domain specific data. This is my base model simple pre-trained model. Okay, so I'm going to use this particular model to perform the domain specific finetuning on top of my PDF data. Right, I already prepared a data. Now what I'll do guys, I will basically perform the finetuning. So first of all guys what I'll do I will load the uh I will load this specific library like auto tokenizer autocausal lm trainer training argument and data collector for language modeling. I think this will not be required or training till training argument will be required. So let me run it and I'm going to load the library. Now here what I'll do guys I will load the tokenizer. Okay I will tokenize my data because I already performed the chunking. Now I will perform the tokenization using this particular tokenizer. Okay. So I'm loading a tokenizer. Now after that guys I have to execute one more line of code. So if padding is none then in that case I'm going to be assign this end of the token to the padding right now why it is required let me give you the reason of uh that as well. So here I
Model Selection, Tokenization, & Padding Explained
kept one image with that you can easily understand. So guys uh what is a pad token? So pad token we use to make all sequence in a batch to the same length. So let's say input in input word we have two token hello world right in input three input two we have three token uh good morning everyone uh technically there is a three token hello world this full stop then good morning everyone full stop now here you can see the size of the token size of the input one and input two is different so if I want to make it same so here what I'll do I will do the padding okay now how I'm going to do the padding so at the end okay at the end of this particular see here the length of this particular uh input is three sorry four okay 1 2 3 4 now what I'll do so here at the end of the sentence hello world okay after this particular word I will add one uh one more token okay that's going to be US end of the token okay this e US so if I'm going to be append the US token now how my sentence will look like hello world us okay so the length of this input one and input two is going to be same so that's a simple use of this line so let me run it and here we are able to append this uh end of the token okay now After that what I'll do guys? So after that guys we are going to be pre-process the data. Now the pre-process step is pretty simple. So here we are passing example means every text chunk. Now after taking every text chunk see we are truncating okay we are padding and we are like defining the max line. So what is the meaning of this particular parameter? I'll tell you now. Here we have one very important line. So to token okay to the label actually we are going to be assigned this input ID. Okay. And then we are going to return the token. So let me execute it and let me explain the meaning of this each and every line because it is very much important. So here what I'm doing guys I'm going to be uh show I'm going to be like add some example and all and with this particular example we'll be able to understand. Now see so whenever we are passing the text so let's assume this is my text okay metformin improves insulin sensitivity in the liver. So what will happen? So this tokenizer token okay it is going to be take this particular text. Now truncation true what it will do? So if the text is longer than 5 12 tokens, it's going to be cut off that padding. True means if the text is shorter than 5 12 token, it's going to be pad. Okay. Uh and the fixed length of this particular sentence of this like whenever we are doing the tokenization, it will be 512. Okay. If it's going to be less and more to this 512, then we are either we are going to be truncate or we are going to be perform the petting. So after processing it, I will be getting this particular input. So input output where I will be having two column input ids. Okay, which is going to be assigned to every uh token and then attention mask. Attention mask is saying which token is important for me to the attention layer. Then label guys. So token labels token input ID docopy. Now why we are doing it? So this is a key step for the causal unsupervised language modeling means what is our aim? The our aim the model should try to predict the next token in the same sequence. Okay, I shown you how the data is being prepared for this non-instructional finetuning. Okay, for this plain text uh for this particular plain text. Okay, so we take we took this plain text, we convert into the text, okay, multiple rows, we did the chunking because of the model, right? Because we cannot put uh the entire data in a single go to the any model. Okay, and then we have to predict the next word. Okay. Uh in the non-instructional finetuning, we are doing this selfsupervised fine tuning self-supervised tuning itself. Right? So what we have to do we have to put the no next token and for that what we have to do we have to prepare a data in such a way. So here you can see the sentence what is my sentence metapformine improve insulin sensitivity in the liver. Now see over here this is my input metapformin improve insulin. Now what is the target level improve insulin sensitivity to okay so metapformin improve insulin. So here what is the next word of it? So metapformin improve insulin sensitivity. Okay. So the sensitivity will be picked as the next word. So this particular line with this particular line we are going to be prepared this kind of data. Okay. Now whenever we are passing uh whenever we are getting final result so we'll be getting the input ID attention mask as well as the labels. Right. So let me execute it and let me show you how the data looks like. So for executing we'll have to map the data. So here what I'm doing guys I'm going to be map the data. So I have a data set I'm calling map tokenization function is there. Batch to means we can pass the data into the batch if we have so many data. Okay, so many rows and here remove column text means in the final output we just want this three thing input ID, attention mask and label. We don't want this text. Okay, so I'm going to remove it. Now here I will be getting my tokenized data. If you want to check it, you can simply check it. See here is what here is my tokenized data. Input ids, attention mask and label. Now here is the number of row. Number of row is four. Now what I'll do guys, I will load my model. So here you can see I'm going to be load my model. So model loading might take some time because the model size is around 4 GB. Okay. So in your uh it depends on your internet speed. Uh in my case it might take like 4 to 5 minute. So let it load guys. So guys uh my model is loaded. It took
Defining Training Arguments: Epochs, Learning Rate, & Batch Size
around 4 to 5 minute. So as I told you it depends on your internet speed also. Uh now after that what I'll do guys I will define my training argument. Okay. So uh here uh inside the training argument uh so guys see we have so many training argument inside this class uh if you will see the list you will get the hundreds of argument. So how you can get the detail of it. So for that uh you can simply call this uh help training argument. Okay. So you already loaded this class from the transformer. You already imported Now simply pass it to the help method. Okay. Now once you will run it, see here you will get the detail of each and every parameter whatever is there. Now uh I mention uh the required parameter only. So I kept the meaning of this particular parameter. Let me mention it over here. So uh output directory means where we are going to save the model. Uh override output directory means we are going to override the previous model. If we are saving the new model, it will override to the previous model. Number of training epochs. How many epochs we are running for the training the model per device train best size means uh in one single go how many batch size we are passing save step at which step we are saving the checkpoint save total limit okay so uh keep how means uh how many checkpoints you want to be keep on your disk let's say you have five checkpoints so you will keep only four and five checkpoint if you are writing two okay the latest two checkpoint point you will keep on your uh disk. Then logging step at which step you are going to be log. Okay. Uh learning rate means it depend it belong to the optimizer. So if we have very huge learning rate my basically graph will go here and there. If we have like a small learning rate then my graph will go smoother. So guys uh if you know the basics of the deep learning then I think you can understand the meaning of this learning rate. Now uh FP16 for the precision right in which precision basically we are going to be load the model report tool means we are not going to be log uh our data anywhere okay on any uh basically tensor board or any bit and bias uh like dashboard right or anywhere. So we are just like keeping none. If you want to keep like we can uh remove this none and we can keep our matrix as log and all on some different platform. Okay. By default you will get the bait and bias W andB platform. Right. So this is the meaning of this parameter. I think you got to know. Let me run it. So my model is will be available inside this particular directory. Now after that guys what I'll do uh so you can check with this helper method. Now I'm going to be define my trainer. So after defining a trainer. Okay. So see the trainer might take some time. So trainer is taking three things. One is model, second is data. Okay, this tokenized data and the third is a training argument. That's it guys. Now after training uh after defining a trainer, I will just call the trainer train method on top of it. So trainer is a class. We are going to initialize this particular class and then we are calling this train method. So once we'll call this train method. Now guys see what we'll get. Can you can anyone guess what I will get? So you can pause the video and you can give me the answer in the chat uh if you're watching till here. So if I'm going to be run it guys, see here I will be getting out of memory error. Now why I'm getting this out of memory error? Because guys uh you have you haven't focus because we are training the entire model. We are retraining the entire model over here. If you will check see we are loading the model. We are not going to be select any uh basically last row okay or the initial row we are not going to do any lora and qora we are simply retraining the weight of the entire model and my machine is not capable to do that thing right now and because of that I'm getting the I'm getting this out of memory error so what is the solution of it so is lora okay parameter efficient finetuning now before the lura Guys, let me show you the other method also. So here I written some sort of a description. So let me keep the description over here. Okay. So what is the description guys? So here we have we are not specifying anything means this is the full finetuning. Uh now we have two method for the partial finetuning. The first freeze some layer and finetune unfreeze layer which is the old CNN method or B style method. Right. The second is Lora append some external weight to the already trained pre-trained bait. So guys, I will show you this both method method. Okay, I will more focus on the lora. I'm not going to explain you this freeze some layer and all. I will give you the code. I'll keep it over here. But I'm not going to explain because I already explained in my previous video. So if you will go and check right. So let me show you in which all video I have shown you. If you will go and check with the playlist. So uh okay this is running. So if you will go and check with my playlist. So just check out with this third video. Third video and the ninth video. Okay. In this both video I discuss about this particular technique and even I shown you the practical also. Now guys uh come back to this uh like solution. Now here what I'm doing I'm going to be like uh write a code. Okay first I'm giving the code for this particular method for freezing the layer. You can try out from your end okay or else you can watch out those particular video but this is not a appropriate method. There is some pros and cons. Maybe in the later video we'll discuss otherwise this video will be very longer. Now here this is the code guys. So let's uh look into the code what we are doing over here. So first we are loading a model. Okay. Then we are freezing some layer. Then we are unfreezing the last four layer. Okay. And then we are loading the data set. Then we are like defining the training argument and then we are training the model. Simple guys. Okay that's it. Nothing else. So you can look into this particular method and you can run it. But this is not an efficient one with respect to the larger LM. We'll discuss theoretically later on why it is not. uh I'll show you the mathematic mathematics of the lora dpo everything guys don't worry right in the upcoming session now what I'm doing guys so here we are going to perform the lora based technique so how to do let's come to that now before running the lora based
Executing Fine-Tuning with LoRa
technique I will run the uh this uh garbage collector okay so whatever like caching memory and all will be there unnecessary memory it's going to be removed Now again what I'm doing guys I'm going to be update the library because before running the lora configuration we'll have to update the libraries okay uh because initially we haven't loaded we haven't installed the sp library right bits and byes we also required the upgraded version transformer and the accelator else also so let me run it let me execute it now after that what I'll do guys I will import uh this particular statement but before that guys what you can do you can simply uh restart the session okay because restart the session basically will load the latest version. Okay, whatever version we require. Now after that what I'll do I will import this packages all the packages auto tokenizer coser llm training argument trainer then lora config get p model task type from the pft and then from the data set we are going to load the load data set okay now after that guys what I'll do I'll take a same model which I'll taking which I was taking initially now uh here I will load the or tokenizer in a same way okay then I'm going to be assigned this US token at the end of the as a pad token okay So let me execute this. Now here it's the same thing. We are going to be uh map the data set. Okay. Now which data set guys we are using? We are going to use the same data set. So uh here let's see the data is available or not. If not, okay, the data is available. Now what I'll do? I'll load it again because I restarted the session. So I will lose my data. Okay, I will lose the variable basically. So where is my data now? First of all, I will import this uh import statement. Now FS extract data. Okay, this is fine. Now, PDF, this is perfect. Uh, regular expression, this is also correct. Paragraph is there. Data. Okay, data. Now, data set is ready. Okay. So guys, here what I'll get? I'll I will get my data set. So, let it run. Let it execute. And what I'll do after that? Uh, I will again tokenize. So, guys, you need to rerun this step. Uh, restart the session because you might get some issue with the LoRa configuration and all. That's why restart the session. So let me check. Okay, now it is done. So here I got my data set. So where is the data? Okay. So tokenizer is running. Let it execute. Okay. So here guys, it's still it is connecting. Okay. Okay. So let it connect. Uh or else what I can do? I can disconnect and delete the runtime again. I can connect. Okay. Uh okay. Fine. Fine. not is done. So this is fine. It's loading. This is fine. Uh guys, it might take time. First time now it takes time. Okay. Loa config get p model. This is a like huge library. Okay. So the library is loaded. Uh now what I'll do I'll load the model then tokenizer. Now here I'm going to append the US token. Now this is my tokenizer function. So let it run. Okay, reconnect. Why it is disconnecting every time? Connected. Tokenizer is there. Okay, this is required. Uh don't know why it is reconnecting. Okay. So guys, uh I followed the same step and I got my tokenized data. So inside this tokenized data as you know we will be getting the input attention mask and label. You can include this text column or you can exclude it's up to you, right? So uh you can pass along with the text column as well as you can exclude it also. You know how to do that. So I get the I got the tokeniz. Now after that what I'll do? So here after getting a tokenize guys I will load the model. Okay. Now this time guys you can see we are going to load the model in the 8 bit format. Okay. So uh here I'm giving the model then uh loading a model in 8 bit and then device map is auto. Now it is saying bits and bytes require the latest version. So yes we'll have to install it. That's what I was saying. Uh just a second guys. Let me execute it. pip install- u. Okay. So this is done. If it is giving you this particular warning then please uh error then please install the latest version. Now this is done. So yes this is fine. Now what it is saying okay fine guys let me uh restart the session. So restarting a session. This issue you will get in a collab. Okay. While you are working with this library. Now let me execute it. Okay. Autocausal alarm is not defined. So here is fine. Okay. So guys uh my model is ready and my data is also ready. Everything is done. Now here see guys we have loaded the quantise model. uh let me write over here uh loaded the quantise model right now what I'll do I'll define my lora configuration so guys we'll understand this configuration in a very detail in the upcoming session so what is the meaning of the task type so task type is a causal lm means we are doing the uh next word prediction rn means rank okay rank of the matrix roller alpha so this is again hyper a parameter target module Q and V. So this is related to the uh attention layer. Okay, Q, KV. So Q, query and V means value. So we are targeting to this particular module. Now Laura dropout 0. 05 bias is none. So we'll understand all these parameter in a very detail. So here you can see the complete list of it. It's a very huge number of parameter. But until we are not getting the mathematics of it. understanding the mathematics of it, uh we'll not be able to get the complete one. So definitely I'll show you in the upcoming session. So here I define the Lora configuration. I'll load the parameter efficient model. Okay. Get PET model. I'll give the Lora configuration. So this model is going to be my quantise Lora model. Okay. Quantise laura model. So yes uh model is getting loaded. Let me define the Lora configuration and see the model is getting loaded. So it's saying model model. Okay, let me check what I have inside this model. M model. Okay, so this should not be the case. Just a second. Let me load it again. Actually, we should get the model. I think I run that uh model string again. That's why it's coming like this. Okay, we should have the actual model over here. So yeah, this is the case. Just a second because I already loaded the model. So it will not take much time. Okay, done. Now see this is my model, right? So here if I'm going to load it, so I'll be getting the Q Allora model. Now my training argument would be the same one. Then I have the trainer right so let me define the trainer so here what I'll do I'll give my Q Lora model okay then argument then tokenize is the data set let me check with this particular variable uh tokenize is correct now once I'll run it so my trainer will be ready now what I'll do guys I will train my model so tokenize is not defined uh tokenize tokenize okay this is my tokenize so if I'm going to execute it my tokeniz is ready now what I'll do guys I will run it and my trainer is ready now this time I will not get any error because what we are doing we are going to do the lura based training so if I'll do this trainer train my model will be trained guys okay so see uh I have a very less data and we are doing lura training so that that's why it's not taking much time and we are just doing for the two epoch so see the training loss is here and you can see the other metadata so see the training loss is 9. 66. You can run it for the more data and for the multiple epochs but that is not a case right now mean we are not running we are not learning that how to reduce how to improve the accuracy and all that will be the different uh thing. So for that also I will create one session but as of now we have to learn how to train the model at least right. So my model is trained now after that I can get it uh I can get my model over here. See tiny llama Laura and under this particular folder my model is available inside this checkpoint right. So what I'll do I'll copy the path and this particular path I'll keep it inside the double code and this is going to be my model path. Now what I'll do guys tell me after training the model I'll do the prediction right? So let me do the prediction with this particular model.
Post-Training: Model Prediction & Inferencing
Now first of all guys what I'll do I will load the model. Now I'm going to load the model. So here is my trained model. Okay train model. Train uh on the domain specific data. So let me execute it and see my train model is loaded. Now what I'll do I'll give any sort of a prompt to this model. Let's say my prompt is clinical trial demonstrate that combine atroastine with as a timi right something like that right I took it from this particular data I don't even I don't have the domain specific knowledge but I kept uh this prompt from this uh data itself see here uh from this data okay you can check out with the different other data now what I'll do I will uh perform the tokenization of this data I already have a tokenizer so here I will perform the tokenization now what I'll do I'll get output. So here model dot generate. Now which model train model okay so train model dot generate input max token this much temperature top do sample repetition penalty. So these are all the parameter which we can pass but you just need to focus on this input. Now once I'll run it guys I will be getting my output. Now here I'm going to print my output. So let me decode my output and tokenizer dot decode and I'm giving the output over here. Skip a special token. I'm going to be skip that. Now let's see the output. So guys see this is output. Critical tries demonstrate that combining absor that right. So guys uh here what we have done we have performed the non-instructional pre-trained LLM fine tuning means we took the pre-teen LLM and on top of our domain specific data we have performed the finetuning and we are able to get the very amazing result but guys here let's say if we are asking any sort of a question and my model is not able to generate that particular answer in that tone a specific structure for that what we will do the structure finetuning instruction finetuning right so now on top of the same model in the next session I will show you the instruction finetuning so that we can ask the question right more structure question it can generate the answer according to that so yeah this is it for this particular video guys thank you bye-bye take care I'll see you in the next video thank you hi everyone welcome back to my YouTube channel my name is Sunonny and I'm back with another exciting an important video. So, uh in this video guys, we're going to discuss about the instruction finetuning. Uh as you know, I started with the end to end LLM finetuning
Part 2: Comprehensive Guide to Instructional Fine-Tuning
playlist where I uploaded 14th video so far. So, uh in the previous video, I discussed how you can train your pre-trained LLM model on your domain specific data. If I'm saying domain specific data means the data could be available in any format and the data would be available as a plain text. Now in this video we'll see if you have instruction based data then how you can fine-tune your LLM model. So we're going to take same model which we have already trained in the previous class. On top of the same model I will perform the instructionbased fine tuning. So this video is going to be very very important. Uh now guys uh let me discuss what all point uh we are going to uh discuss in this particular video. So the first is what is the instruction finetuning. Then how the data looks like in the instruction finetuning. Uh then we'll see why it is called the supervised finetuning. As I discussed in the previous class that this is instruction fine-tuning comes under the supervised finetuning only. Uh then I will come to the practical right. So uh this each and every point I will discuss throughout this video and yes at the end you will learn how you can uh fine-tune your LLA model on the instruction based data. Now guys uh without wasting a time uh let's start with the video let's understand the theory first and then I will come to the practical guys. So guys uh before starting with the instruction finetuning let's take a recap of some previous points. So uh the first thing is what is the meaning of the finetuning and why we do it. So here is a definition fine-tuning means retraining an already trained model on your own specific data set. So guys uh here if I'm talking about the model right? So the model is nothing it's a llm model. Now this llm model it is based on the transformer architecture as you know. So uh let me write over here transformer. So this transformer is nothing it is a research of the Google which was published in 2018 itself. Okay. It was a sequencetose sequence architecture where uh we were having two main thing. One was the encoder and the second was the decoder. So the GPD model right uh the GPD model actually it was built on top of the decoder part of the transformer. So if you want to understand the LLM then before coming to any LLM architecture understand about the transformer okay and then jump to the LLM. Now here I'm saying uh LLM right so we are going to be retrained already trained LLM and uh if I'm going to be talking about the training right so what are we going to train here so we're going to train weights and biases okay so weights and biases now uh this weights and biases where you will get this uh weights and biases inside this transformer architecture so we have attention right we have attention layer inside the transformer plus neural network. Okay. So this transformer one single block of the transformer it is a combination of the attention layer as well as the neural network. Right? So uh there we will get the weight and biases and yes uh we are going if we are going to be train our model means we are going to adjust a value of this weights and biases based on that loss function and the optimizer. And if we are going to be again retrain it in that case also we are going to be uh adjust the value of the bait and biases according to your data. Okay that's a whole sort of a meaning of the training or retraining right. So uh I think you understood about it. Uh and if you don't know about this basics and all then you can follow my previous video there I already discuss about this thing in a very detail along with the practical. Right now uh if you're talking about the LLM training process, so in the three stage plays a very important role. The first step is called the unsupervised pre-training or it is also called the self-s supervised training. Uh which we are doing on the common crawl data set. So generally we consider the internet data over here the entire internet data. Okay. Uh then uh the second thing is called the supervised finetuning. Now inside the supervised finetuning I discuss two thing. The first uh basically first uh behalf on the parameter okay and the second uh based on the uh the second based on the data right I will again uh give you that recap. The third was the preference based alignment or preference based training. Now here whatever output we are going to be generate right from the AI from the model. Okay. So based on that particular output based on the feedback of the user again we are going to retrain our model right. So that comes under this preferencebased alignment. So here we have very popular algorithm that is called uh PO right it is a reinforcement learning based technique. Now apart from the PO we have one more state-of-art technique that is called DPO. Okay direct preference optimization. So we'll discuss that in our next video. Okay. and even I will show you the mathematics and all in my upcoming videos. So guys, uh here my main focus onto this supervised finetuning. Now let's take a recap of it. So as I told you if we're talking about the supervised finetuning so we can divide into two section right. So one uh basically it is based on the parameter already I discussed this thing in my previous video I'm just giving the recap of it and the second behalf on the data right now if you're talking about the parameter wise uh so parameter wise the first one is called the full finetuning okay full fine tuning and the second is called partial fine tuning Okay, partial finetuning full finetuning means we are going to retrain all the parameters. Okay, inside the model whatever parameters we have we are going to train all the parameter. So generally we don't take we don't follow this particular technique. So we always go with the partial finetuning means we take subset of the parameter over here. Okay, subset of the parameter. Now we're talking about the partial finetuning. So we have two techniques over here. The first technique is called the old technique. Okay, old technique. Now here's the old technique. What we are doing? We are going to be uh freeze. Okay, we are going to be freeze some layer. Okay, and we are going to be train some layer right some layers. Okay. But guys, in terms of LM, we don't follow this particular technique. Right? Instead of that, we have second technique that is called PETbased technique. Parameter efficient fine-tuning technique and in that LRA is a very famous technique, right? So, Lora is very famous technique. Now, apart from the Lora, I discuss couple of more variants of the Lora, couple of more techniques. So if you want to understand that you can watch out my previous video there I discuss in a very very detail. Okay. So uh here you understood we are going to perform the partial finetuning and in that we're going to discuss about the pft and lora is one of the way to follow the p okay to perform the parameter efficient finetuning. Now the second uh is based on the data. So if we're talking about the data guys, so data uh we could have okay let me take a different color over here. So uh data basically uh is available right in a non-instructional format. All right in a noninstruction format or this is also called the plain text. Now this plain text it would be available in any sort of a document. Okay, Now this document could be the PDF document. PPD docex. Right? This document could be anything. Right? Wherever basically we'll find out the plain text that comes under this non-instructional category. The second data uh the second type of data is called the instruction data. Okay. Instruction data. In instruction data actually how it looks like? Uh I will show you that. So instruction data actually uh there we will be having input column as well as the output column. Okay So guys this supervised finetuning this specific term actually it is being used in terms of this context instruction data. Okay where actually we have a input and we have a output. If you will uh uh think about the machine learning right so in the machine learning guys uh we have supervised machine learning and in the supervised machine learning uh what kind of data we have the data where we have a output column okay uh so in whatever data we have a output column and we are feeding that data to the algorithm any algorithm it's a decision tree xg boost or svm right and behalf on that labels the y column if my model is learning so that is what that is supervised learning in a same way guys this SFT actually okay so because of this instruction finetuning only it is called the SFT means we have a input column and the output column so then what is this non-instructional data okay means it does not comes under the supervised finetuning I would say no not directly because this instruction finetuning technique right it is only called means because of that only we call it the supervised fine tuning tuning. Why? Because we have a labelled over here. Okay? The output column, right? Uh now guys over here what we are going to be do see now one more thing let me tell you over here uh if you're talking about the LMS right so whatever technique uh we are discussing right let's say in whatever stage we are so let's say we are at first stage uh at this particular stage unsupervised pre-training or self-supervised learning uh there also we are going to predict the next token. Okay. Now uh we are at this particular stage SFT supervised fine-tuning. Uh at this stage also we are going to predict the next token. We'll format our data in such a way uh that model will predict the next token only right and in the preference based alignment or in this particular uh like technique again we are going to predict the next token. So in whatever way we have a data right uh it doesn't matter. Let's say we have a data the entire internet data without label. In that case also we'll arrange a data in such a way that's going to predict the next token. If we have a data in the instruction in the output format in that case also we are going to predict the next token. We'll format our data in such a way we'll predict the next token. If we have a preference based alignment means we have generated output as well as the feedback regarding that in that case also we'll format our data in such a way that model is going to predict the next token. Okay. So as it is a language modeling and model will always predict the next token in whatever way we have a data okay at whatever stage we are going to be uh perform the training right so I hope guys this thing is clear this is the fundamental which I already discussed now uh let me uh talk couple of more point so here I have written why it is called the supervised finetuning so in pre-training That is a first stage right there where we are doing a training on top of the entire internet data where actually that particular stage is also called the self-supervised learning means the label will be the next token itself inside the sentence. Uh so there actually what we are doing so in the pre-training data model predict the next token from the natural text itself. Right? But if we're talking about the instruction finetuning there also model is going to predict the next text but we have curated data in such a way that we will be having the target column. Okay. So in instruction finetuning model predicts the next token only but from the human curated target answer. I will show you the example and because of that it is called the supervised finetuning. Means this instruction finetuning is only called the supervised finetuning. So uh guys over here I can give you the quick recap. Uh we're talking about the LLM training uh process. So we have three stages unsupervised pre-training or self-supervised. There's the first stage where we are going to be create our raw model. Second is called the supervised fine uh tuning where we have already seen about the partial finetuning uh that is called paft and uh that is a lora. Okay. Uh this is based on the parameter right how many parameter we are going to be select while we are going to be train the model. Now data wise how we are going to prepare the data while training a model. So we have two ways. First is the non-instruction where we just have plain text right and second is the instruction based data. Now because of this instruction based data we came up we end up with this specific name that is called the supervised finetuning. Okay. But guys, uh if we just have plain text, then ideally we should not say it's a supervised finetuning means here we will say we are just going to be fine-tune our model. Okay. On top of our domain specific data. Okay. Uh now I hope everything is clear. So uh let's do one thing. Let's uh take some example and uh then after that we'll start with the practical guys. Now guys uh let's uh revise the differences between the uh non-instruction and the instruction finetuning and after that I will let you know why uh this instruction finetuning is required and then we'll move to the practical. So uh non-instruction finetuning first uh let's discuss about this one non-instruction finetuning. So fine-tuning on a plain text means teaching the model your domain language. Uh now what's the purpose of it? So the purpose it to help model to learn uh the language tone and the terminology is specific to your domain. Okay. So let's say if you have this type of data uh the plain text which is available in any sort of a document. So on top of this data we are going to be retrain or we are going to be fine-tuned our LLM model. Now uh in which format we are passing our data to the model. So uh the uh data uh you will get at the end you will get in this particular format means uh we are going to put the next token. Okay. So the next token will be in my output column. So let's say this is my sentence. Okay. So this is the next token regarding it. Now this is my sentence. Now here is the next token. Now this is my complete sentence and this is the token. Right? We already understood in previous uh video. So uh let me give you uh one more concept over here. uh let's say uh there is one company uh let's say there's meta okay meta has trained one model the model name is llama 4. 2 two something like that. Now you want to be used this particular model inside your organization. Okay. So you belong to let's say pharma. Okay. Pharma. Now in your company in your organization you want to be used this particular model. So what you will do? So you will directly take a model and start using it. No, this is not a right thing because this model does not know the farmer specific term, right? about the pharma specific term. So it will helisonate. So what you will do here you will fine-tune you will go with the finetune. Now here uh for the finetuning directly you will finetune on the instruction data set means input and output data set. You can do it you can teach your model. Okay, model if this is the input then regarding that what will be the output. This is only called the instruction tuning. But guys this is not a good practice. Okay, directly to teach your model on a input and output it's not a good practice. Right? So in between what you can do you can take your data company specific data okay from wherever you have collected that. So you will be have a big corpus okay for your company data then first perform the non instructional fine tuning. Now with this particular tuning your model will understand your data right. It will understand the specific vocabulary. terminology. It will understand the technicality of your data. Means overall it will deep dive into your data. Right? And after performing this particular step the non-instructional finetuning then come to this stage where you are teaching to your model the more structure output based on the given input. I hope this thing is making sense. So that's why guys this step okay most of the like YouTube video will not teach you this thing. This particular stage is very much important and I already covered in my previous video. You can go and check. Now coming to the instruction finetuning. So in the instruction finetuning uh you will get a data right in the form of instruction input. Okay. So let's take example of it. So first of all let's discuss the purpose. So what is the purpose of it to train the model to understand instruction and generate well structure and the relevant answer. Okay. So to generate a structure and the relevant answer based on the given instruction. So you will find out a data in this particular way in this particular format where you will be having the instruction input regarding the uh the corresponding input and the output. So instruction uh summarize the following paragraph. Now this is the input regarding it. Okay. And we are going to be summarize. So this is my summarization. Here is my summarize output. So after giving this particular input uh we should get this kind of output. Okay. So this is my instruction. Now without input also you will find out uh some sort of a rows. So let's say you have a instruction list application of AI in pharmaceutical research means here you are giving input and then this is the corresponding output. Okay. Now here one more example. So explain a mechanism of the M format. Now we don't have any sort of input. Now here is my output. Okay. So in this way also you will get a data. So this uh data set format was followed in the alpaka right. So if you will check with this alpaka right. So this is one of the data set which was uh prepared by the researcher. I will show you the research paper and the hugging face data set and all everything. Uh I think I show in my previous video you can check over there right. So in this format only the data set have been prepared but apart from this one you will find out data set in some different format also. So this is the one format instruction input and response. As I told you this is the alpaca right. Uh apart from that you will get the instruction. Uh this input could be the context and this response could be the answer. In this format also you can also prepare the data. You can directly prepare the question answer data as a user and the assistant. Okay. In user column you can give your questions and in assistant you can write your answer. You can give the uh you can prepare data in this format also. System user and assistant. Okay. This is also a way to prepare data for the instruction finetuning otherwise context and response. See here I kept one example for the context and the response guys. So I hope uh this thing is clear in which format actually you will get a data for the instruction finetuning. Now here is one more point I written. I missed this part. So you can read it out. If instruction uses extra text means if you have a instruction and the input right. So in that case mostly you will find out we are uh like uh saying to the model do the summarization translation rewrite you can go ahead with this uh particular example. So here we are giving a instruction to our model with respect to this input and then we are generating this output. Now uh here you can see the second line if instruction is a selfcontain. Okay, if instruction is having the self-content context or dialogue style or conversational data then you can keep input empty means this thing right I just written as a extra note and I think you are able to get it what I'm trying to say here means if we have a instruction then we are giving a instruction with respect to this corresponding input uh if we don't have any sort of input means uh in the instruction only we are keeping some context okay some question and regarding that here is output as simple as that So uh I hope guys you understood this entire thing. Now the biggest question how you are going to be generate this instruction data because uh in every company that's why if I'm taking example of any XY Z company any ABC company or any uh YX company everywhere you will not find out this kind of data okay sorry not means instruction data. So what is a way of preparing the data the instruction data okay the first way see here now the question is how to prepare the data for the instruction finetuning means in your company let's say the data is available in the PDF right so this is the biggest hurdle you have trained you have done the non-instructional finetuning but how you will teach your model to generate the structure answer right so for this one for generating a structure answer you will have to prepare that kind of data input and output. How you will do that, right? So, here is a way. First, you can do it manually. You can write your own like question means you can uh only create your question and answer, right? Uh but you cannot do it for very huge scale. Here the accuracy would be very high but uh this could not be idle. If you have very less data or maybe mediocre data in that case maybe you can do it but there's not ideal situation, right? The second thing is so again it's a manual way only expert is doing that you are like hiring some intern and all for doing this specific thing or some just for doing this thing or like so many people are working in parallel then this process could be faster but again this human annotation is not an idle thing for the bigger data set. So the last thing is the LM synthetic data means here to the LLM only you can give some instruction uh not instruction I would say instruction will be the like confusing here to LLM only you can provide some prompt okay uh some guides right to the GPD kind of to GPD model to cloud a model right so those model only can prepare your instruction data set means let's say you have a plain text this text you are feeding to your GPD model and you are saying can you prepare some question and answer from this particular text GPD model will do it for you. So this is the one of the way and company is following this specific way uh like they can generate synthetic data. Now guys uh the next thing is uh let's say if we have a data in this way okay but how the LLM will look into the data okay means it will be like this instruction then input and then output right separate one like uh we are having in the machine learning as I told you uh this is a supervised learning right supervised why it is a supervised because we have a human curated output over here but actually this is a language modeling. Language modeling means we are doing a next token prediction. Okay. So at the end we'll have to format this data in such a way that so that LLM can perform the next token prediction. Right? So let's say this is my data instruction input and output. So here you will be formatting your data in this way. So here is the instruction then this is the input. Right? And here you can see the response guys. Getting my point? So here guys the uh native right the native role or the native behavior of the LM to predict the next token only right. So because it is a language modeling the native behavior of the LLM to perform the next token prediction. So for sure in whatever way we have a data at the end we'll have to prepare a data in such a way that model can perform the next prediction. So uh let's say we have instruction input and output. So for sure this is a supervised data because we have a label over here but at the end we'll feed the model in this specific format. Okay means input and instruction what will be there along with the responses and model is going to be learned from this specific responses. I hope uh this is getting clear. Now let's see why this kind of tuning is required. Why instruction tuning is required then we'll move to the practical. Now guys let's understand why this instruction finetuning is required. Uh let's take a look onto it. So here I written a base LLM like llama, falcon, GPT or any LLM model. It only knows how to predict the next token. Okay. So I written over here. This means it understand the pattern only pattern of the data and based on the pattern only it's going to be decide what will come next okay next token or sentence prediction. Uh so here is the example you can see the example we have input matt forin is used for so this will complete the text the output will be the treatment of type 2 diabetes melitus. Okay, this is fine. But guys, if we are giving this kind of prompt to the model like explain this, summarize this, write this, translate it or what it is right. So in this case the model is going to be fail means model will not generate the appropriate answer in a converse. See model will not generate a answer in a natural language like how we are we human are talking right. So that's why guys the instruction finetuning is required and that was the uh like successful mantra behind the chat GPT right how chat GPT is giving the uh human curated answer right uh human compatible answer because of this instruction fine-tuning so let's say yeah here is example if you will ask the model write three points on mattforming mechanism so it might response with something like this write three point on Matt foring mechanism is request means it will just predict the next token instead of giving the three bullet point or three points. Okay. Now because of this right because if we want a instruction uh like a structure answer or if we want a relevant answer right if we want a answer in a human curated form uh for that only this uh instruction fine-tuning will be required. So here I return. So the conclusion is to teach the model the meaning and purpose of different prompts. Okay. So for the different prompts we perform this instruction finetuning. Now in the instruction fine-tuning how the data will look like as you know right and what will be the result. So result could be anything whatever user is asking. So I hope you understood why this instruction finetuning is required. Now without wasting a time let's start with the practical. Now guys uh let's start with the practical of the instruction finetuning. So in this IPv file I kept the entire code. Uh now in the previous uh video I have shown you the practical of the non-instruction finetuning. This entire code is already available on my YouTube channel. Please go and check uh the description of the previous video. You will get the link of this GitHub. Okay. Now in the previous video guys I have used this particular data matt for PDF. So inside this PDF I just having one single page. Okay but in the real time the data could be very huge. Now guys this was the non-instructional data means the plain text. So I trained my model on top of this data. But in this video we required the instruction data set means we required the question means the instruction and the corresponding responses. Okay. So uh I already created a data I will show you in some time. Right. uh now over here guys uh so I'm going to use the same model which I trained in the previous video okay so what is my uh ideology over here let me uh let me talk about that what I want to teach you so uh let's say we have one pre-trained model okay so we took the llama model this is from the meta now I got a problem statement that okay uh I have to fine-tune this model for some pharma data right so uh I downloaded this model this pre-trend model which was this one tiny llama 1. 1 intermediate step 1431 K3T okay this model is a quite small that's why I have used it otherwise you can use any sort of a model if you have a good infrastructure now guys uh I took a pre-trained model I trained it okay I performed the non instruction finetuning on plain text. Okay. Now, why did I uh why I perform it? So that I can teach my model the specific term terminology.
Loading & Unzipping Previous Training Checkpoints
Okay. I can make my model basically this farmer ready. Now I will teach my model to follow the instruction. Okay. Now what I'll do I will do the instruction fine tuning. Okay. on instruction data set. So guys uh I have a data set the plain text and all I taught my model uh basically uh the language the tone and all everything. Now I will uh take this instruction data set and I will teach my model how to response with respect to the different questions. Okay. Then in the next video I will discuss uh the preference alignment. So based on the user preference okay which response needs to be picked up. So the next uh video I will uh upload with respect to this preference alignment. So as of now we are over here. Uh I hope you got it. So guys uh whenever uh so when I was training this model right. So I already uh saved this model. So let me show you. So I already saved this model under this directory uh you can check with my previous video. Okay I shown you over there. And what I did after that I jip the model. Okay. And I downloaded that so that I can use it anytime. So here what I'm doing I'm going to be uh basically unjip this file this tiny Lora. j file and then I will load my previously trained model. So first of all let me load the tokenizer. Uh I'm going to be execute this one. This is perfect. I think you are able to understand it clearly. Now uh let me run this. Okay. Let me import all the necessary uh libraries. So uh here I think you are already familiar with all these libraries. Okay. uh now what I'm doing guys I'm going to be load the tokenizer is very much required to perform the tokens to get a tokens okay and the token ID with respect to the data now here what I'm doing guys I'm going to be unjip the model see here is my model this one after unjipping it I will get like this one this is my folder I already run it that's why I'm getting it but if you are running it first time you will means uh if you have this jip and basically if you will run it then you will only get this checkpoint right so I'm going to be executed and see after unjpicate I'm getting this checkpoint dash five okay now uh guys I got my model now let me load my model so this is my model path so what I'm doing I'm passing it to this particular method auto model for coal lm from pre-train and here I'm passing my model path okay and device map is equal to auto so I got my non-instructional model right now what I can do guys after loading this model so it might take some time if you're doing it first time now I'm giving my prompt this is my prompt clinical tri demonstrate that whatever right now what it will do it will try to predict the future tokens okay so it is not any instruction it is not a like a specific question just a simple sentence okay and it will try to complete this sentence so here's my prompt first I will tokenize it then I will pass my input okay and these are the other parameter I will discuss this parameter it's very easy to understand so how many max token would be there in the output temperature means whether my output will be creative or not okay top is also belonging to the same thing right so this parameter we'll discuss in the upcoming session I will discuss some more theoretical more like a mathematical point okay so there we can talk about it or else we'll discuss any sort of a API right open a API cloud API and there also basically we'll get this parameter and for sure we can discuss now here I got the output see and I let me show you the output so first we'll decode it and uh after decode see uh you will get the output see critical try demonstrate that combine ator ove westin with it timbi is a safe and effective to treatment of the like cholesterimeia okay so like these are some uh pharma related terms and disease related disease specific term even I'm not familiar with it so see it is able to generate the response right now what I'll do guys so here first of all let me show you how the instruction data set look like and then I will take the same model this non-instructional model and then we'll will try to perform the finetuning. Okay. So to just give you the demonstration see what I did. I already I'm loading this pre-built data set inbuilt data set from the hugging face itself. It is already available inside this repository amod repository and the data set name is this mental health counseling conversation. Right? So once I load it guys see I'll get the data inside this variable data set variable. Okay. Now uh here if I can show you the data see this data okay is data set. So let me write over here data set. So I got the data set. Now inside the data set I have just I just have two column context and the responses. Okay. And how many rows we have? We have 3 512 rows. Right now I already downloaded this data set just to showcase you. I downloaded in both format. In any format basically you can keep the data. So this is a CSV format. Let me show you the CSV first. Okay. So inside this CSV you will get the context and the responses right. So uh as I told you this uh instruction finetuning data set it could be available in any sort of a format. Even I uh given you the example over here. So instruction input response instruction context answer user assistant system user assistant context and response. So inside this data set which is already available over the hugging phase. Okay. So inside this data set basically you will get two column one is the context and second is the responses. Now see the same data set basically I saved in the JSON format also. So yes for sure you can keep it in both format. Right now what I'm doing here uh so I loaded the data set. Now I'm going to be formatted. So here basically I will be having my question means this context is nothing is a question. This response is nothing it is a answer. Right? Now I'm going to be combine both and after that I'm keeping inside this text column. So let me execute it. So after executing it guys see what I'm doing. I'm mapping my entire data set data set. m map. Okay. And here I'm mapping my function. My function name is this format row. Okay. So once I'll do it guys I'll be getting my formatted data set. Let me show you. So here is my context. This is my responses and this is my text. Okay. So see over here. So instruction what is the instruction? I inst it is a instruction. So this is the instruction I am going through this that right and then uh with respect to this instruction here you can see the final responses okay so what I did guys I formatted my data set means either I can keep this contact and response okay or I can keep it like this instruction and this SL instruction is only representing the question and the SL instruction is representing to the answer right now over here instead of writing this instruction and question I can simply write this uh context means hash context okay or like this context and then response right let me show you how I'm I can keep it so you can keep like this so let's say here is your context and this is your response now whatever text column you will get so like this means instead of the instruction you will be having the context and then instead of this last instruction you will be having the responses okay in any sort of a form you can keep it but over here what I wanted to show you that I have to pass my data as a final string only. Okay, this context and responses. Now what I did over here, see I created a data frame of this data set uh the data set which I loaded. Now see context and responses you will get the context responses under this data frame. Okay. Then what I did I just saved it. So here I already shown you this file right. So I can basically load the data from the hugging face. I can save it in my local or else if I have a data in my local the CSV data and all whatever right? I can simply keep it over the hugging phase. I can compatible into the I can create a compatible data set okay with respect to this hugging page everything is possible right. So see I have converted into the JSON I converted into the CSV and both way it is possible. I hope this entire thing is clear. So this is just guys this is just a uh like demonstration that how the instruction data look like okay and how to format it for the training. Now uh in my case in this particular practical I'm going to use my own data set means I'm not going to be use any pre-built data set over here. I will be using uh this particular data. See let me show you the CSV. So under the CSV basically you will only get five to six rows. See uh how many rows is there? I just have one uh then two then three then four and five. Okay only five row. Now I have a instruction. Okay. This is the output of it. Then again instruction output of it. Now instruction. Now this is the input. And here you can see the output of it. Then instruction uh here you can see the input and this is the output. Right? So guys uh you can read this data you can analysis this data on top of this data only we are going to perform the training. Okay finetuning. Uh now guys here what I shown you how the pre-built data set look like it could be in any sort of a like uh like there could be any sort of a column right and here what we are doing now guys we are going to be load our own data set. uh this data set actually I created by myself manually. Okay, you can create it using the LLM. You can take a help of any theme subject matter expertise right and you can generate this instruction data set. Now how chatg has done that? So chat GPT actually took the conversational data set. So conversational data set from the Reddit from the kora from the GitHub from the different places. Okay. But if you are doing for our domain specific problem statement in that case we only have to create this data set. Okay. So I kept the data in both format CSV and JSON. In the real time also it could be in any sort of a format. Okay. Now I'm going to be loaded in a CSV format. So uh let's load it and perform the formatting. Now guys uh I loaded my CSV data over here with this function load data. Uh then I'm passing this parameter CSV. Then I'm passing my file path. Okay. And then I'm writing is split is equal to train means whatever data I'm going to be load over here it will be a train one. Uh now inside the data set you can see we have three column instruction input and output. Uh I can uh show you over here. This is my data set which I am using. Okay. Now what I'll do? So after that guys I will format it as a single string as I told you whatever data goes to the llm. Okay. It goes to as a single string. Right? So let me run it. Let me execute it. See uh if you will see this formatting prompt. So we have a instruction right instruction will come over here. Then we have a input. Okay. Uh the example will come over here and then response. Okay. So example input will come over here. Then response then example output will come over here. Okay. So uh here guys if I will run it and after running it I can map it. Okay. After mapping it see inside my data set I'm having four column now. instruction, input, output and text. Now this particular column, this text column, we are going to use it for the training. Now let me show you the first row over here you can see. So we have a instruction, then we have a input and then we have corresponding responses. Okay, this is my responses. Now if you want to check with the CSV now over here see check with the CSV. So this is my instruction. Okay, and then in the input I don't have anything. It will be blank. Then I have a output, right? So this uh first row is going to be combined. Likewise the second row will be combined. Third Fourth row will be combined. Uh means first row will be combined and that will become my one string. I will pass it to the LM for training. Likewise the second row, likewise the third row, fourth row and so forth. Okay, I hope you got it. So uh guys, uh this is my data. I have formatted my data. Okay. So first row, second row, third row, fourth row means whatever column we had over there, we just combine that and we'll be passing as a single string. And in that column what we have? We have our instruction and the responses of it. Uh now uh guys see this is the row which looks like this only. Over here you can see we don't have any sort of a input. Input is none. And then we just have the response. If the input would be there then instead of the none the actual uh data for the input will be passed over here. Now I'm going to be initiate my tokenizer. Okay. And now I'm going to be tokenize my data. So after tokenization guys see here I'm going to tokenize my data. Means I'm passing my single example my first row. Okay. Now I'm taking the text from there means this particular value. Okay. Then I'm going to be truncate. Truncate is equal to true. Uh if max length basically if it is going to be exceed to the max length then we are going to be truncated. Okay. Otherwise we are going to be padded. If it is less than this 512 right now here is one more line token labels is equal to token input ids do. copy. So why I'm doing it? As I told you the behavior of the model. So model is to predict the next token. Okay. So by using this line basically I'm telling to my model. So whatever data you will get whatever text you will get this entire row. Okay. So you have to train yourself in such a way that you are going to predict the next token. This all the thing I already discussed in my previous video. Uh there also I have used the same technique at some of the places I have seen what I have seen guys. So they are going to be mask the value till the responses. Okay. So till the responses they are going to be masked the value means model will get to know okay so this till here basically I have a instruction I have a question and after that my response is coming so how I will mask the value till response
Masking Labels for Improved Instructional Responses
means this particular value I can put any special token like let's say I can put minus 100 over here so here to here whatever token is going to be create so for those token all the value will be minus 100 and the actual token will be assigned from here itself okay uh itself. So this kind of technique also I have seen right. So just to teach the responses to the model we take this kind of like we basically go ahead with this kind of technique also right but yeah this is very effective means we can entirely copy this input ID to the labels. What does it mean? Means I'm not going to be mask anything model from this particular text model will learn how to predict the next token. Right? So here is the here all the thing is done. Now what I'm doing guys I'm going to be load my uh basically load the model as a lora model. So from the pept I have used this lora config then get p model then task type. Now here whatever basically parameter I have used you can see the description of it. So task type means it's a causal lm means the next value prediction. Next token prediction. Now here r is representing to the rank. So this could be the rank. Okay. Control table parameter size. So now here Lora alpha it's a scaling factor. So the value will be between this one. So balance adaption strength. Now Laura dropout. So dropout probability 0. 5. So it's a regularization value. Target module which layer to tune. So I want to tune this query and the value trade-off between cost and quality means you can select the other layer also. We have key query value. Right? So you can select the different layer which is remaining the uh the next one. Okay. Then biases find during none. Keep simple. Okay. So over here guys we are going to be mention this parameter but under this particular like class lora config you will find out so many parameter. So maybe after discussing the mathematics of this lora we can talk about it right. So here is my lura configuration guys. Now what I'll do I'll write get pep model. So here I will pass my non-instructional model which I train in my previous video and I here I'm passing my lura configuration. Okay. Uh now I will be getting my lura model. See here I got the lura model. Now what I'm doing I'm going to be define my training argument. So tiny llama instruction here I will be getting my instruction model for three number of epoch I'm going to be trained. Okay per device uh train batch size means how many batch in how many batch we are passing a data gradient accumulation step. So at what all step we are going to be calculate the gradient learning rate regarding the optimizer it's a precision value logging step at which step we are going to be log the value save total limit. Okay. Now repeat uh report to none means we are not going to be capture any sort of a matrixes anywhere on any platform. So this is my all the argument guys. Now what I'll do I'll call the strain method. To the strain method I'll pass my model. I'll pass my argument. I'll pass my tokenization. Right. Now my trainer is ready. Now what I'll do I'll call the train. Okay. So here guys see my model is getting trained on top of this data set. Now my model is my model got trained. Now here actually you will get the model. See tiny llama instruction. This is my model. Okay. And under this you can see I have a checkpoint three and see my model got saved over here. Adapter model dots save tensor. Right now uh let me uh execute it. See this is a model path. Now after that what I can do? I can load my instruction model. Now here guys see this is I can give this kind of question to my model. Explain the mechanism of the action of metformin. Right. So earlier guys I was uh not uh maybe I cannot give this kind of question to my model. It will definitely hallucinate. Okay, we'll compare that. Don't worry. But guys, now after the instruction finetuning, we can give this kind of question where see my data set is very small. I just train it for very simple epoch. Okay, my model is also very small one. So, it might not predict correctly. But if you are doing it on a full scale with a good model, with a good data set, with a huge data set, okay, that definitely this technique will work. So, here is my prompt. Now, what I'll do, I'll tokenize the prompt. I'll pass it over here. Mean I'll pass all the tokens over here. Okay. Now uh I let me uh take the output. So here guys you can see the output. So what output is generating? Clinical tri demonstrate that combined atroen west vestine with azy timb is a safe and effective for treatment of the hyrochloro hyro cholesterolmia. Okay. So guys uh here I asked what explain the mechanism of the action of the matt forming. So see it is going to be explained everything right. So explain everything in the uh normal human tone. Okay. Now uh over here guys you can see. So this is all the data which I have. Uh now guys I wrote the CSV data. You can load the data in the form of JSON also. Okay. And this is the pre-built data set which I took from the hugging phase means I shown you how to load it from the hugging phase and even I shown you how you can save it and after saving it anytime you can load it. Okay. Or else if you will get the data in CSV and JSON then from there you can easily load everything I have shown over here. Now I hope guys this thing is clear. Now let me show you one more thing I was telling you that basically before the responses okay we can mask the value so that model can easily understand my response is getting started from here. So I took one code over here. Uh let me show you. So see what is happening over here. See we are taking a data set. Okay we are loading a data set. We are formatting a data set. After that we are passing it to the tokenizer. Okay. The tokenization and all everything is done. See here basically I'm going to be initialize my tokenizer. Now see I'm getting my text. Okay. Now after that guys see I'm getting my uh input ids means my tokens. Now here I'm writing response marker. So this is my response marker. Now wherever I will find out this response or from wherever the response is going to be start response answer whatever you can say. Now uh over here what I'm doing? So I'm going to be mark it. Okay, it with this. See, till the response actually I'm going to be marked with this minus 100. Okay, so uh till the response actually I'm going to be mark it uh with minus 100 with this special token and after that the normal token would be there. So what does it mean? The mean is very simple. See here I have written clone labels and mask out everything before responses. So the meaning is very simple. My model will be able to discriminate between the instruction as well as the responses. it will get to know okay till here means this is a special token means this is my input or like my instruction and after that my actual response is getting started okay so both training you can do you can try out with this one as well as the previous one okay you can check which one is giving you the effective result according to me the previous one is a good one because here there actually my model is learning onto the uh my model is iterating onto the entire string okay the entire row right uh text uh the instruction uh input and this uh responses Okay. Now here till response we are masking and after that only we are allowing to model to learn through some tokens. Right. So yes I have like written this logic over here. You can go through with it. I have seen in many like places people are following that. So that's why I given you this particular like solution as well. Okay you can try it. Here is the entire code. Now uh guys so I kept some question. Okay. And what I'm doing over here I'm going to be check with my uh non- instruction and the instruction model what is going to be the answer right so I have both model instruction and the non- instructional so see this is my question now what I'm doing I'm iterating over the questions okay now I'm tokenizing it and after tokenizing it guys I'm passing to the non-instructional model I'm generating output and then printing the output now here what I'm doing I'm going to be load the tokenization model sorry tokenizer then I'm loading the instruction model okay and then I'm going to be perform the uh generate the answer with the instruction based model. Okay. So here I'm going to be generate the answer with the non- instruction. Here I'm going to generate the answer with the instruction. So you will be able to understand. Okay. So if I'm asking this kind of question like explain this, summarize this, what is that. So instruction model will be able to perform good compared to the non-instruction model. So that's why guys instruction fine-tuning is required. See my data set is very small. My model is also very small. So it might not give the correct answer. But if you're doing it really first uh teach your model on your do domain specific data set on your PDF text and all and later on perform some instruction tuning it will work well guys it is proven technique okay chat GPD also does did the same thing right first they have trained on the entire data internet data the self-supervised learning and then after that they have trained it on a question answering task from the Reddit from the hugging phase sorry from the like different forum like GitHub stack overflow and all So let's run it and let's see what is going to be answer. So here it can predict it. See uh the answer explain the mechanism of metapforming. So it is saying explain the metapformin is dug. Fine. Now here okay expect output test case test case. Okay. Now here it is saying summarize how MRN. So guys it is predicting something right? Some garbage thing. Okay. uh you can try out from your end. You can check right you can take some more data and then uh basically again you can retrain and check check that out right I took the very specific question just four to five row guys with respect to LM is nothing just take some good data set retrain your model okay uh on the instruction data set and check okay means first take the base model check with the non-instructional data mean some PDF and all train it and then ask the question and then again do one thing create some instruction data give your model so model will learn how to follow this prompt and then again ask the question to your model and check okay in which way it is performing well in the instruction way or in the non-instruction way right so fine thank you guys I'll see you in the next video where I'll discuss about the DPO
Part 3: Preference Alignment & DPO Training
techniques and all thank you so here I kept the complete uh points guys so we'll learn about the preference alignment or preference training uh then we'll understand why do we do preference alignment means why it is required then we'll see the example data set example like how data set look like if I have to do the preference alignment then what kind of data I will have to create uh then we'll see techniques for the preference alignment so what all technique we have uh we just know about the RLHF that is called reinforcement learning through the human feedback but that is not only one of the technique we have a couple of other techniques so definitely I will discuss onto it and even I will show you the research paper uh then the very famous uh infamous technique for this preference alignment that is called DPO training. So we'll understood about the DPO training. We we'll see the mathematical formula. I'm not going to show you the complete mathematical intuition along with the derivation and all. I will just focus on the formula and we'll discuss about that formula. Okay. Uh then we'll see the practical implementation with the DPU itself. So uh whatever model I had means whatever model I trained in my previous class the instruction fine-tune model I'm going to take a same model and on top of it I will perform the DPO that is called direct preference optimization then uh during the practical I will show you the Lora adapter means how you can use the Lora adapter why you should not directly implement the Lora okay if you are going to be use the already fine-tuned model okay how to uh use the lora over there definitely I'll show you that comes under this lora adapter so yes we are going to discuss all this point throughout this tutorial now after this tutorial guys you will be uh you will like become a champion in the preference alignment and you can basically fine-tune okay you can train uh any sort of a model on top of the preference data now or let's start with the theory then I will come to the practical Now here guys I created a stepbystep notes for all of you uh so that you can refer it later and you can revise your concept. Now before starting this thing uh let me show you the notes from the previous session. So for that uh I have created one uh repository with the name of this complete LLM fine-tuning. Uh there only I'm uploading uh all the notes and all everything. Now where you will get a link of this repository. So you will get inside the description of the video. Okay. So uh here I uh created a repository for the LLM fine tuning 14 for the 15 and 16. So the 16 basically it's a current video. Okay. Now I likewise I will create for the other uh basically video also. I'm getting so many requests uh sir please upload all the notes and all. So definitely I'll update this particular repository. Okay. Now guys, if you will go and check uh with the previous repository or with the previous nodes, right? So here it is. Uh let me show you. So see all the files and all everything I kept uh handwritten notes is there uh IPV file is there, CSV file, JSON file, even uh the GIF file, model GIF file also I kept right. So you can directly download it and you can start your practice. So guys, this was the handwritten notes. Now here I discussed some fundamental thing. Uh so I discuss about the LLM training process. So the first step of the LLM training process is called the unsupervised pre-training or self-supervised uh training. So here we get the foundational model okay at this particular stage. So we are not going to perform uh this particular thing from our end right we are taking any foundational model from the hugging face or from any other places. Now our aim to perform the finetuning. Okay. So regarding the finetuning I shown you the supervised finetuning. So I shown you two way. one with respect to the non-instruction data and the second instruction data. Okay, the instruction data one is like specifically called the supervised finetuning. But if we have non-instruction data in that case also we can fine-tune the model. I shown you each and everything you can refer the previous video. Now in this video we'll discuss about the third point. Okay, preferencebased alignment or training. Right? So these are three main stage of any LLM training. Right? And now we are going to discuss this third one and uh after this basically uh means after this video you will find out video on top of the different framework. Okay. Because uh in this video we'll complete the third stage the last stage of the LM training. Uh now guys uh let's start uh with our with the theory of the LM base alignment or sorry preference based alignment or preference based training. So guys uh to align or train a model with a human expectation or with a human preferred data is called preference alignment or preference training. Uh so this particular technique was introduced by the open AI in uh instruct GPT paper. Uh don't worry in some time I will show you that particular paper and definitely you can refer that. Uh now why we do it? uh we do it to get a safe, helpful and the honest model. Maybe you're not getting couple of thing uh just by reading this particular definition but uh you will get once I will show you the different example. So uh here I kept one example uh just read out uh this statement. So user is asking one question to the model. So uh the question is very simple. How do I lose my weight? Okay, weight faster? something like that. So, uh I have a fine tune model. Uh let's say this is the instruction finetune model. Now, it is answering. It's a simple thing. What you have to do, you just have to stop eating, right? Just stop the eating. Give me a moment. I think now it's fine. Yeah. So, uh just stop eating so much. Now, you can see the answer is correct. But it is rude. It is dismissive and there is no explanation means it is not aligned with the human expectation. If JGP is giving you this kind of answer maybe you will not be satisfied. The answer should be according to the human expectation. Right? So uh let's say this is the output from the instruction fine-tune model. Now just look into the one more response. Right? Now just by seeing this response you will be more happy and uh nowadays from the chat GPT or from any uh basically large language model we are getting this kind of output because the model further have been trained on a human preference data. Okay. Uh now just uh look into the another answer. Now uh let's suppose we have one more model which have been trained on a preference based data. So the answer is safe bait loss generally happen gradually. Okay. You can start with a balanced meal, regular movement, uh adequate sleep and hydration. Uh if you have medical condition, it's best to get a personalized plan from a professional. I can help you with a simple step if you want. Now guys just look into the difference right between this answer, this particular answer and this answer. So if you want to generate this kind of answer right so maybe you will have to take one more step with respect to your LLM training you will have to perform the uh RHF RL AI if that is called reinforcement learning through uh AI of generated feedback or you will have to perform the DPO that is called direct preference optimization. Now first two technique RLHF and RL AIF it is based on the reinforcement learning uh and the second technique DPO it is a simple supervised training okay so yes uh definitely we'll discuss now uh here you can see in the second one in the second output you can see uh the answer is having a correct tone it is a respectful right and it gives the proper explanation with the like it is a more helpful answer okay it's a more human align line answer. So that's why guys I was saying this preference training or preference alignment is a very important part of the LLM training. Now coming to a couple of more example. So here I kept one more line. So after the preference based training model does not just produce accurate answer it behave according to the user preference. Okay it uh intention. Uh so that's a like key difference between a normal fine-tuned model or a align model like GP 4, GP 5, 5. 1, 40, 4. 1 whatever like latest and the state of state-of-the-art model you can see. Now why we do this preference training guys? So this preference training we do to improve the uh safety and ethics of the model. uh we do it for generating the helpful answer for the more polite answer. Okay. We teach the model uh so which can uh response like a human means which can response in whatever way the human wants. I kept one more example maybe with that your understanding will be bit more clear. So how I can lose 10 kg weight in one week. So if we have a normally model normal train model so see how it is going to be generate answer you can stop eating drink only water and take fat burner uh burner pills uh this will uh reduce weight quickly okay so just suppose this model basically it has not been trained on a human preferred data right now here guys you can see the another answer now another answer is rapid bait loss 10 kin a week is unsafe okay and it is medically harmful A safer approach is just to loss 0. 5 to 1 kg per week through balanced diet, hydration and activity. If you have urgent concern, please consult with the doctor. Now guys tell me which answer you will refer. So you will refer this particular answer or which is a more ethical safe answer. So definitely this answer is a more safer compared to this one. So in the human preference training in the hum uh in the preference alignment basically we teach to the model to behave like this. I hope you are getting my point now. Now uh we'll see the different technique what technique we have and we'll look into the DPO formulas and all and then we'll go for the practical guys. Now guys uh let's see the data set example. Let's see how the data looks like for the preference training. So here I kept the example for all the three method. Uh the first one is for the non-instruction finetuning as well as the unsupervised pre-trading. Uh in both case uh the data will be the plain text. Okay. Now how the input and the output column will look like. So be the next token. Okay. And the continue word. So let's say this is my sentence. Now what is the next word of it? This is the next word. So this will be my output. Now see this is my complete sentence. Okay. Till oral. Now, what is the next word? This is my next word. Now, uh here you can see this is my complete sentence. Right? So, inside the non-instruction finetuning or inside the unsupervised speed tuning, what we are doing? We are predicting a next word. So, the next word will be inside the uh output column. Okay. Uh now, how to decide the length of this input and output. So, for every model we have one specific context length. Okay. So according to that we can decide right. Uh now the second is the instruction finetuning. Now in the instruction finetuning we'll be having three column uh or sometime you will only get two column. Okay. So the first column is the instruction the second is the input and the third is a response. In this particular format you will get a data or else the data would be like this input uh called context and the answer or the data might be like this user and the assistant. Okay. or sometime you will see context and the response means uh the moral of the story is uh we will be having one input column and the corresponding output column. Okay. Uh then how to format this data and how to utilize it for training the model. Uh if you want to know everything in detail then please uh go and check with my previous video. Right now how the data look like for the preference training that's the main agenda of this video. So inside uh for the preference based training guys you will find out three column three main column right uh one is a prompt second is a chooser and the third is a reject. Now this two is very important choose right which one is going to be select and rejected. Now uh let me show you uh some real example from the hugging face itself. So here is a data from this anthropic. Uh so entropic is uploaded one data. Okay. The repository itself is entropic and the data set is called the HH RLHF. Okay. Uh now here inside this particular data you will find out two column only. The first is a chosen and the second is a rejected. Right. Now you can see the another data. So inside see this data basically it is available inside this a r ga repository gilla. Right. So the data set name is ultra feedback binarize preference clean data. Now inside this particular data also you will find out two main column. First is the rejected and uh the second column will be the chosen. Okay along with the given prompt right now here is the second third example. So this is available inside this Z lily repository. Uh so the data set name is math step dpo 10k. Now inside this particular uh repository also inside this data set also you will find out two main column. uh the first one will be the chosen okay with respect to the particular prompt and the second uh column will be the rejected okay so see here is a rejected so choose and reject right select or reject this will be the two main column inside any preference data set right choose means which one we are going to be select and reject means uh which one we are going to reject right I hope uh this thing is clear and now let's see the technique guys and then what I'll After that I'll show you the DPO formula. Okay. And then we'll jump to the practical. Now guys let's see the technique for the preference alignment. Uh so the very infamous technique that is called RLHF reinforcement learning through human feedback. The second technique is RL AIF reinforcement learning through AI generated feedback. The third is DPO direct preference optimization. Now these are the algorithm KTO PO IPO it's a reinforcement based algorithm uh to implement this RLHF or RL if in RL a also we use this particular algorithm okay so what's the full form of this algorithm just for the general knowledge so KTO is called the canman tverki optimization p stand for proximal policy optimization and this IPO stand for implicit preference optimization. Now this is very famous technique guys. Even OpenAI is also revealed that they have used this particular technique initially for the reward modeling. Okay, PO proximal policy optimization. It is a reinforcementbased technique. Okay, reinforcement it's a like reinforcement learning algorithm. Now uh the technique is RLHF. What was
the core idea? The core idea to train a reward model using the human feedback. Uh now what kind of data we were using there? ranked responses okay which was ranked by the human uh example open AI instruct GPT so this is a research paper one model basically was released by the open AI regarding that model I'll show you the research paper this open in GPT there also you will see the use of this RLHF technique okay through this PO the second technique is called RL AIFF this was introduced by the enthropic okay so inside the RL aif you will get the uh AI generated feedback feedback. So human generated feedback was not very scalable idea means how many feedback can be annotated by the human right maybe one lakh two lakh right but if we have to make it scalable then how we can do it so there they have introduced this RL af where human is not giving a preference actually we are taking that particular preference from the AI itself okay so this was discussed inside this research paper I'll show you in some time the third technique and very uh popular and in demand technique right now that is called a direct optimization policy. Okay, using the preference pair the full form of it direct preference optimization. Now guys this is not a reinforcementbased training okay reinforcementbased learning. So here we are not going to use reinforcement learning. This is a simple supervised learning. Okay, simple supervised learning means we just have input and in the other column we will be having the output. That's it guys. Okay. Uh so chosen and the rejected. That's it. Right. So uh nowadays we are using this particular technology. Now let me show you the research paper regarding each and everything. So guys uh uh I will attach all this research paper in the description. So this is the first one. Uh the research paper name is training language model to follow instruction with the human feedback. So just check out with this particular research paper you will get so many detail over here and uh this research paper was published by the open AI it's a very good research paper on top of the RLHF just read the instruction at least and the couple of headings okay you will get you will understand see here I was saying now uh they have used the PO technique proximal policy optimization so initially for the RLHF uh they have used the PPO technique okay so just read out uh this uh research paper now uh The second one is the uh direct preference optimization DPO technique. It is also very famous technique and it was introduced by the Stanford University. Right? So just look into this particular research paper. You'll get the complete details. See here this particular research was published by the Stanford University. Now here you will see the uh Indian also one Indian Arches Sharma. Uh now the couple of other person right? So just uh see it was released in 2024 and just read out the abstract at least okay you will get the complete detail of uh like what is a DPO and how we can implement that. Now the third technique which is called RL AIF right so it was inspired from the RLHF only the difference is human is not going to be annotate anything now like only AI will do that so just check out with this particular research paper it is a very good research paper you will get uh like very good knowledge through this research paper okay and this was published in 24 last year itself it's a very latest research now here also like you will find out so many contributor. Okay. So, Abhinav Rastoi and Susant Pragas is one of the guy right who contribute inside this particular research paper. Right? So, just read it. You will get the complete detail of the reward modeling and the differences between the RLif and the RHF. Now guys, let's look into the DPO. Okay. Because see, we are not going to use the RLHF technique, RLif technique as of now. Maybe I'll show you in the future, but that is deprecated. Now people are using DPO which is like very simpler okay and simple to use. So I will show you the formula of it formula of the DPO and then I will go for the uh basically practical okay so let's start with that. So guys uh here is a DPO training loss intuition. So it's a loss function. So based on this loss function uh my model is going to be trained. Okay. Uh now guys uh you know about the supervised learning. So in the supervised learning we have input then we have a output. Okay. Now uh this uh output basically it is called the actual output which we generally demonstrate with the y and then we are going to be predict right uh something from the model that is called yhat. So we check the differences between this y and the yhat and we try to minimize see this differences actually it is called the loss. Okay. and we try to minimize this uh particular loss. Right? So that's the overall idea behind the supervised learning. If you don't know about it, you can learn about the uh linear regression. artificial neural network. Okay, there you can learn about this particular concept. Now uh using uh see this is a loss function and using this particular loss function only we are going to train our model. Now let's try to understand this formula. Now why we are understanding that? So uh let's say if someone is going to ask you in an interview right so how did you train uh how did you like uh perform the training this preference training right so you can say I perform using this dpo and inside the dpo basically we are using this loss function to train my model okay it's a supervised learning only so inside this formula we have so many term but it is not very like uh complicated it seems complicated but it is not let's try to understand it okay so uh here you can see we have this uh pi theta pi reference. So pi theta actually it's a uh perference align model okay which was which is trained. Now this pi reference is what this pi reference actually it's a reference model. So it's a uh like uh instruction tune model okay which comes before the preference alignment model. Okay. So pi theta and pi reference is clear. Uh now pi this y plus is what this y plus actually prefer response means the uh chosen response. Okay. with respect to what? With respect to this prompt x prompt. Okay. Now uh here see this is uh this is like my reference uh sorry alignment
DPO Intuition: Understanding the Training Loss Formula
model. Okay. And here uh basically we are passing this uh preferred uh this is my preferred response with respect to this prompt. Okay. Now here is my reference model. Right. And here is what here is my preferred response with respect to this particular prompt. Right? Now uh similar to that you can see over here. So uh the model is there right? Y minus means what? Y minus means rejected response with respect to this prompt. Okay, I hope you understood it. Now we have couple of more terms. So we have this sigmoid. Okay, now apart from the sigmoid, you will find out this beta. Okay, and now minus E, right? This minus E is nothing. It's a symbol. Okay, minus E means what? Expected, right? What we are expecting? We are expecting this term should be minimum. Okay, and the maximum one. That's it guys. Okay, just a symbol nothing else. Right? Now let's try to understand one by one. Uh I just kept uh like I just broke everything over here. So a log uh pi theta okay y + with respect to this x and then pi reference model okay y + with respect to this x. So what does mean the meaning is how much more does your model prefer the chosen answer compared to the reference model. Okay. So here is what here is my uh basically preferred model and here is my reference model. So with respect to this respon refer reference model means my super instruction uh supervised train model I'm checking how this uh preference model is behaving. Right? Now uh similar with respect to this rejected prom also. Okay. So the selected prom as well as the rejected prom. Now what we'll see the differences. So choose an improvement. Okay. And the rejected improvement. So if it is going to be positive means my model is aligning to this chosen uh prompt. Okay, the chosen output. Now here sigmoid what it is doing? So you know the value of the sigmoid it is between the 0 to 1, right? So it is giving me a probability okay kind of probability score right. Uh now here beta means what? Beta is a scaling factor. So if the beta is high means we are enforcing model to like go to align more to the chosen okay if beta is low means the rejected one more the model is more aligning to the rejected okay the typical value of the beta between 0. 1 to 0. 5 right and here I written the minus meaning what is the meaning we want to minimize the negative which means the maximize we are going to be maximize the positive value so here let's understand the meaning one again let's take a quick revision. So uh this particular term with respect to the preferred response okay means the chosen response. So we have two model this is my uh like preference line model. This is my reference model. Okay same with respect to the rejected response. So we are checking right how my so here what we are checking how much more does your model prefer the chosen answer compared to the reference model. Okay. So we are going to be compare with respect to this reference model. Then uh what we are doing we are going to be scale it right and then we are going to be check the probability right we are just going to be compress the entire value between 0 to 1 that's it guys nothing else okay and if uh the answer is positive okay we are getting more positive in like multiple epoch we are training for the multiple epoch and this result the loss result is going to be positive means my model is aligning to the chosen responses that's it guys so I hope you understood it later on uh in the dedicated video I will show you the derivation of Right. Uh now one more thing guys before coming to the practical. So I kept a couple of more point with respect to this inst GPD paper. So this paper just now I shown you this paper right training language model to follow instruction with the human feedback. So this is a inst GPD uh research paper. Now regarding that I kept a couple of point some few summarize summarization right. So uh here human was labeling the data right. uh so whatever response uh we were generating through the model humor was ranking those thing now using the PO basically we are going to be find out which is like more helpful right so this was a chat GP uh like style alignment so which uh initially was done by the open AI okay now on what all prompt basically we are finding out we are generating the we were generating the output so on top of the API user prompt means whatever a user was writing okay through the API uh okay some question answer right sorry some public questions Basically those prompt was taken and on top of that they have generated answer from the mult generated a multiple answer and then human ranked those answer right. So this is like some uh extra information you can confirm it from this particular research paper. It is very good uh like to understand the uh to like to understand how they have initiated the RLHF technique. Okay. Now let's move to the practical guys uh and after that uh basically I'll show you the comparison between all the model. Okay. And one more important concept with respect to the lower adaptor. So here only we'll cover that part.
So guys uh we had the base model. If you remember then I uh took the base model. This base model is also called the foundation model. Now here is my foundation model. My base model. So I fine-tune this model on top of the PDF data. And after that I got this uh particular model non-instruction model. Now why we have done this thing? So that my model can understand the domain specific language domain specific vocabulary. Okay. Uh then I want to teach my model proper conversation. So what I did I fine- tuned my model on top of the input and output data. Okay means on instruction data. Okay. So what I got? I got the instruction model. Now guys, I want to be train my model again. I finetune that I finetune my model on human feedback. Okay. So after that what I will get? I will get the preferenced model. So this is the aim for this particular video. I hope you got it. Uh now for that what I'm going to do uh I'm going to load all the libraries. So the auto tokenizer autocausal for LM training argument trainer Laura config get pep model task type and load data set. So I will uh teach you the meaning of each and every uh class each and every function which I'm loading over here. So yeah this is done. Now here is my base model. Now why I'm uh I have written this base model here so that I can load the tokenizer. Okay, because this tokenizer I will be using. So uh yes uh the tokenizer is here. tokenizer is ready and I think I already explained you the meaning of this uh pet token and this uh end of the sentence token you can check out with the previous uh session itself you will get the entire detail uh now what I'm doing guys so I'm going to load my I'm going to unjip my previous model this uh tiny llama instructionjip model now why I'm doing it because uh I'm using a same model throughout this journey means uh I was having the foundation model then uh I the same model I train on the pdf data I got this model Then same model I trained on the instruction data I got this model and same model I'm going to train uh on uh this uh on the human feedback data and I will get my final preference model. Okay. So uh here what I'm doing uh see like when I trained my model uh in the previous class so I saved that as a JIF file. So this JIF file is also available in the GitHub. You can check it out directly. Okay. Or if you will train it uh the D model from a scratch. Okay. over here uh using this particular uh notebook this IP1B file uh so at the end you will get this uh particular model itself this tiny llama hyphen uh instruction okay then you can convert into the jip and you can save it anywhere that's it uh so uh guys uh I have a model I have already uploaded this particular model over here uh you can see now uh let me unzip it so after the unjipping it what I will get this checkpoint 3 okay so this is my train checkpoint instruction checkpoint uh let me uh load it Let me take it inside the variable. Now I'm loading it. Okay. And I'm testing whether everything is working fine or not. So for that I kept one uh prompt. So explain the AI in improving the process of the drug discovery and the development in the pharmaceutical industry. So this is my prompt. But this uh first what I'll do I will convert into the tokens. Okay. And I'm mapping to my uh GPU. Now uh I will pass this token to this uh method. So instruction model dot generate I'm passing the token uh along with that I'm passing some other parameter like how many tokens I want in the final output some other parameter uh with respect to some tweak some creativity in the output. Okay. Now repetition penalty means uh the token should not be repeat. So regarding that we can mention this particular score 1. 1 and I think this score we can me uh we can up uh like write up to two uh you can check out uh the complete detail of it. Okay. So yeah, this is also one of the parameter. It will stop the redundancy of the token. Okay, so we'll get output. Let's see what output I'll be getting over here. So before the class, right before the class, I was testing and uh I already run it. Uh okay, if you are running it first time, then it might take some time. So here is the output. So explain how this is the question. Now uh regarding that uh see the answer is being generated. you can get some better answer the uh if you have much data then definitely you will get some good answer aligned answer itself. Uh now here this answer is also aligned and uh it is with respect to my question. Now I want to perform the preference based learning. So for that guys we are going to use this TRL module. So under this TRL module only you will get uh all the uh re this preference tuning based classes like DPO like RLHF like RLIF okay different classes you will get under this particular module only. So uh let me uh install it. So the command is very simple pip install - URL you will get the latest version. Now after that uh if you want to load a quantized model so uh there is one more package bits and bytes. So let me load uh let me like uh get this package also. Okay. Now guys after executing this two command uh pip install - utl and pip install- u bits and bias you always uh restart the uh kernel otherwise you might get a error uh that this package is not visible. Okay. So let it install and after completing this one what I'll do I'll restart the kernel and okay this is done. Now uh what I'm doing I'm uh checking with the runtime. Now here you can see the restart session. Just click on this restart session. Okay. The kernel will automatically restart. See right hand side it is getting restarted. Now uh load this uh step again. Okay. Because after restarting this will be gone. So yeah everything is fine. Now uh guys this uh module is installed. This uh bits and byes is also in installed. Now let's try to perform the DPU training. Now here I want to teach you one very important concept of the LoRa guys. It is very very important. I think most of the beginner and even the experienced person uh does this kind of mistake. So I don't want to repeat that mistake over here. Okay. And even I rectify that mistake in the previous solution also and definitely I will highlight those part. So uh for this uh preference based learning I'm using uh this TPU trainer. Okay. Rest of the module will be same which I already imported in the previous cell. So from the TRL itself we are going to import this DPO trainer. If you are doing RLHF or if you are using some uh if you are doing the RLHF RLF right so from the TRL itself you will be loading everything okay so we are having this DPU trainer now what I'll do so here is my base model guys uh then you know this is my instruction checkpoint right so my model is available over here inside this particular checkpoint the instruction model uh now after that guys uh you can see so we are going to be load the data set so here the data set plays a very important role I will show you what kind of data I'm using and how I created that. Then uh I'm loading the tokenizer and after that uh you can see we are assigning this end of the token to the padding token. Okay. So let me check what is happening whether everything is ready or not. So yes this is running because see guys we have a limited memory. So we might get some issue with respect to the memory and RAM. So better don't execute everything again and again the harder step otherwise you might face a issue in the collab. So yes, it is working fine. My model is uh is still giving me a reply. Now TRL with respect to the TRL in bits and byes I load reloaded the environment. Now first of all let me import all this statement. Okay. So after that guys what I'll do? I'll take the base model. I'll take the instruction point. Now here is what here is my data set. So how the data set look like? So I already keep kept the data set over here. Pharma preference data dot CSV. This data could be available in CSV as well as in the JSON format. So I basically kept the CSV as of now but you can load the same from the JSON file also. So how the data look like? See here is a data. So inside the data you will get the prompt uh you will get the chosen uh one column. Okay. The second uh sorry the third column will be the rejected. So we are giving a prompt to the model. Then we are generating a multiple answer. Now which answer is being selected and rejected. So that particular information we have kept over here. I think you got this point. Now whenever we are passing a prompt to the model. Okay. So model will generate something. So that this can be wrong or this like can be the correct one. So initially I shown you like how the human annotated this entire labels and all whether I have to choose it or reject it. Later on we have automated this task also. Okay. On a very high scale. So this task have been automated by the LM only. So we are giving certain instruction to the LLM and based on that it is able to find out which is the chosen one and which is a rejected one. So this type of data we required for what for the training. Now here guys uh see uh we are loading a base model. Okay we are uh having the instruction checkpoint. Now we have a data set also. Now what I'm doing I'm going to be perform tokenization. So from the auto tokenizer I am loading my base model. Okay. So it will come inside this part variable tokenizer variable. Uh then what I will do guys? So after that uh the same thing you will have to assign the pet token uh US token and of the sentence token as a pet token. Right? Now uh here we need to understand one very important concept. So we're talking about the pept module. Okay. So pept is giving us uh two different methods. So see p uh we have a pept right. So from the p we are importing this pft model and from the pft itself we are importing this get pod. So guys we need to understand the differences okay between this uh pft and get pel because it is very much important. So guys uh I kept the complete intuition uh over my blackboard. So uh let's understand it one by one. So what we are doing guys uh as we know we are having base model then we are training it for the non- instruction model then preference model okay now uh how we are doing this training so we have a base model now we are uh doing the lora based training and we are getting a non-instruction model then again we have a non-instruction model and we are adding the lola adapter Laura layer and we are getting a instruction model now here again we have a instruction model okay and uh we are adding the Lora we are do means uh we will try to do the same one uh we will add the lora okay and then we'll get the preference model but guys uh to be honest this is not a good thing practice and uh no one is following that okay uh now uh see over here what we are trying to do we have a base model we are connecting with the lora okay the lura adapter then base model lura then again uh in the instruction tuning again one more lura then we have base model lura lora and then Again one more lura would be there. We are following the same uh step over here. So stack of the lora layer is not good. Stack of lora is not a good idea guys and that's a step I uh followed in my previous tutorial right and uh you were able to see the responses. It was not uh quite good. Why? because the lura the lora layer was getting in stack. Now if you don't know about the lora don't worry in the upcoming video I will explain you with complete detail with a complete mathematical derivation and all. Okay. So don't worry about the lora but let me give you the quick definition of it what it is. So uh here I written lora is a lora is not a fully full layer. Okay it's not a complete model. It's just a delta patch. Okay. So delta patch cannot be stacked. They must be merged before the next training. So what is this delta patch? This delta patch you can think in such a way. Uh we have a weight old weight. To this old weight we are going to be attach some small matrix of weight. Okay. And we'll get the new weight. Okay. new weight w e i g ht. Okay. So we are having the old weight. We are going to be attach it with the uh like some uh small weights. Okay. And now this particular patch the small patch. Okay. It is only called the delta patch. Okay. So my lower is nothing. It's a small patch. It's a small weight which we are going to be attach on top of my old layers. Okay. And then what I will get? I will get my new weights. So here is a proper mechanism for it means this particular weight is being trained. This is going to be freeze. This particular weight trained. Now after the training it will be merged into the old weights. So that's a whole sort of a idea of the lora. We'll discuss it in a more detail in the upcoming session. So this delta w is called the patch and this is only called the delta patch. Okay. And this is my lura weight. Now we no need to stack the lower weights. Okay, see this is my W the original weight. If we are doing a non-instructional training on the same model, we'll get this W1, DW1. Then we are doing a uh we are doing the instruction tuning on top of the same model, then we are going to be attached this uh DW2. Then for the preference learning again DW3. So we should not take this particular step and this was a mistake even which I made in the previous solution. Okay, I will give you the correct uh approach which approach basically you can follow uh for the Lora. Okay, if you are uh using a same model again and again for the training that how to use LoRa efficiently, it's very very important. Now what is the disadvantage of this thing? So the disadvantages loss will be unstable. Model will hallucinate. Uh tuning will not be good and the quality will degrade. Why? Why it will degrade? Because loss will be unstable. We won't be able to figure out the loss properly. Right? If we are having this kind of weight, if we are going to be uh we are going to be create a stack of the lora, right? Uh so what is the solution of it? So to use the lora in an efficient way. That's a solution. Let me show you how. So let's discuss how we can use lura in a better way. So if you will check guys. So this pept is giving me two method. One uh is get pept model. Uh the second is uh pft model from pre-train. Okay. So when we have use when we have to use this get pept model and particular method. So definitely we'll uh we'll be talking about it. Now here we have a get pod model. So it creates a new lura during the training means the new lura patch the delta patch which I showed you. Now this pft model dot from pre-trained now what it does so it load a already trained Laura model okay for the inference or for the further training right so we are going to use this particular method for loading the previous lora weights for the like uh train lora model and then on top of it uh only we are going to perform the finetuning okay but the way is going to be little different see over here observe over here what we are doing so uh we have a lura configuration So here I'm writing task type is going to be causal lm that is for the uh next token prediction okay for the language modeling then there's the rank of the lora r is representing the rank lora alpha is one of the parameter lora dropout okay uh it's a hyperparameter you can keep any sort of a value of it just to test your output means just to uh like uh check what uh impact it is having on the final output then uh which like module we are targeting in the attention layer so we are mentioning that part over here and bias is equal to none so this is what this is my lower configuration now what we were doing guys uh in the previous class and even uh if I didn't find out the current approach then what we would be doing let me explain you that first okay then we'll come to the correct approach so we are having this method get pet model so we are simply passing this uh instruction model okay and then we are passing this lura configuration so we were get we were thinking okay now we will get a model which we can tune further. But guys this is a wrong approach. Now what we are doing over here we are having the instruction model and on top of it we are going to be connect the lora stack. Okay. So the stack of the lora again and again okay on a like same model which we are training on a different phases uh to app to append the lora okay to create a lora stack it is not a good practice. Okay. So what is the correct approach? Let me tell you that. So first what we'll do guys we will load the base model. So uh here is my base model. Okay I'm not going to take this particular step. I'm just going to be commented out means directly I'm not going to be take a model means directly see here I'm giving my instruction model which I loaded earlier from the jip uh okay and uh here I'm attaching the lura st and then I'm getting this p uh model lora but I'm not going to perform this thing because this is not a correct approach. So what I will do guys? So first I will load my base model. Okay, inside this particular variable I was having the base model. So let me show you this base model which uh was there. So here is the base model. Okay, so we are able to load the base model. I got it inside this variable. Now in the second step, what I will do uh using this method pept model dot from pre-train. Okay, I'm passing this model my base model and I'm passing my instruction checkpoint means uh this instruction model. Okay, this particular model. Now uh after that what I will do uh so after loading this thing I will get my model. Okay. So this uh model this base model basically it is connecting to the instruction checkpoint right. Now what I will do I will merge it. Okay. Merge and unload the weight means uh I was having the base model. Uh on top of it I will keep the LORA weights. I will merge both weight. Okay. And after that I will get my model. So here is my model. Now what I will do on top of this model only I will connect the lora stack. So here is g pept model I am passing my model and then I'm passing the lura configuration right. So just check out all the thing it is very much important guys very very important see over here. So what I'm trying to say uh just focus over here just for one more minute. Okay guys so we are having the base model. We performed the non-instruction finetuning. Okay. After the LoRa and we got the uh non-instruction model. Then uh again we were having the instruction data. We performed the instruction tuning and we got the instruction model. Okay. Now this two thing this non- instruction model I did with the LORA instruction fine-tuning. Again I have loaded this non-instruction model and I attached with the Lora and then again I perform the trading. And then now the same thing I'm going to do with the preference model also. But guys this is the wrong technique. Okay. To create a lowrise stick like this which I explained over here, it is not a good thing. Why? Because we might get this kind of issues. So what is the best approach? The best approach is uh first guys uh see here is my uh basically this instruction model. This one this is my instruction model checkpoint 3. Okay, which I already trained. Right. So what I'm doing over here, see just focus for one more minute. So uh here basically what we have a lower configuration that is fine. Now I'm not going to be like pass this instruction model and we are going to be uh create a lora again on top of it and then uh I'm calling it is my preference model which I'm going to tune further. No. So uh here I'm taking a base model. Uh so I'm loading it. Now after that we are going to be connected to the instruction checkpoint. Okay. Now after that I'm calling this method merge and unload. So merge and unload what it will do? It will merge model my freeze model as well as the instruction Lora. Okay. Then on top of it I will create the Laura patch. Now this particular patch is going to be trained. Okay. So this model which I got now PEP preference model Lura. Okay. After see uh this my method get PEP model. I'm passing my Lura configuration. Now I will get the delta patch. Okay. I will get the lura patch. delta the delta right now that particular uh so I'm keeping it over here inside this particular variable now I will be training this model on top of my uh on top of my preference data set right so here I created one table also non-instruction base lora it is correct instruction base plus merge okay stage one lura then new lora this is a correct approach directly lura on lura it is not a correct approach now preference base so base model then merge stage to lura then plus new lura this is the correct approach lura on lura this is not a correct approach I think now you got the complete lura so let's uh train my model so here I am going to be write bits and biases disable true and don't want to be capture any sort of a matrix so uh here guys I'm going to be define my dpo trainer from the trl so trl is giving me these classes dpo trainer and the dpo config so yeah uh this is fine now what I will do uh I will create a object of this class dpo So uh basically config now uh here I'm writing a directory uh in which directory in whatever directory I want to be saved my model uh here I have a learning rate uh and then I have train batches okay gradient uh accumulate accumulation step right at uh how many step we are going to be uh accumulate the gradient value uh number of training epoch how many for how many epoch you want to be running beta value report to none I don't want to report any on any uh basically platform okay uh So here also I did that same thing and you can mention this parameter also logging directly none as of now I don't want to be log anything loss type is sigmoid okay will collect the uh we'll will calculate the loss with this particular function remove unused column okay false I don't I'm not going to be remove any uh column as of now I know guys uh you get the little difficulty while you go through with this all this particular parameter we have so many parameter if you will hover the mouse over here you will get maybe so we have so many parameter over here maybe hundreds of parameter. So don't worry guys, it is my responsibility to teach you everything. I will create a proper video on top of each and every parameter of these classes. Okay, it is my promise. So uh let me uh take this DPU argument. Now here I'm defining the DPU trainer. There I'm passing my model. Okay. Uh which uh the model basically here you can see this particular model this one preference model Laura. Now how I got this model? So I was having the base model. Okay. I on top of it I appended this instruction checkpoint. I merge both the bits. Now on top of this particular model bits uh okay this particular model I attach the delt this uh like lower patch. Okay. And then I got this model and further I'm going to train it now. Okay. Uh now uh here is my model and reference uh model. I'm not passing any reference model otherwise I can pass the reference model over here. Uh that is also one of the facility. Okay. uh argument. So, DPU argu argument this particular argument which I defined over here. Now after that guys uh training data set. So data set which I loaded okay from the CSV this particular CSV this I shown you okay only five data points you can keep as many as uh then uh here processing class uh that is tokenizer. Okay. So if I run this trainer so see uh it is saying preference model is not defined. So let me run it first. Okay. I got this one. This is fine. This is perfect. DP argument is also fine. DP trainer is also perfect. Now trainer train. Now guys uh this is my final step for training the model. So trainer train and yes my model is getting trained. It will take time guys if we have a huge model and the very huge data set. As of now it is a quick because we have a very small model not very small guys we have a small model with a very small data set and my poke is one and I kept the parameter in such a way it won't take much time just to show you guys but in a real time you will be doing it with a huge amount of data. So it will take maybe days. Okay. Uh now uh here uh it is just a testing. So testing uh with non-instruction model. Okay. So here is my question. Explain how mattforming works in the human body and why some research believe it could have benefits beyond diabetes treatment. So guys uh if uh I will test this question with my different model. Okay. So let me test for two model instruction and the preference. You can test from your end this one non-instruction one. Okay. So this is my question guys. Now what I'm doing? So here is my testing with the instruction point model. So this was my checkpoint. Okay. Instruction one. Now I'm going to be load this model. See instruction model would be here. Uh I'm going to uh tokenize this question. Okay. And then I'm going to generate a output. And then here will be my final output. So let's see what Guys, we'll compare the output. Okay, we'll compare the output of the instruction model as well as the preference model. Let's see the difference uh whether we are getting some uh like good uh terms, terminology, something like that. Right? So, it is saying question is not defined. Let me execute it. Okay. So, here we have a question. Now, model is there. Input tokenizer is ready. Okay. Now, here is my output and then I will be getting the final output. So let it complete and uh yeah I will get the final output guys just a second it takes some time. Yeah. So this is the output. Now see guys explain how metforming this is that. Now see this is the answer. Cone disease inflammation bowel disease. I don't know this is correct or not. You should check it out. Right? But guys there's some redundancy uh in the output. Uh because I did the mistake uh in the previous uh training. Okay. I will come to that just a second. Now here is my model path. Uh this is my LoRa model. Uh this one preference based model. Okay. See here I saved that model inside this uh folder tiny llama preference alignment. See there's a folder. Okay. Now what I'm doing I am going to be uh load my model. Model path is here. I'm going to be load my model. Now I'm going to be uh like uh connect with the CUDA. Okay. To the GPU. Then uh guys I'm going to be uh like tokenize the question. Okay. I will be getting inside the input. Now this input I'm passing to my model. Okay. preference alignment model for the final generation. Now let's see the final output. So let's see what I'll be getting over here. So it takes time. The output generation might take time. Let it complete. It depends on the infra also. If you have a good GPU, good infra. Now see guys explain how metapformin works in a human body. This is that. Now see metapformin diabetes drug two type. So see guys, you can clearly see the difference. So difference between this normal like output from the instruction tuning and the output from the after uh like output after the alignment. Okay. So guys you can make a difference over here means uh like you are you have train a model on top of the instruction data that is fine that is completely fine. I'm not denying that. But if you want to more enhance on the human preferences you can take one more step like this chat GPT have done. If you're training your model from a scratch, this will be very very helpful. Now I was saying guys, I have done one mistake. So uh the mistake basically I rectified over here. Uh if you will go and check with the instruction tuning. So I written that code over here. You can uh now execute this file and uh in whatever way I have explained you this lura stack over here. Okay. So see this I'm not going to be follow now means I will not append lura lura. First I will merge the weight and then only I will append the lower uh Lora patch. Okay. So I kept the code uh over here. Let me show you where it is. Uh this one, this one. Now let's uh Okay, I think it will be the blue one. So see guys this one. Okay, I kept the complete code. You can go through with it. You can run it and then you can train your model. So fine guys uh this is it for this particular video. In the next video I will uh come up with uh some different framework okay to teach you this finetuning. Uh yeah so thank you guys. Thank you for watching it. If you haven't subscribed my YouTube channel please subscribe. Uh this kind of uh content takes very much effort guys to research and all and then record. Uh so please uh respect for all those thing and subscribe the channel because see guys it is free for you. I know but uh it is very important for me. Okay, your subscribe, your like, your support, everything. So fine, uh I'll see you in the next video. Thank you. Bye-bye. Take care. So here I have mentioned uh what you will learn. So the
Introduction to the Llama Factory Project
first thing what is a llama factory, right? You will get the complete introduction about that. Then what type of training does llama factory support, right? So what kind of training you can do means like supervised fine-tuning, RLHF, DPO, right? So uh we'll take a overview of it and then we'll perform the supervised finetuning. uh then uh which model are supported by the llama factory. So we'll see all the model families which is which all supported by the llama factory right uh then which data set format are compatible with the llama factory. So if you want to fine-tune any model so for fine-tuning uh for fine-tuning in which format you have to keep the data you have to prepare the data so definitely we'll try to discuss uh that also uh then step-by-step guide for the finetuning using the web UI. Okay. So llama factory is a project. So the llama factory actually it is giving the web UI as well as you can run it from the CLI. So we'll see both thing. We'll see step-by-step guide like for the finetuning using the webbi web UI uh as well as I will show you the training via CLI. Okay. So these many points uh I will be discussing throughout this video guys. So stay tuned with me till end uh you will get to know everything uh about this llama factory. So guys uh now let's understand about the llama factory uh then only we'll start with the practical. So uh llama factory is an all-in-one open-source fine-tuning project uh that makes LLM training and inferencing very simple and it works with hundreds of model and the data set. So what is a llama factory guys? So llama factory is nothing. It is just a project which is coded by someone else. So let's uh look into the source code of the llama factory. So uh here guys uh this is a source code of the llama factory. This is the repository name. Uh the name is Hi yoga. And uh this uh repository is written by this code is written by one Chinese guy. The name is Yaoi Jinang. Uh here you can see the location right. So uh this repositories are quite famous and here you can see the number of folks it is around 7. 7K right and the star is around 63k okay so uh now guys uh see this is the entire code uh the complete source code uh you can uh check over here you can just click on this src and you can go through with the different folder you can download this code inside your local and you can run it and you can finetune your model. So guys uh this llama factory actually is a UI and CLI based framework right means uh it is providing the CLI oh sorry UI uh it is providing the CLI based execution both thing it is being provided by the llama factory. So a UI it is also called the llama board right. So it is a beginnerfriendly web interface where you can directly select the model, you can upload the data set, you can set the uh certain configuration related to the finetuning, okay, you can run the training, you can export the model or even after the training you can do the chatting, right? So this each and everything I will show you inside this video itself. I'll give you the complete walk through of the llama factory UI and uh how to basically select the model, how to train uh do the chatting and all everything I will show you. Then the second way is a CLI. Okay. So if you prefer scripting, automation or advanced control then through the command line interface also you can do the training, you can export the model, you can like start chatting, right? Everything you can do by CLI also. So just think in such a way uh I have developed one project. Now that project you can uh use you can run via UI as well as from the CLA. That's it. Okay. So it is just a simple project nothing else. Uh now guys one very important thing regarding this llama factory just read out this line. So llama factory is a build on top of the hugging face libraries. Okay it internally wrap up transformer path bits and byes trl. Okay. So which provide one-click fine-tuning workflow means guys the meaning is uh it contains means llama factory basically they haven't written the complete code from scratch no they are using the hugging phase libraries only okay but on top of that they have written like certain custom code for developing the training pipeline okay for the UI for the templates for the data set handling Okay for uh some quantization and all as far as I investigated their repository so there I haven't get any custom code regarding the model okay uh like see if we are going to be code any model any transformer based model so I will write a code from scratch using the tensorflow using the pytor and all right so what I figure out and whatever I search right so uh they have used the transformer paft bits and bites means they have used the hugging face-based library only and on top of that they have done the certain customization means uh like regarding the training loop regarding the they have added the UI over there they have like added like the data set templates and all right to uh to like use the data set in a efficient way right so those thing they have done they haven't written a like code regarding any model from scratch even I can show you inside the uh repository itself. So if you will go and check with the repository. Now here just uh open the model. Okay. Now over here uh let's click on this adapter. Now inside the adapter just check see the import statement. So they are using PET from the hugging face. They are using the transformer Okay. Now you can check uh let's suppose the chat right. So in the inside the chat also see they have created this hugging face engine. So see uh they're using the transformer right. Now you can check out with the different other folder the different other code and all everywhere you will you everywhere basically you will get a use of the hugging face module right and on top of it certain customization certain logic and all for the training and for the data set handling and all they have done so I hope you got the clearcut introduction and the meaning of the llama factory now let's see what all model is being supported by the llama factory and the data set format also Uh so guys uh different training type is being supported by the llama factory. Uh so I written couple of uh names over here like SFT uh DPO, RLHF uh then RL Aif and even a full fine tuning. uh so this all method uh is being supported by the llama factory and easily you can navigate to this method from the web UI itself and definitely I will give you the quick walk through of it so sft is called the uh supervised finetuning so like it is also called the instruction finetuning and we can perform this supervised finetuning using the lora as well as with the Qura okay then dpo is called the direct preference optimiz ization. It is a method to perform the preferencebased learning. I have shown this thing in my previous video. You can check out over there. Then RLHF is a reinforcement based method for again for the preference alignment and uh it is also called the reward modeling. Okay. And for the optimization we are using this PO method. Right. So RLHF with reward modeling and PO it is also very famous method which is uh which was used by the open AI itself to uh to perform the preference training. Then RLif it is a like method. All right. So instead of the human feedback we are training our model on top of the AI feedback. Okay. So this uh particular technique also I discussed in my previous video you can check out over there. I discussed the research paper and all everything. Then full fine-tuning means so we can train all the weights of the model. Then yeah this particular technique uh is also available uh in the llama factory right fac using the llama factory basically we can retrain the entire model we can train all the weights of the model. So yeah these are the couple of technique which is supported by the llama factory. Now let me show you the model as well. So uh the model family supported by the llama factory. So llama is being supported. That's fine. I think the name and the llama right these both are matching. So it's a pretty obvious thing that definitely this llama model will be available in the llama factory. Uh then mist family uh then coin 1 coin 2 even the vision based model is also available. GMA model from the Google this is also available. Uh and five model from the Microsoft it is also available. Then couple of other modu other model uh like yi okay it is also very famous uh opensource model from this uh 01. aii AI company belong to China. Then uh by Chuan right so this is also a very uh like famous repository over the hugging face you can check and it is from the chuan inc right it is again from the China now other model other popular like committee model right uh like chat GLM from this uh Chinese university okay then deepse again from the China right and open buddy right uh I don't know like to which like company blog but yeah this is also one of the famous opensource model now Guys here you will see along with this meta mist five okay and this Jima you will see like various Chinese model because uh this repository belong to one Chinese guy so definitely he will give a space to their like uh specific Chinese model right those Chinese repositories so yeah you can basically go through with it and you can check and even I will give you the walk through from the web UI itself and now the data set format so it support uh three kind of format. So the first is a alpaca format. There you can put the instruction input and output right and we already seen this particular format right in our previous uh like sessions. So uh this is called the alpaka format which generally you which we generally use for the instruction tuning right. So there we have three columns. The first column is the instruction, the second column is the input and the third column is output. Right? Uh the second format is called the sear GPT format. Right? So this format is also being supported by this llama factory. If you're keeping your data in this specific format, the definitely llama factory will support it and you can fine-tune your model. So what is this here GPD format? So inside this share GPD format you will have this conversation. Okay, this key and under this conversation you will have this from basically is representing to the user and the value basically the uh the specific message from the user. Now from the assistant, right? Uh so uh now assistant means model what model is replying then here is a value so this will be the like the actual value. Okay so in this particular format also you can keep your data in the llama factory and the third format for the DPO. So in the DPO basically in the previous video also I discussed this DPO format this preference training preference alignment format uh where we would be having three column. The first would be the prompt and the second will be the chosen and the third will be the rejected. So this format is also being supported by the llama factory. So if you are keeping your data in this three format the definitely llama factory will support and you can train your model. I hope this uh data set uh like format is also clear. Now coming to the couple of more points. So if you want to like fine-tune uh your model from the web UI right? So step by step you can follow this process and uh in some time I will show you practical. So the first you can select the model, you can load the data set, you can do the certain configuration for the training, you can select the GPU right uh the GPU selection is also there means uh it is not providing the server right but a GPU configuration right the certain configuration regarding the GPU you will also get so that level of optimization you can perform you can start training you can evaluation you can uh chat with your model and you can export so in this uh specific uh sequence you can fine-tune your model from the web UI. Uh now one more thing guys uh so if you are willing to uh like fine-tune from the CLI so these are certain command means you can write your configuration inside the YAML file. So see I have attached like YAML file. Okay. And then what you can do you can run the specific command. So if you want to train you can run this command lama factory CLI train. If you want to check you can run this command. If you want to evaluate you can run this command for export this command. Okay. uh so this for the API configuration this for the wave UI web chat so for every uh sort of a action one CLI command is also have been given uh you can write your configuration inside the YAML and then directly you can pass in the CLI command so yeah guys uh now let's uh see the practical I will show you each and everything through the practical itself whatever we have discussed in terms of theory uh and then uh we'll wrap up this particular video guys. So guys uh this entire practical will do
Setup & Setting up Llama Factory via GitHub
in the Google collab. Uh you can do in your local as well if you have good high-end system. I'm uh doing in the Google collab because here I have a support of the free GPU and over the GPU the training would be little faster. Uh so uh guys there is two way to setting up this uh llama factory. Uh the first is via GitHub. We can directly clone the GitHub. Uh the second is we can basically install this pi package. So I'm not going with this pi package because with this I was facing certain issue. So directly I I'm going to be clone uh this particular repository uh this llama factory repository and then uh use after cloning this repository only I will uh show you the further training. So what you have to do uh first guys you have to select the runtime. Okay. So just go just click on this runtime and uh here see my runtime is already running. Uh so what you have to do guys you have to select the GPU over here. If it is not selected then let me check uh whether the GPU is selected or not. So yes I have a I have access of the free GPU you can purchase the Google Collab Pro. If you want some high-end GPU like 800 L4 right so uh you will get the like some high-end GPU with the paid version of the collab. Now let me save it. And here see my uh server is also connected. Right hand side you can see this uh green tick. Now what I will do guys first I will clone this repository. After cloning this repository I will install the requirement. TXT and then only I will perform the uh further training. So uh let's uh set up this llama factory. Now guys see this llama factory just it just a project right? uh so it is not providing you any sort of a platform where you can configure the GPU okay uh it is not providing you any sort of a GPU and all nothing so it is just a simple project which you are going to execute on your own server so in my case means as of now right now the server is a Google collab so uh here only on the Google collab itself I'm going to be execute this llama factory uh code right I hope you got it so for cloning this repository I will simply write this g clone and uh then I will give the path of this github. So how you can copy the part of the github. So just uh open this github and then click on this green icon. Now here you will get this link. Okay, this https link. Just copy this link and paste it over here. Okay, this is a link. This is the same link. Now paste it over here. That's it. Write get clone and paste your link and then run it. So once you will do it guys uh you will be able to clone this entire repository in your collab. So how we can check it just click on this file icon. So once you will icon you will get the entire repository over here. Okay. So this is the entire code. Now what I will do guys I will check where I am right now. So for that I can simply execute this pwd command. So pw pwd means what? PWD means present working directory. So I can check my it is pointing to the content but I want to go inside this llama factory folder. So if folder I will simply write this command cd. CD means what? Change directory with this amp percent. If you are doing change if you are changing the directory in the collab you will be writing with this m percent. Okay. So amp percent cd contain and then this folder llama factory. Once you will run it and uh then you will check so the present working directory will be pointing to this llama factory. Okay, this is very much important. Now what you will do guys after that you will check uh you will list all the directory. Okay, with this ls command. Now uh list ls means what? List all the script. Okay, list all the files. So once you will run this command you will get all the directory uh sorry all the files inside this particular folder inside this llama factory folder. So here we required this uh require. txt. Okay. So what I will do, I will install this require. txt. So uh here is a command for installing the require. txt guys. Let me do it. So uh I'm going to be install the recon. txt. Now after installing the requ. txt, you can execute this command also. So this particular package right will be installed as a so this particular project package right pip install e. If you know about my end to end project there also I perform the same step to convert my project as a local package. So here also you can do the same thing. So you just need to write pip install - e dot. So let it complete uh let it install this recan. txt. After that what I will do I will execute this particular command. Now couple of more thing guys what I have observed uh even though I'm installing this recurren. txt txt but sometime it is giving me issue with the bits and bytes library okay uh with this particular library this specific library so what I'm going to do I'm going to be install this uh library as well separately maybe it is not up to date inside the recurrent txt so what I'm doing here I'm installing this pip install bits and bytes now after installing this bits and bytes guys what I will do I will install this pip install dot hyphen dot means what it will do it will convert this entire project into the package okay and it will be saved in my local uh environment right so I won't get any package related issue something like that so let it complete guys this bits and byes will also take time now after that couple of more step is required uh so that I will let you know what all other step is required for the uh setup so yeah bits and byes is installed now I'm running this pip install - e dot so it will also take some time so let it install Okay. So it is saying file contain does not appear to be Python project neither setup. py nor pi project. toml. Let me check with the ls whether it is there or not. Uh here you can see setup. py is available. Then why it is saying like this? Let me again check with a pwd whether we are pointing to the correct directory or not. uh if it is not installing we'll skip it. Okay. Yeah. So that is the issue guys because I restarted the runtime now because of that it is pointing to the content again right so if you are restarting then please check where you are because once you will write once you will like restart the session. So again you will be pointing to the home route only. Okay to the home directory only. This is the home directory this content. So what I will do again I will run this cd content llama factory. Now here see I'm into this particular directory. Now I can check with this pwd. So pwd means what? Present working directory. And now I'm into the current direc uh correct directory. So what I'll do I will write over here hyphen ls and hyphen ls basically it will give me all the file. Okay. So yes recon. txt is there and inside thetxt itself the hyphen means basically this is not required recon. txt for installing uh this project as a package. I can simply write this pip install e dot. Okay. But yeah the like the thing is we should be okay we should be inside this specific directory uh inside this llama factory otherwise it will give you the error. See here I'm getting this error because it is pointing to the setup py file. Just look in uh look at my uh end to end project where I discuss this entire thing in a very clear way. What is this setup py? What is this hyphen dot everything guys? Now uh let me install it. Uh let me run it and I think now it will be working. Yes it is. It is working. So let it uh complete and we have to launch the UI so that we can do the further uh we can like uh do the training from the UI. Okay. And after that I will show you from the CLI as well. So everything I kept don't worry everything I will show you. So yeah guys I think this is done. Now what I can do I can check with this src folder. So inside this src folder you will get this API llama llamaactory info. See this info file is there. Okay. So now I can use this package sorry this project as a package. Uh train py is there. Web UI is there. Okay. That is fine. Now what I have to do guys see this UI will be launched with the help of gradio. Okay it's a gradio UI. We have streaml UI. We have a grad UI. So using this streaml gradio we can uh like quickly create a UI. So this UI basically which is integrated over here. It's a gradio UI. So how to get that UI? Let me show you. So first you have to set this environment variable gradio share. Okay with that actually you will be able to run this gradu UI over the public URL. And now what you will do guys you will log into the hugging face. So this is required this step is required. Now why this step is required because whatever model and all being loaded right so it will directly load it from the hugging face itself. So uh for that this particular step is required. If you're not following it uh maybe you will get a error that okay model is not getting loaded or tokenizer something like that. Okay you might get those specific error. Now just put your token right and then uh select no. Uh so here you can login. If you don't know about the hugging phase how to login how to get the token. So what you can do inside this playlist itself I have uploaded one crash course related to the hugging phase that I have shown all the method of the login. Okay how you can loging to the hugging phase how you can generate a token what is the different type of token is there like uh we have read token write token fine grain token different kind of token okay and different way of logging to the hugging face. So what you have to do guys you just need to write this hugging face cla login just put the token over here this will be the read token I already created a token and I kept inside my keys over here so I just copied from here okay this particular token and then I passed it over here that's it guys and if it will ask you to get credential so this is not required as of now you can simply say no and hit enter that's it guys nothing else now uh I think we are good to go so what we can do we and launch the UI. So for launching the UI guys, this is the command web uh inside this src folder, we have a file web UI. py. Even I can show you this particular file. So once you will go and check with this src folder. Under this src folder, you will get this web ui. py file. You can open this file and you can check the entire code. See this is the entire code and this is running the gradio server. So that you will get a UI. So uh here what I'm doing guys I'm going to be executed. So once I will execute this particular file uh it is going to be like up the uh like public server. Okay for the web u for the uh gradio UI. I will get a URL after clicking on that URL I will be directly redirecting to the gradio UI. Okay. Uh now guys see you have to follow all the step in the same way which I am doing. If you are missing any sort of a step guys, you will not be able to fine-tune the model using this llama factory project. Okay. So please do the setup in the same way like I'm doing. Now we have other way also. If you don't want to be launch the UI with this particular command, what you can do? You can do it like this. You can import this uh create UI from this web UI then you can create a object of it and then you can call this method launch. If you will do like this in that case also you can launch the UI. We have both way. Now over here guys see it is running the gradio UI. Okay. And over here I will get my UI on this particular uh URL. So we have this local URL also this local URL will not work because we are onto the Google Collab server. So we required the public URL. So yes we are getting just click on this running on public URL. Local URL will not work. Again I'm saying this local URL will work if you are running it inside your local okay inside your system. So just click on this public URL. Once you will do it guys. So here
Using Llama Factory Web UI: Selecting Models & Data
uh once you will click on the public URL guys. So you will get your gradio UI. So this is a UI which I was talking about and this is a UI of the llama factory. With this particular UI I think within a minute within 2 minute itself you can fine-tune your model. You just need to fill out the details. That's it. Okay. So here you have to pass the model name guys. See this is the model different model basically and as I was telling you it is supporting to so many Chinese model because this particular code is being written by the Chinese guy. Okay. Uh then model path automatically the model path will be coming where the model is available inside your directory. Then from which hugging from which basically platform you are reading the model. So model scope hugging phase open mind. So as of now we are reading from the hugging phase. Then finetune method. So full freeze lora of fft. So see all the different method are there. Now the checkpoint path will be over here. Then quantization method chat template rope scaling. Okay. Booster. So different like parameter you will get like okay so and here you can see right after filling this entire detail what you can do you can preview the command you can save the argument you can load the argument. You can start the training. You can abort the training. Now after that guys see here you will get the output directory wherever your model is going to be saved. Here you will get the config path right. So uh if you have any configuration and all you can put over there. Then device count okay how on how many devices on how many server you are running the training. Then uh here you can see the deep speed stage. Right. So many configuration so many different configuration have been given to you. Now just by seeing this configuration UI you can learn so many concept of the finetuning which one which parameter you need to be used choose okay and how basically you can uh basically how you can like do the best to best fine-tuning right the how you can get the optimized finetune model so just by uh reading this UI okay you will get so many knowledge regarding that that's why it is important and that's why we should go through with this opensource project. Okay. Now guys, uh what is the next move? So I will explain you each and every parameter from this UI. I created one PD PDF. So let me open that PDF. Okay. I will attach inside the description. You can go through with that PDF. You can understand each and every parameter from here. And then uh right after that we'll start with the training guys. Okay. With our custom data and I will show you how you have to do the data entry inside this particular project. Okay. So guys uh I kept the complete detailed guide of all the parameter inside uh this PDF. So whatever parameter have been highlighted over the UI right. So you get you will see the description of each and every parameter inside this PDF and I will attach this PDF uh in the description and I will keep in the same repository. Okay. Uh so guys uh hub name right. So we have seen this uh particular option. So we were having the different option like hugging face, model scope, open mind. You can select anything. So generally we'll go with the hugging face right. Model scope actually it's a Chinese based model hub. So yeah China is also developing like model hub for the LLM models. That's like very great thing. Then openminded. Open-minded means if you want to be load the model from any custom storage you can select this one. Then uh related to the finetuning which technique you want to be used whether it's a lora full freeze right or oft means orthogonal finetuning it is a alternative of the lower itself. Uh you can explore more about this particular parameter and you can select best and pos best possible parameter okay while you are training uh while you are fine-tuning actually. So uh quantization width so 8 bit quantization 4bit quantization then quantization method bits and byes HQ high quality quantization or ETQQ experimental fast quantization. Okay. Uh then R O scaling means context window upgrade method whether you want to be select linear dynamic yan or llama 3based method. Okay. Now guys uh here uh if you will go and check with the UI right so you will get like each and every option over here I'm not writing by myself. So uh here there I written all only those like description which is available over this UI. So I can show you if you will see with this quantization bit. So see eight and four bit just now I shown you quantization method. So BNB, HQ, EEQ right? So just now I shown you this thing chat template. So whatever model you are going to select. So according to that you can select the chat template. Okay. R O scaling right. So context window upgrade method just now I shown you this thing. So here also you can see linear dynamic yan llama 3 these particular options. Okay. In the booster see flash onslaught lier kernel. So all this description okay all this parameter basically I kept over here. So just go through with it just read about it and then select best and possible values over there over the UI just do more research from your side. Okay. Uh then guys uh stages means what kind of training actually are going to be performed. So whether it's a supervise, whether it's a RLHF, right? Reward and PO, whether it's a DPO, right? Whether it's a KTO pre-training. So you can uh select these option also. Right? Apart from this you can uh give the data directory. You can provide any custom data set. You can select the learning rate epox right? You can basically select the maximum gradient norm. Again this is uh related to the optimizer. So for that you will have to take a deep understanding of the optimizer. Okay. How the optimizer is working inside the transformer architecture. Then only basically you can have a better understanding of this particular parameter. What should be the exact value of it? Okay. what value should I keep over here. Okay, you can understand in a better way if you have a mathematical understanding of the transformer model or LM model. uh then max sample right how many max data we have to provide then compute type whe it's FP16 FP32 then cut off length how many uh token we want to be generate from the model right size gradient accumulation validation size learning rate setular okay then there is some extra configuration logging step save step and the other configuration okay uh then uh guys you can see the lower related configuration also have been given there right uh RLHF related configuration also is there. Uh then multimodel related configuration is there. Okay. Then you will find out some optimizer related configuration. Okay. So just look into uh just look into like those configuration. So just go through with all this configuration. Okay. Understand it like what is the meaning of it. See again I'm saying you don't need to like again like select all the configuration. You don't need to do entire configuration in a single go. If you won't select anything, it will keep the by default value over there. Okay? So no need to panic regarding each and every point. I just given you this like I just I will give you this PDF as a reference. Uh later on peacefully you can read it and you can understand each and every variable from there. But as of now uh no need to worry too much. Uh you just need to take a select the model. You just need to select the data. keep all the parameter like as a by default one and start the training. That's it guys. Okay. Now apart from this uh particular parameter I wanted to show you uh like I wanted to like discuss about the data also. So uh if you will go and check uh with the llama factory repository. So inside this uh repository basically you will find out one folder. So the folder name is data. Just open this folder. Now inside this particular folder you will get the different demo data uh which is being provided by the developer itself. Okay. And uh inside this folder you will get one file. So the file name is data set_info. So it is containing the entire metadata regarding all the data. So whatever data basically whatever custom data you will you wanted to use. So you will keep it over here inside this data directory and you will do the entry inside this file. If you are creating any custom file right so you will keep it over here you will make a entry inside this data set_. info info even if you are going to read a data from the hugging face in that case also you will have to make a entry inside this particular folder sorry inside this particular file. So let me show you both the thing. So what I will do uh let me open my code. So here is a complete code guys uh which I cloned. So this is the complete code. Now what I will do I will upload my custom data. I already created the custom data. Let me show you those data and all. So uh guys uh the data is available here. So uh okay let me open it. Okay. So this is the data guys. See I created my custom data. My custom data 2. My custom data 3 means I created a data in each and every format. So let me open this my custom data how it looks like. See here is this my custom data. Okay. Instruction input and output. Then my custom data 2. This is in a set GPD format. Okay. And then this my custom data 3 uh it is a like plain text. So uh in my one of the video I've shown you if you have a plain text then how you will create a model compatible data or hugging face compatible data. Right? So if you have plain text then you can create your then you can keep your data in a multiple chunks. Okay. And that then basically you can keep that chunk under this particular column under this text column. So this thing I already shown you in my 14th number video. If you will go there you will get it. Uh now guys uh here I shown you data in each and every format right. So uh like my custom data 1 2 3 I will give you all this data. So if you are going to be create your own data your own custom data you can create in a same format. Okay. So let me keep at least one data over the uh inside this data folder. Okay. Let me show you how to basically mention inside the data set_. info. info. So I'm uploading one data over here on custom data. Okay. So see inside your case maybe there would be like so many rows so many uh like there will be like so many rows right inside the data set. So yeah I think you know right how to convert into the JSON. If you don't know you can watch my previous video. I already shown you over there. If you have any type of data then how you can convert into the JSON. Okay. So after converting into the JSON uh you will upload this file. Okay. you will keep this file inside this data folder. So let me keep it. Uh I think the data file. Okay. So yeah my file is uploaded. Now what I will do? I will just drag and drop from here to this data. And yes the file is okay. File move fill. Why? Let me do it again. So this is my file. I'll keep it over here. Data uh whether it is coming or not. Let me check. Yeah, my custom uh data JSON is there guys. So this is the file my custom data JSON. So uh here guys see you will have to keep the file inside this particular folder my uh inside this data folder right my custom data. json then you will have to make a entry inside this info file. So let me open the info file data set_. info. So inside this particular file I will make a entry. Okay. So uh see what you will have to see already you will find out so many entries over here it is regarding this particular data whatever data they have kept over here the demo data okay uh now what I will do I will uh see anywhere you can make in between you can make at the first place end anywhere you can make okay so I'm just making it at the first place so here I will write a key first so the key name would be the my custom data you can write any sort of a name I like there is no issue with that uh then what you will do guys you will write a format okay format of the data. Now after writing a format guys what you will do you will give the path. So let me give you the complete uh details. So what all thing you need to keep over here. So uh here guys you can see uh what we are going to keep. So just a second. Yeah now I think it is perfect. So guys uh here we are going to keep the uh key right my custom data. Under that we have a format. Okay. So the data format is alpaca where we have a instruction input and output. Then uh the path of the data. So it is available inside this data directory and this is the like file name. Then column so we have this prompt okay that is instruction query that is input. Okay. And the response is the output. So in this particular way you will have to mention the entry inside this data set_info. json file. Okay. Now guys let's suppose if you want to read any data from the hugging phase. So how you will do that? So let me show you uh let me give you the overview like how like you can mention it inside this data set_. info. json. So uh I have this data okay the data set name is uh Unix command right. So this data actually it is available in this in instruction input and output format. So in the instruction we have an instruction then in the input we have a input right and the output we have a final response. Uh we I even I have other data I can use any one data. So alpaca clean right? So here we have output, input and instruction again this three column let's say I wanted to use this particular data for my training okay I want to be like fine-tune my model on top of this particular data or any hugging face data then how you will make a entry inside the uh data set_. infojson info. json okay because guys I'm not going to be upload the data over here means I'm not going to be keep the data over here the data is already available over the hugging phase right so in that case how I will make a entry over here so let me show you I already kept the format so I'm adding in the starting of this particular like JSON so see in this particular way you will make a entry so you will write key hugging face data set you can write any name I like There is no like uh basically rule for this key right you can write your name my name whatever name you want to be write I return hugging face data set then you will pass the hugging face URL means the id of the data okay so here you can see like once you will click on it you will get the ID uh then you will get a you will have to mention the column so prompt is a instruction query is a input and response is a output okay so in this particular way guys what you will do you will mention the information of your data so Again uh let me repeat. So if you have any custom data guys, so you will keep it in a like first you will create a file JSON file. Okay. So whether the data like would be available in the alpaka format or it will be you will keep it in a like uh C GPD format or you will keep it like this. Okay. In the text and the data right you will have a multiple rows. So yeah you if you have plain text you can keep it in a multiple chunks and you can add multiple text over here like this. Let's say the second text like this and third text like this something like this. Okay. Uh then guys you have one more format that is a DPO format right? Uh prompt uh rejected or selected right something like that. So yeah what you will do guys? So if you want to use your custom data so first you will upload inside this data folder. Now after uploading in after uploading it inside this data folder you will make a entry okay inside this data set_. info. json. Okay. And after that you can use it. So I will show you over the UI how where you can select this custom data. Now one more thing if you want to use the data from the hugging face then how you will make a entry over here because the data is not available in the local directory. So in that case you will make a entry like this. You will write the key under that hugging face URL and then column. I hope guys this thing is clear. Now let's do one thing. Let's start the training from the uh UI. Now guys uh let's start with the training. So for the training guys I will have to select the model as well as the data set. So a data set I already configure. Now along with the model and data set I will configure some essential parameter over here. I'm not going to configure all the parameter from here. I will only select a few parameter. So model. Okay. So there are so many names, so many model. I will I'm I have selected this GMA 1. 12B instruct because it won't take much time. It is a small model, right? Then automatically the model path will come over here. Right? Then hub automatically it will be selected as you will choose the model. Uh then finetuning method which method you are going to be use here. So I'm going to be select the LRA. Uh then checkpoint. So you don't need to mention the checkpoint automatically it will come when the model will be trained. Then here quantization bit. Okay. So it will be required. So whether you want to be select 4 bit or 8 bit. So I'm selecting 4 bit. Now quantization method this will also be required. So which like method you want to be select BNB, HQ, EEQ. So I'm selecting B BNB only. The chat template automatically it will be selected as you will select the model. Then R O keep it uh empty. uh booster keep it like auto only then here is a stage so what kind of training you want to perform so I want to perform the supervised fine-tuning now data set where is your data available so if I'm selecting the custom data the data will be available the data directory but if you if I want to be select the data from the hugging face right so what I will do I will click on this drop-down here I will get all my configuration okay so uh here is see you can see the custom data also so the custom data I'm not going to select the custom data Right now I'm selecting a data from the hugging face. So I will select the first one. Right. So if I'm going to be select the custom data in that case I will choose the directory data directory. Okay. Under this data directory my custom data is available which I already configured which I already mentioned inside the data set info. So I will select this particular option. But as of now I'm going to be select the data from the hugging phase. So I'm selecting this particular configuration hf data set. Okay. Now uh this is done guys. Now apart from this learning rate so you can uh choose this learning rate you can keep like any sort of a value I'm keeping uh the same okay I'm not going to touch this one epoch I'm doing it for one single epoch okay so let me select one epoch over here maximum gradient norm I'm not going to select maximum sample I'm not going to be select okay uh compute uh type so guys here uh you need to change this compute type because uh BF 16 is for the higherend GPU so you can select like this app 16 okay it is for the lowerend GPU uh then cut off length I'm not going to be touch it best size and I'm not going to be touch rest of the parameter so I'm performing this Lora like fine-tuning so I can look into this lura configuration if I want to change some lura parameter like lura rank lura alpha lora dropout lura uh plus lr ratio right so definitely I can tweak this but as of now I'm not going to be touch this part as well once I will teach you lur Laura the mathematical concept of the Lora that definitely we can look into this particular parameter and we can tune means we can change it. Okay. Uh I hope guys till here everything is fine. So after configuring this entire thing this is the mandary one whatever I done so far. Uh then you will preview the command. Okay. So uh you can uh preview the command. See once you will click on it. So here the entire command will come. Right now uh you can see output directory. Here your model will be saved at this particular directory. Okay, this is the config path. If you want to be keep any sort of a config, right, you can keep b see this entire configuration, this entire like command configuration will be saved over here inside this yaml. Okay. Uh then device count, I have only one device. So I'm keeping it one deep seat. No, I'm not going to be select that. This device memory basically uh it will show you the memory uses. So automatically this will be uh here and there. Okay, this slider. Uh so yeah, everything is like fine. Now what I can do see I preview the command. Now I can save the argument. If you want to save the argument you can load the argument the same argument. Okay. Uh now what I'm doing guys after selecting all this thing. Okay. After preing the command after checking okay my output directory is perfect and my configuration path is fine. See even though we are not going to be like uh do anything right now with respect to this configuration path but yeah you can check all this thing all this value. Then click on this start training. Now once you will training your training will be started. Now you can check the same thing uh over here as well. See uh that it will be reflected over here also over the collab. So this server should be up and running guys. If you're going to be stop it this will not work. This uh UI part will not work. Okay. So see my training has started. Now the same thing basically you can see over here. So it will be reflecting uh over the UI as well your training. So it will take some time maybe four to five minute. After that your training will be completed. Then what we'll do guys? So here we'll select this evaluate and predict. If I want to evaluate my model I can do from here or else I can check. Okay. Even I can export my model. So yeah see the training has started. Now once it will be completed on top of it you will get finished. Okay. And uh then basically you can chat with your model. So let it complete then I will show you the chatting. So guys uh here you can see my training has completed. Uh it took around uh 4 to 5 minute. So you can see finished over here. Now uh you can uh see the same thing over the console as well. Okay. And uh where you will get a model. So once you will check with your repository. See llama factory. code under this there is a folder. The folder name is save. Just click on the save folder. Here you will find your model GMA 1. 12B instruct. Okay. Now just uh click on it and uh under this you will get Lora. Under this Lora you will get this folder train 2025 12 11 17 40 51. So see guys uh this folder name is same over here. This one here this is your output directory. Okay. Now from here you can load the model. You can just copy this path. Copy the path of this model. Okay. And keep it over here. Means uh you can do the inferencing. Okay. So I kept the inferencing code. You can do the inferencing after training this model. So what you have to do for that uh you have to like uh write a path. Okay. This path. So under this particular folder your model is available. See this one uh this tensor save tensor file is available. Okay. So you can uh keep it inside this variable. Then you can load the tokenizer. model. Okay. Then you can load the pft model and finally you can evaluate it. Sorry, finally basically you can make a prediction, you can do the inferencing. So this is from the code. But if you want to do it from the UI, yes, you can do from here as well. So what you have to do, you just have to click on this chat. Okay. Now after clicking on this chat, so here is a option load model. So just click on this load model. So once you will it is loading your train model. Now after uh basically loading the model you can do the chatting. So it will take maybe like 1 minute. Okay. So within 1 minute it will load your model and then basically you can start chatting. So let's wait for 1 minute. Okay guys. So my model is loaded. Uh now over here you can see so uh it is giving me a option uh to write a prompt. So I can see here is a role. Role is a user. I can write a system prompt also. So I can give my tools as well. So if any input I have to pass I will pass over here. So let's ask the same question. So my question is can you tell me what is a what is ls-l? Okay would display. So this particular question I'm providing over here. Uh let's see what it is going to be generate. So if I will submit it. Okay. So here the output will be present. See ls- displayed detailed listing of the file. See it is generating the entire output. You can uh see the complete output over here guys. Means it is working uh fine. Okay. So uh this is uh the model which I finetune on my own data using the llama factory and I shown you the prediction. So this is from the UI guys, right? This is from where this is from the UI. So I think you got to know now how to like fine-tune from the UI and how to make a prediction. There is couple of more option you can uh like uh evaluate and predict. Evaluate and predict means what? So you can give the bulk data and you can evaluate your model how it is behaving. You can export it. So wherever you want to be export anywhere in any directory. Okay. You can mention the directory and you can directly export the model. So just explore it from your end and try to find you the model and then uh like do the chatting and all. So this is from the UI guys. But uh in the points I mentioned one more thing. So I will show you via CLI also. So let's do the same fine tuning. Let me show you the command via CLI. Okay. So how to do the same kind of tuning via CLI? So guys uh if I want to do the same training from the CLI uh then uh directly I can uh execute this command and I can perform the finetuning. So
Training via CLI: Configuration via YAML Files
what is the command? The command is python - m llama factory dot cli train. Okay. and then I will pass my all the parameter. But guys, this is not a good practice. Okay. Uh we should not directly run like this. So uh if I wanted to train via CLI, then what I will do? I will write one configuration file, YAML file. Okay. And through that YAML file only, I will train my model. The same thing I have shown you over here. Uh let me open the notes and let me show you all the commands. So here I already mentioned the commands. Okay. So llama factory cla config. yamel config. l. You can write any sort of a name. I just written config. yamel. Okay. So what I will do guys? So I will write one config file. I means I already written that. Let me show you that particular file uh I kept in my folder and this entire thing guys. Entire resources I will provide you. Don't worry. So this is my config file guys. I hope you are able to see this one right. So inside this config file what we have. So just check over here. So first we have the model name. Let me zoom in a little bit. So first we have a model name. Okay or model path from wherever actually you are going to be read the model. Then we have a stage right. uh then do train finetuning type lura means whatever parameter you were selecting from the UI now we are passing inside the yaml right uh see we can write a yl or else we can pass like this okay if you're not going to be write a yaml you can directly pass like this all the parameter but guys this is not a good practice because if the terminal is going to be closed or delete right so in that case this all the parameter will be lost. So keep it in one physical file that's going to be YAML and then execute that YAML file. Okay. So here you can see so whatever parameter we were selecting from the UI now we are going to be define inside the YAML. Uh here you can see the data set. So uh let me show you the data first. See this is a data set. Uh I'm going to be use data from the hugging phase. But if you are using from the local okay your custom data then you just need to mention the path over here. So uh let's say guys if you're going to use this custom data so the data basically was available inside this data folder now. So my custom data so just copy the path uh after just mention it over here. Okay that's it. So if you will mention like this uh okay instead of this alpaca demo uh you can use the custom data. I hope this thing is clear but as of now I'm using from the hugging face so let it be uh then guys template cut off length and max sample override cach I think you are already familiar with all this thing now output directory where you want to save your model so you can give any sort of a directory over here where wherever you want to save the model okay and the rest of the parameter basically it is a like training specific parameter and for how many epochs like I'm running it so let's say I'm running it for the one epoch only uh so guys this file I will keep in the uh same uh folder. So I will keep inside this llama factory folder. So let me upload this file and uh here the file name is train gimma qura. Okay. So you can write any sort of a name. I written just uh train gimma qura. So I will pass uh sorry I will move this particular file inside this folder llama factory. Now what I will do guys? See the file is available over here. Train GMA Qura YAML. So first of all let me comment it. So yes this is fine. Now what I will do guys I will uh move I will like go inside this directory. Okay llama factory. Then I will check with my current working directory with the pw command. That is fine. Now I will check with this Nvidia Smi. Okay the CUDA is there means I'm using the GPU only. Right. So uh here you can see guys I mentioned one more thing one more parameter uh so this you have to set as a environment variable that is CUDA launch blocking okay so you can set it as a true so what it will do guys uh it will not like block it sorry it will basically not block anything while the CUDA is getting launched right uh like getting used in a back end uh now here what you have to do guys you just have to write python m lama of factory CLI this will be same even the train now instead of writing all the parameter inside this command you're just passing this YAML file okay so this is a more safer approach uh now if you will run it guys uh see the training will be started that's it guys uh nothing else okay and after that uh your model will be saved uh you can check with your model will be available over here okay so wherever basically we are saving and then uh what you can do you can simply test it for the testing also you can create one uh sorry this is just uh like uh file one testing file basically I created so see the training is going on so here it takes time it will take maybe uh 4 to 5 minute or maybe more than that uh then guys uh you can check with your output folder whether the model is there or not and uh after that what you can do you can make a inferencing so let me comment all this unnecessary code I was just testing so here here this is fine Uh yeah this is the inferencing code guys. Okay so you can basically mention the model path adapter path over here. You can load the model and then finally you can make a inferencing that's it. Nothing else. Okay. So this unnecessary code which I was uh just like testing uh I will remove it. I will comment it out. So you will focus on the main code only. Uh now let me uh show you guys the training is going on or not. Yes, the training is going on. So, where is the training? Here is a training guys. This one. So, yeah, it will ask you one more thing if you will do it from the CLI. So, create W uh WNB account. Use an existing account or don't visualize my result. So, as of now, I haven't like configured bait and bias account. So, I will not select any one or two. I will select three. Okay. Then hit enter. And uh yes, uh it is running now. So, yeah, it has started a training. It will take time. Uh last time when I did it means yesterday I was practicing. So it took around 5 to 10 minute. So it might take more than that. I don't know because the RAM is being consumed continuously. So it might crash also. Okay. So guys uh I'm leaving this up to you. Uh now what you have to do I'm giving you an assignment also. So prepare uh any custom data set keep it inside the data folder and then finetune on top of that data. Okay. Now after this training guys what you will do? So after this training uh just go and check with this particular code right mention your model path over here uh it will be saved over here right. So yeah this is the path just take this path uh copy the path and mention it over here and then test it guys whether your model is generating the answer or not. That's it guys that is called the inferencing after the finetuning. So yeah this is it for this particular video. I hope you like this entire llama factory finetuning. I given you as much as knowledge I can and now it's your time to like revise evaluate everything. Okay. And guys one more thing if you're liking my content effort then please uh subscribe the channel and please share uh this content with all of your friends. Okay. Whoever is required this type of content. Okay. So thank you. Bye. Take care. I'll see you in the next video. Until take care guys.
Unsloth Framework: Achieving 2x Faster Training
Hey hello everyone. Welcome back to my YouTube channel. My name is Sunonny and I'm back with another exciting and important video. So guys in this video we're going to discuss about the onslaught which is very important and the useful framework for the LLM fine-tuning. So in the previous video I discussed about the llama factory and there I given you the complete guide and the walk through of the llama factory. If you haven't seen this video please go and check and believe me guys you will learn so many thing regarding the llama factory as well as the llm fine tuning edition. So in uh this video we'll discuss what is a unslo what model is being supported by the unsllo then we'll see training types supported by the ensl. Okay. And uh we'll see why unsloth is so fast and the memory efficient. Uh then we'll see top key features of the unsloth and we'll make a uh we'll try to check right what is the differences between the unsllo llama factory and the hugging phase and finally we'll come to the practical of the unsllo. Okay. So guys when I looked into this unsloth so I really got amazed. So there are so many things, so many features right and this library is very useful and basically it is supporting to so many model and if you are fine-tuning your model right so you can finetune 2x faster with the less RAM with the less VRM guys and really guys see this library is very amazing when I will show you like you will also like surprise just by seeing the performance and all everything. So uh guys this library is not a small one. There are so many thing to learn and to cover up entire thing in a single video it's a bit challenging. So uh I so in this video we'll discuss the theoretical point and I will show you one practical and the rest of the concept relate to the other model multimodel and then basically relate to the uh RL right reinforcement learning whether it's a grpo or the different other concept of the finetuning right so we're going to learn in the upcoming video now apart from this one uh I'll discuss about different other framework like axelottal is one of them and definitely I'll show you that practical is also ready. Maybe that would be the next video. Okay. So now without wasting a time guys let's start with the unsloth and uh then I will come to the practical. So guys uh now let's understand what is a unslo. So unsloth is an open-source project for the LLM fine-tuning. It help you to run the end to end pipeline. So what does it mean? Uh let's understand. So unsllo allow you to load the model to apply the quantization means uh you can uh perform the different kind of quantization then uh you can train the model you can uh perform the inferencing you can evaluate the performance uh then you can uh save the train model and you can export so all of these guys 2x faster with up to 70% less uh GPU memory that is called VRAM okay so this is the main advantage or and the important feature of the unsloth. So let me uh give you the quick walk through of the unsloth GitHub. So guys once you will write Unslo GitHub on the Google right you will get it. So uh here is the entire source code of the unslo you can take a walk through of it. So the entire source code is open source once you will go and check inside this unsllo right you will find out the different folder like utils registry model kernels okay data preparation and all. So you can look into that you can understand the entire code and all so that your uh understanding will be more concrete. Now guys uh just uh check out their readme file. So inside the readme file they have mentioned so many thing regarding their model. Okay. Then they have mentioned on what are platform actually you can install this unslo. Now unsllo news means if anything they are updating inside the uh inside the source code or any new feature so they are keeping it over here. So you can look into this unsllo latest news then guys uh link and the resources so you can join their community you can go through with the documentation the Twitter page okay so different hyperlink they have provided over here now what is a key feature you can read from here as well okay I kept all these thing in my notes so I will provide you definitely I'll provide you now installation of the anslaw so they have given you the complete detail how you can install it and then they have given you the uh like uh complete preview of this documentation If you want to explore the documentation in detail, you can click on it otherwise like they have given the complete like the short uh code only the quick start code. So you can take this code and you can run inside your uh system right on your server wherever you want to be run. Then uh see the uh basically some information regarding the reinforcement learning that what techniques being supported some hyperlink that definitely you can check it out. Okay. And then performance benchmarking. So these many thing they have provided over the uh GitHub itself inside the readme. Uh I would say this GitHub and this documentation is a very useful if you are willing to start with this onslaught. It give you like so many thing and every kind of detail. So guys just go through with their GitHub. Uh if you want to be like go and check their source code go and check uh otherwise check with the documentation. Okay, over the documentation uh they have given you each and every information in a very structured way. So guys, I hope you understood what is a unsloth. So unsloth is nothing just a project which is coded by someone else and we are using it. Now uh they have done some sort of a optimization in their code means everything uh they are building on top of the hugging face right on the hugging face native library like transformer pep and all on top of it they have done some sort of a customization right and that customization is very useful for achieving the speed as well as the less GPU memory okay I hope you got it now what kind of inferencing is supported by the unsllo means let's say if you're training a model uh and after the training you wanted to save somewhere means you are exporting that model. Now where you can use that and what all places you can use that. So these are the name guys you can use it in the llama CPP uh you know llama CPP right? So we can run the GG GGUF for GGUF model over there. I already explained in my previous video if you don't know go and check over there. Then we can run the same model over the Olama. uh through the VLM. We can run the same model through the SG lang hugging face hub means we can upload the model of the hugging face and we can export it through the hugging face native libraries and we can utilize that model uh or we can use the model through the open web UI. So these are the different platform okay this platform are supporting theirs model. So if you are training a model through the unsllo and if you are exporting that then you can utilize it anywhere okay at any platform. I hope you understood it. Now I mentioned couple of more points. So what model is being supported by the unsloth. So unsrot guys is not only supporting the text to text model. It is uh image, image to text, audio to text, text to audio means all the multimodel whether is supporting the text, images or video audio. Okay. So whatever model is available over the hugging face, all the model is being supported by the onslaught mean I will show you their repository. uh actually Ensloth has created one repository over the hugging face itself. So you can directly fetch all their model from there and see here I mention the example also. So this is the normal uh repository okay of the tiny llama and uh in the same model actually the tiny llama model you can fetch from the unslod. So this entire thing I will show you uh in some time okay everything I'm going to be show you in terms of practical as well as I will give the I will give you the quick walk through from the hugging face also. Now guys training what kind what all kind of training is being supported by the onslaught. So training wise you can do the full fine tuning full finetuning means you can train all the parameter of the model or you can perform the lora means you can basically train the subset of the parameter and then you can use that as a adapter. Okay. Then qura means a quantise lora you can load the quantise model on top of that you can perform the lora. then six bit LORA FPA training okay or uh basically you can see over here the different type of reinforcement learning so guys if we're talking about the reinforcement learning so different kind of industry-leading reinforcement technique is being supported by this and that's the main power of the law so here I mentioned couple of name so uh you can perform the reward modeling using the KTO and PO now apart from that you can uh perform the latest like technique like GRPO which is uh which is being performed in the uh deepseek itself okay uh and GSPO DPO RPO right so every kind of reward every kind of basically preference training preference alignment training you can do using this unsloth right and like guys believe me it will give you the very good uh speed as well as it will utilize very less memory while you are training okay your model I will show you all the coding and all everything guys I will discuss in some time. So I hope you got the quick over o over overview of the ansllo. Now let's look into their features uh and let's see why this unsloth is faster because that two thing is very important guys. Now guys uh before exploring the key features of the unsllo let's take a overview of the unsllo hugging face repository. Let's see how many models are available over here. So guys, once you will write unsloth over the hugging face, you will get this particular repository. Now under this repository, total 1,150 models are available. Every sort of a model you will get over here, whether it's a textbased or video based or for the images, for the audios and all. Okay. Now guys uh here you can see so we have one model that is tiny llama and there is like one more model tiny llama right. So both are different model or both is a like same one. So guys over here you will see so this tiny llama actually it is belonging to this unsloth repository and this tiny llama model it is belonging to this official repository of the tiny llama. Okay. So guys let's see the differences. uh actually this both model are different uh unsllo have done some sort of a optimization so let's look into the optimization okay what all kind of optim optimization have been performed so here I mentioned the optimization guys uh let me show you this is all the like optimization which is which have been performed by the onslaught so we're talking about the normal hugging face based model so the model name is what a tiny llama okay this one chat v 1. 0 O okay now here we can load this particular model with the HF transformer we can apply some bits and pes we can perform the lora okay and then it is being trained using the pytor kernel right it's standard pytor kernel but if we're talking about the one so basically the same tiny llama model on top of it they have done some sort of a quantization means if you are going to be load the model from the unslod repository so that is a pre-quantized model uh then they are using the trion kernel So it is like more than this standard PyTorch kernel. It is a specific kernel. The same kernel basically have been used by the chat GPD also. Okay. For the GPD model for the training. So uh Trion kernel and then manual autograd and this autopacking. So these are some feature which have been implemented on top of the base model to make the model little faster and the lighter. Okay. So that we can load it inside the minimum VM. Now what all this feature? So definitely I will give you the quick walk through under the key feature of the unsloth. And if you want to understand the mathematics behind it for that basically uh I will record a separate video because before understanding the mathematic of this autograd and the other concept and all our fundamental should be clear right how the LLM have been trained from a scratch. So once I will record that particular playlist under that I will keep this uh features points also but yeah don't worry I will give you the quick walk through of these particular feature we have so many actually five to six more so yeah I'll give you the quick walk through now I hope you understood uh you understood about this uh unsloth repository just uh go through and try to explore each and every model how to use it I will show you in some time now one more thing guys uh let me show you that as well because that is very much important. So here I mention one point. Try to read this point. So unsloth is built on top of the hugging face transformer PAP and the TRL. Okay. So hugging face uh sorry unsloth is built on top of the hugging phase transformer PAP and TRL but it enhanced them with a low-level GPU optimization to deliver 2x 3x faster and 50 to 80% better memory efficiency. So what is a conclusion? what I wanted to say you guys so show you so we're talking about the unsaw so this is also built on top of the hugging face okay hugging face transformer so under the hugging face basically you will find out one very important library that is a transformer and this transformer actually it's a open-source project it is a open-source code which completely written in the python and some sort of a part of the transformer right is specifically the tokenizer have been coded in the rust right so guys uh this uh transformer this is a very important project of the hugging phase right and this transformer completely written in the python and uh there they have used the pytor and the tensorflow and even j okay now guys if we're talking about the pytor and tensorflow so what is the like the back end the low-level language for these framework we all know right so this framework have been written in the C++ right so pytor again uh the back end of the Python completely written in the C++ even for the TensorFlow even basically some kernels also have been written in the C++. Okay. So this transformer and this PVP TRL actually it's a native library of the hugging phase. So let me show you the uh raw code of this uh transformer and the TRL and the PEP also. So guys over here you can see so this is the code of the transformer. This are very important guys and this is a backbone of every framework. So whatever framework you are seeing whether it's the axelottle whether it's a llama factory or unsloth right so it is a backbone of all the framework actually they are using the same source code and on top of it they are making some changes some enhancement okay and then it is making some like faster or little memory efficient and all so this is the source code of the transformer guys and uh this is very amazing and see here the number of star and the number of fork right just go through with it you will learn so many thing regarding transformer your fundamental will be very strong. Okay. Now apart from that you can see so one more library that is TRL. Okay. One more repository. So yeah this source code is also public. You can uh definitely navigate to this entire source code and one more very important library that is pafted right. So I think we all know about this TRL paft and the transformer and even I shown you the practical of with all this library in my previous to previous video right? If you don't know you can go and check over there. So what I wanted to say here I wanted to say guys so the base of every library is this uh transformer only transformer p and the trnln only this is very much important okay most of the uh low-level code have been written inside this transformer itself and the code have been written in inside the pytor and the tensorflow now guys uh you know right so this is under the hugging face okay this all the library this all the packages comes under the hugging face right hugging face actually uh they created it and Then they make it like they make it open source okay for the public so that other developers also can contribute over there. Then uh on top of it the unsloth have been built okay there's a optimize engine. So if you are looking to the unsloth right into the source code so just think just think one thing that this is a optimize engine on top of the uh transformer on top of the hugging facebased library like transformer TRL and the PET okay so yeah so there this again basically it's using the triton kernel this is a very specific and the very powerful kernel okay regardless this the pytor the standard pytor kernel okay if I'm saying kernel guys it's nothing it is just a set of programs okay which have been written in the C++ which is uh which is for the GPUs that's it guys nothing kernel is nothing okay and uh so that my application is running over the GPU itself so I hope you understood what is a unsloth and where it is standing uh and I think your all the doubts rel is clear now let's uh look into the documentation and the key features after that I will show you the practical So guys uh the goal of the unsloth or the main claim of the unsloth is uh 2 to 3x faster training 50 to 80% less je GPU memory uses. So it gives ability to train large language model even on the free GPUs like collab and the keel even I will show you the practical with the free GPU only and easily we can train our model with the unslo. Now uh what does it mean and uh how they are achieving this fast of this fast training and the efficient memory. Now let's uh like take a look. So uh here what they are saying they're saying if normal task right if the task normally takes 10 hour and 40 GB of VM using standard hugging face training then it will only take 5 hour and 12 to 16 GB of VRAM with the unsloth. Right? So this is the claim of the actually of the unsolved. So uh let's understand with this particular example. Let's say we have a model. The model name is llama 3. 1. Okay. The parameter is around 8 billion. Now if a hugging face takes 20 GB of VRAM so unsloth will only take 7 to 80 GB 7 to 8 GB VRAM. Okay. If hugging face takes 2 hour of training then unsloth will finish within an hour itself. So this is the claim of the unsloth guys. Now just see the differences. But guys you must be thinking sun how all these thing are how all these things are possible what kind of changes they have done because of that this uh thing could be possible. So guys here I listed couple of reason. So because of this particular reason the things is possible. Okay. So let's uh understand
each and every reason why one by one. I'm not going to teach you the mathematics the complete detail in depth of mathematics but yeah I will give you the overview and some idea. Okay, how these things are working. So we talking about this uh we talking about the first one first reason. So custom cuda and triton kernel. So first of all we'll have to understand about this term CUDA right? What is a CUDA? So we're talking about the CUDA guys. So CUDA is nothing. It's a framework. Okay. It's a framework. It's written by the Nvidia. Okay. Nvidia specifically. for what? For the GPUs, right? So, CUDA is a framework which written specifically for the GPU training. Okay? For the GPUs actually and it written by the Nvidia and this framework this CUDA framework actually it was written using this C++ mostly the C++ have been used over there. So, you can say CUDA is nothing. Okay, just a library of framework which have been written in the C++. Okay, which is written by the Nvidia specifically for the GPU. Now what is this trione guys? Trion again it is a kernel like the CUDA. Okay, this trionee it is written by the open AI. So it is a open AI it's a open kernel. Got it guys? So So they have written some they made some changes inside the CUDA kernel the existing kernel itself they have used a trionee kernel and because of that uh because of that only they are able to do the faster operation on top of the GPUs there is a one reason the other reason uh which I listed over here fuse attention and MLP operation so what does it mean guys so if you know the transformer architecture is having two main thing now the first uh thing is called the attention. Okay, attention. So, first block basically it's a attention block. Let me write over here attention. The second block it's a MLP multi-layer perceptron. Okay. Now guys, this two operation are the separate operation. So they have fused this operation. Okay. Means they have merged this operation. They have used some sort of a technique in back end. So this both operation is happening all together. So that's a simple meaning. Okay, optimize forward and the backward propagation. So yeah, this is also possible means the epoch basically right we are running. So they have optimized that also in terms of loss function and the optimizer. Then a smart uh gradient checkpointing. So what does it mean guys? So whenever we are going to create a checkpoint okay so uh in that also they have make some sort of a changes means uh they are not going to be do the checkpointing in uh every at basically every point uh they are going to be stored in a memory and then uh they are going to be highlight that okay something some kind of changes that kind of changes basically they have made so the next is guys flesh attention compatibility so what is a flesh attention so if you will search over the Google you will get this GitHub repository. So flesh attention basically it's a optimization on top of the attention right. So just look into this particular repository. It's a like open source repository. Just read out their uh readme at least. So let's read at least the first point. So they are saying this repository provide the official implementation of flesh attention and flesh attention too. So flesh attention is a fast and memory efficient exact attention with the IO awareness. So how we can uh efficiently load the attention operation in the memory in the RAM actually. So it is all about that. So just read out this particular uh readme you will get each and everything regarding the flesh attention or in some other uh dedicated session I will discuss about this flesh attention. It's a very important thing guys or it makes the you know uh like uh I shown you one point okay I I'll show you I kept that particular point. So long context training. So this is possible this long context training basically is like it is possible because of this flesh attention only. So this is also one of the point uh which is being implemented by this unslot developer then manual back propagation engine not the pytor autograde means for the back propagation they are not using a pych autograde graph. So whenever the back propagation happening pytor autograde is creating one graph okay one tag uh one tag actually direct a cyclic graph. So it is not using that particular one it instead of that they have they are using some other logic okay inside the back propagation also uh automatic sequence pecking. So uh you know guys whenever we are passing any text okay let's say text. So the text basically uh let's say whatever text we have. So let's say we have sentence one right and we have sentence two. So first we are passing vector regarding the sentence one then two right. So this particular sentence this particular sequence this vector is getting merged. Okay So that is called the automatic sequence packing means sentence one and sentence two we can combine all together and we can pass right something like that. So this kind of optimization they have done again I can repeat that. So custom kernels custom CUDA and the Triton kernel. Okay. Then fuse attention the MLP operation. They have combined MLP and the attention operation. Attention wise they have used the like flesh attention. Okay. Now some gradient checkpointing and the optimize and forward sorry optimization the forward and the backward propagation means on a optimizer level and even on the loss function means they have haven't like touched to the mathematics part right they have just tweaked the programs right uh program uh they just made the changes on the programming level that's it guys. then uh programming level and how basically this uh entire system is interacting with the with our server basically with our IO operations right that's the main one main part now uh automatic sequence packing I think I already told you right a manual back propagation engine so they are not going to be use the pytor autograde right for the back propagation operation and all they are using the manual and the customized back propagation so because of that only guys they are not going to be lose anything okay the accur accuracy loss is like negligible or like very uh minimum and they're able to achieve 2 to 3x faster uh training and uh with the minimum RAM right with a 50 to 80% less VRAM right now over here I written some sort of a more point so if we're talking about the CUDA Nvidia low-level CC C++ library so what is a someone is going to be ask you what is a CUDA so it's a Nvidia's low-level CC++ library is specifically built up for the GPU right and because of that only the parallel operation is possible and it is like fast right so uh it is like very fast now what is a trionee guys so again it is a like kernel okay it's a cuda like kernel is specifically have been designed for the GPU itself by the open so yeah because of this thing guys the unsloth is becoming like faster and the memory efficient now let's look into some more key feature and then basically come to the practical guys now guys uh let's revise the top key features of the unsloth. So the first is long context training. This is very important and the amazing feature of the unsloth. So the meaning is unsllo can handle up to 300k token training. So guys 300k just imagine two to three lakh of words it is equal to one single book. So it can handle up to 300k token training. It's like really amazing. So the same thing in the normal HF training will give you the out of memory error. So uh if you're taking this much of data and you are simply using the hugging phase okay in that case you cannot do it guys will give you the error the maximum limit is 28k token okay 28,000 token now guys uh here I kept one example maybe with this particular example your understanding will be bit more clear so here I written uh the model name is llama 3. 18b okay so approximate Maximum context length using the onslaught means in how much memory how much context we can bear right how much tokens we can bear so if we have 8 GB of memory in that case we can like uh take up to 3,000 token if we have 12 GB memory in that case we can take up to 21,000 token if we have 16 GB of memory we can take up 40,000 token 24 GB memory 78,000 token guys remember 24 GB memory means the same amount of memory we get in the collab. Okay, I think no 12 to 16 GB of memory. I I'm not sure. I will have to check. But guys, with the free GPU itself, we can bear at least 40k,000 token, right? And the same thing uh same thing basically in the hugging phase will definitely give you the error. So how this thing is possible? Let's understand that part. Now if you have 80 GB of memory, in that case you can handle up to three lakh 40,000 token. Okay. Now these number are possible due to unsllo memory efficient kernel smart checkpointing and the rope is scaling. Now let's compare with the hugging phase. So guys uh with the same standard hugging face training. Okay 12 GB of GPU will give you out of memory error means you will not be able to load the model. That's the first thing. The second thing uh on 80 GB of GPU only 28k tokens. Getting my point guys? So here what I wanted to say if you have unsllo and you have 80 GB of RAM then you can train up to 3 lakh 40,000 token but if you have hugging phase the normal hugging phase not unsloth model okay you're not optimizing using the unsloth and on nothing simple hugging phase in that case only you can bear 28,000 tokens that's it guys so that's a power of the unsloth and the same feature have been highlighted over the documentation and even uh over the readme page of the GitHub. Okay, Unsllo GitHub. Now uh let's look into the other feature of the unsloth. I think you all already like I already discussed about it but yeah let's take a revision of it. So massive VM reduction. Yeah, this is possible like up to 50 to 80% reduction. I think you know why so I already highlighted points because of that uh it is going to be reduced memory. Then uh reinforcement learning. So, GRPO right and GSPO this is the latest technique of the optimization technique policy optimization technique okay uh for the reinforcement learning and yes uh this is possible inside the uh unsloth then custom CUDA and the Triton kernel this is one of the feature right uh end to end pipeline export I already told you uh we can do everything using the unsloth and definitely I'll show you that exact math no approximation means they haven't do any sort of the changes in the mathematics they just did the they just have done the like code level changes and the framework level optimization the mathematics the implement the implementation of the mathematics is like same to same then work on the free GPU and collab so if uh like uh you are not going to be used too much RAM right if uh you can process it on a like even on the commercial GPU right uh the consumer GPU not on a commercial GPU this is this collab and the kegle GPU actually comes under the consumer GPU Then GPU support it is supporting to the different GPUs right so it is supporting uh to the Intel's GPU AMD GPU and Nvidia GPU it can run it can be run on oper any operating system whether it's a Linux Mac or it's a Windows right so these are the features some feature of the like rein of the like unsloth right and definitely we are going to be discuss it in a upcoming session all the feature we'll see in the detail okay guys so let's Start with the practical. So this entire practical I will perform in the Google Collab. Okay. Now uh here first what I will do guys I will go in the runtime. I will change my runtime. Uh then I will select the GPU. Okay. This is a free GPU. If you have Google Collab Pro access then this paid GPU will be available for you. Now after uh saving it uh here you will get the connect option. Just connect it. uh after connecting it uh you will get this uh green icon means the resources have been allocated to you. Now install this required packages like torch vision torch audio x former right these packages are basically from the pi for the pytorch. So this is the main package of the pytor. Then this torch vision for the vision. Then torch audio for the audio specifically exformer for the attention. Okay. Flash attention. Then unsloth. Okay. Then uh transformer then TRL. So you need to install all this module. It will take some time maybe 5 to 10 minute based on your internet connection. So here I written the complete uh detail okay of each and every packages. I will write going forward as well. So that it won't give you the difficulty while you are running it from your end. Then uh here guys I have defined some configuration. So I'm going to be import this random then numpy then torch right then I define some seed value. So random dot seed np random seed torch manual seed then torch cuda manual seed. Now why it is there guys? So just uh remove the randomness. So at every run actually some random uh thing will be there means I can give you one example. Let's say we are going to be initialize a model, right? weight of the model. Let's say we are executing five times. So every time new weights would be there, right? So just to reduce that randomness, we define the seed value. So for this particular execution, right? the same weights would be there. This is not for only for the W. This is for the GPU. Okay. If the dropouts value are there in between, right? for that for the attention kernel means for the attention value the K Q KV weights right for the CUDA operation so just to remove this randomness for every execution we are defining this seed value then I'm defining some other uh configuration also so this is for the faster and stable matrix multiplication on top of the Nvidia GPU so torch backend CUDA metal means matrix multiplication allow FT TF32 right so I'm keeping it true then torch set float put maximal precision high so I'm keeping precision high then some other values like max length okay len max sequence length data type right load in 4 bit which is true so this particular variable will be used going forward I hope till here everything is fine now coming to the next part now guys what I will do I will check the GPU availability whether the GPU is available or not so for that guys what I will do I will write this line of code now guys uh see I already written a code in my uh notepad so I'm just going to be keep it because uh to write a code from scratch it takes a time. So assert torch coda is available. So if the GPU is available uh it will say yes it is available. If not then it will write it will print this particular message. Okay. So yes I'm going to be executed and see it is not going to be print this message means the GPU is available or else directly you can check uh it will uh basically give it true if you are going to be execute this uh method directly. uh let me show you. So let me print uh this torch cuda is available. So it is sync two right now. What I will do guys I will import the uh necessary library. So the next is going to be unsloth. From unsloth I'm going to import this fast language model. Uh then I'm going to be load this load data set. Okay. I'm going to be import this load data set from data set. Then from TRL I'm importing this SFT trainer and SFT config. Now let me execute it guys. So after execution I will be able to import this unsloth right and the other required packages. Now uh what I will do guys so I will load the data set and before load data set let me do one thing let me load the model itself. So I'm going to load the model. Now over here guys what I'm doing I'm going to be load the base model. So unsloth tiny llama BNB 4bit. This is the model name. So uh this fast language model is having one method from pre-train. Now using this particular model I'm going to be load this model. Then maximum sequence length I'm going to keep this 4096 means
Practical Walkthrough: Fine-Tuning with Unsloth
whatever output will be generated the output will be under that length. Then data types. So I mentioned the data type also. Then load in 4 bit. Yes the quantization will be applied. So here I mentioned this particular variable value load in 4 bit true. Right now guys over here you can see it is importing. It might take some time first time. So yeah it is done. Now I'm going to load the model in the tokenizer. Both thing I can load using the same method fast language model from pre-train and here I'm passing the required parameter. Okay. So once I will execute it guys I will be able to get a model. So this model loading might take some time and it will ask you the hugging face token also. So please keep in your secrets. See I kept it at least with the read uh read permission. So you have to give the read permission to your hugging face token. Now what you can do guys you can check you can print this model and you can check uh the model is there or not. You can print the tokenizer you can check the tokenizer is there or not you just need to print it after loading a model. Uh first time it will take some time. See the model is getting loaded and then basically you can uh check okay uh you can check the different thing different uh basically values of the model. So let me show you some of the thing. So first what I will do guys I will check the model printable par trainable parameter that how many parameter this model is having. Now see guys model is loaded even though this is the like little huge model but it got loaded I think within a minute itself because of the optimization of the onslaught. Now here what I'm doing guys I'm running it I'm so see these are my tokenizer. Now if I will check with the model. So see this is my model guys. Now what I will do guys? So over here I will check with a trainable parameter how many trainable parameter this model is having. So if I'm going to be executed guys see here it is saying okay llama for causal element object no print trainable parameter. Okay fine guys. So first what I will have to do see here actually uh this is the simple model. Okay the normal model. So what I will do I will convert this particular model into the pft model. So this is the code guys to convert this particular model into the pft model. Now over here what I'm doing guys I'm going to be use this fast language model the same object and then I'm calling this get pep model. Now here I'm passing my model I'm passing my lower rank. Okay then I'm passing my target module Q ko then get projection up projection and the down projection. Then this is some other parameter okay for loading the pept model. So if I'm going to be executed guys what I will get I will be getting the pept model. Okay. So uh now after that guys I can check the trainable parameter. So over here you can see trainable parameter is around uh 2 cr 52 lakh 31,360 all sorry this is a trainable parameter 2 cr 52 lakh 31,360 and all parameter is around 11 k 11 cr parameter it's like very huge. So how many trainable parameter is around 2. 242%. That's it guys. Now uh what you can do you can check each and every layer also. So if I'm going to be printed guys, you will be getting each and every layer. Okay, inside this particular model, see this is a layer. Now uh here you can see uh like this is the each this is each and every layer of the transformer. Okay, of the transformer model because this llama model is built on top of the transformer itself. You will get the attention module over there. So see you can uh see the attention basically. So it is giving you each and every layer and regarding the each and every layer the parameter would be there. I hope uh this thing is pretty much clear to all of you. Now let me show you couple of more thing. Now what I'm doing guys, I'm going to be show you how many trainable parameter is there, how many total parameter is there and then what will be the percentage. So this is a simple uh like code I have written with that you can check the trainable parameter. This the total parameter and here you can see the percentage. So table parameter is around 3. 9 3. 94 percentage of all the parameter. I hope you understood it. Now you can check the device also. on which device it have been loaded. Now over here you can see it have been loaded in the GPU device. Okay, it the type is the CUDA, right? You can check the data type of the parameter. So it is having so many like functions and the parameters. So you can check the data type of the model. Now you just need to call model. parameter D type you will be getting that okay now here you can check the model is a PEP model or not. So what I'm writing so I'm going to be import the pept I'm writing model is a pept model or not. So if I'm going to be executed you will see a model is a pept model. Now if you want to check the uh basically uh configuration of the pept you can simply execute this model pep config you will be getting the configuration of the pept. Now apart from this one guys if you want to check the memory how much memory have been allocated. So you simply need to call torch coda memory summary. So once you will run it guys you will get the complete memory detail. Now you can keep it in some other cell because it is in a markdown format. See this is a complete detail of the memory. How many active allocated memory is there? How many active memories is there? What is the requested memory? GPU reverse memor reserve memory. Non-release memory allocation. See so many thing you can see over here. Now I hope you understood so many things what all thing you can call on top of the model. Now let's do one thing. Let's move for forward and let's try to prepare the data. So what I'm doing guys? So here I'm going to prepare a data. So for formatting the data or for preparing the data, I already written a code. So let me give you that entire code. Okay. So this code is also very easy and easily you can understand. So what I'm doing guys, so over here you can see. So first I'm going to be add this end of the sentence token to the tokenizer. This is fine. Now this is my prompt. So here I my data is available into this instruction input and response format. You can create your own data as well. Even the previous video I have shown you how to do that. Now here is the prompt. Below is an instruction that describe a task paired with an input that provide a further context. Write a response that appropriately complete the request. So this is the instruction. This is the input and here is a response. So this is my format data. So I'm going to be load my data. Now I'm just going to be take 15,000500 rows 150. Now on I will map this particular data set. So data set do map. Okay. So what I'll be so here I'm going to be apply the formatting on top of this particular data set or data set dot map and okay and here my function is format data this is my function format data it will take a example and it will format the data it can take the data in batches okay and remove column so yes we are going to be remove so the like uh this data set column name okay this particular feature and then we are just going to be keep the text only so this is my data set guys here if I can show you this particular data and what all feature are there so that you will get a clear understanding that what is happening over here. Now I'm going to be per I'm going to be executing a different cell. So load data set it might take some time again maybe one or two minute up to like based on your internet only. So see it is loading the entire data and if I will show you the data set variable. So inside this data set variable actually you will get some sort of a feature. See here we have output feature, input feature and the instruction feature and the number of rows is around 51,000. So we are not going to take the entire data. What we'll do? We'll take a like 1500 row only. Now what I'm doing guys? So here you can see load data we have trained with a split. Now we'll be taking the data set only 1500 row. Now data set map we are going to be map this method batch is equal to true. Data set dot column name. So this particular column name we are going to be remove. Okay. Now uh this format what it is doing it is going to be take a instruction input and output and it's going to be combine everything in the inside the single sentence okay complete single prompt so this is the format of the prompt here the value will be placed instruction input and response and this entire prompt will be going to the llm for the training okay for the finetuning so likewise guys we have prepared the data set now let me show you the data set how it will look like so we have this data set okay now inside this data set we have this text column and then we have the number of rows is 1500. Now if you want to check the first row of the text, so here you will write the data set text zero. Now once you are going to be executed, so what you will get? You will get the first text. Likewise, we have 1500 text. Okay. Now guys, what I'm doing? I'm going to be install some other packages and library. This is important. So I'm going to be like I'm going to be uh install this P as util. Okay, process and system utility. Then I'm going to be import along with the time. Then what I'm doing guys, I'm checking. So here I'm checking peak GPU memory uses. Okay, this line reset peak counter. So you measure only this training run. Okay, not previous run notebook. So guys, when I'm going to be execute this torch cuda empty cache means it is going to be empty the cache the entire cache. If I'm going to be write torch cuda reset peak memory state, so from here onwards my memory will be uh detected. Okay, how much memory is being consumed? So let me run it and let me uh run the further code. Then now over here what I'm doing guys? So here I'm going to be start the time. So uh for starting a time guys what I'm doing I'm writing ps util process. So process will be there. Then I'm going to be calculate the time. So it's a start timing. Okay. And then I'm checking the RAM. So how much RAM is there before the training. Okay. So after that my process will be here. So you can see the process it is nothing. It's a P utils sorry PS utils object. Now here what I will do guys? So I will check with the train time. Now over here see just So train time is being shown over here. Now we'll calculate we'll compare it with the end time. Okay after completing the training what will be the end time. So see this is a train time right now CPU RAM. So here you can see the CPU RAM. What is the CPU RAM? So it will give you the CPU RAM. Right. So this is the CPU RAM. I will define my trainer. So the trainer defining is very easy using the onslaught. So here what we have to do we have just have to define the septic trainer. We have to pass the model tokenizer data set. Okay. Then data set text field. So text column is there. Then packing true, right? I told you the packing, right? So when I was talking about this particular theory, right? So over here I return one automatic sequence packing. Okay. One of the important feature of the what? one of the important feature of the onslaught. Then here is my configuration SF configuration. So how many box is going to be run? How many batches will be there? Okay, what optimizer I'm going to be decide what is a like rate of that. Right? So everything we are going to be uh learning rate is there. defined over here. Okay, we are going to be initialize a class and then we'll be getting a object. Now I'm going to be call this train method. So once I'll do that guys, so the training will be started. Okay, started and training will take some time. Now after completing a training what we can do we can calculate how much memory have been consumed what is the time right uh and see we are going to be cons we are going to be calculate the training time second peak GPU vm GB and CPU RAM used GB so after the training after the completion of the training you can check out with all this thing it will uh like really give you the detailed understanding so let me print this entire thing so for printing I already done a print method so this is a print method guys now what I will do guys I will print. Okay. The training time, how much training time it is taking? Peak uh GPU, VRAM and the CPU RAM used. Now, uh once it will be done guys, see the training might take some time maybe 5 to 10 minute or even more like more than that. Once I when I train with the 50,000 of like rows, then it was taking too much time maybe it's going to be complete within 2 to 3 hour as well, right? Because that data is very huge. But if you're doing it with a limited data then it will be little faster. So uh here guys you can see we are going to be calculate everything. Now what I'll do the inferencing. So for the inferencing guys see this is the code. Let me keep the code guys. See the training has started over here. Now what I will do I will keep the inferencing code. So in the inferencing I'm going to be load the model. Okay for the inferencing. This is the like this is my prompt. Okay, which I will provide continue the Fibonacci series fibon fibonaki sequence. Then here I'm going to be load the uh here I'm going to be tokenize the input and then I'm going to be called toss. nograde and then we are passing the input over here and finally we are generating a output right. So my output would be there. So let's see whether it will be gen able to generate the correct output or not. So let's wait for a minute at least or see the training how much time it might take. So in uh okay it is 14 15 right now. So till 188 maybe it will take 15 to 20 minute guys. Okay. So what I'm doing so here I'm going to be check all the memory RAM and all everything here basically I'm going to be check right. So what will be the output after training and the loading of the model. Now I hope you understood everything. Now if you want to save the model guys. So for saving the model is very easy. So if you wanted to save on your current directory, you just have to write uh the name okay which name you wanted to save. So model. save pre-train once you will run it and uh tokenizer. save pre-trained once you will write it guys you will be able to save your model inside your respective or the current directory. Okay. So whatever directory you are providing in that particular directory. Now I hope guys you understood this entire thing you got a clearcut understanding. Now one more point is remaining over here. The point is unsrot versus llama effective versus hugging phase. So maybe in the next video once I will discuss the hugging phase versus unslod I will let you know. I will discuss about this ansoth lama effect and hugging face until guys you can practice with this much of thing. So let me highlight you again. You can test with the you can what you can do guys you can load the model. You can check with the different parameter you can see how many layers is being executed. It's a trainable right then you can check the timing how much timing it is taking you can simply calculate in this standalone solution it is not important but yeah if you're doing it if you're going to be compared with the other framework in that case it will be important right then what you can do guys after doing it so data set loading model loading okay model training now after training the model right see model is thing being trained and we are in between so 61 step is done now so at every step basically it is giving me a log right then what we are doing guys so yeah this is the output means uh what will be the training time peak GPU RAM and the CPU RAM then here is the inferencing very easy and then we are saving a model and this particular model we can use anywhere so yeah guys this is it for this particular video and it train this training will take time so that's why I'm going to be stop the video okay or else uh let's do one thing let it complete uh and after completing this one only I will show you the prediction inference ing and then only we'll close the video guys. Okay guys, so the training is completed. Uh here you can see I completed one single epoch and let's see how much time it took for me. So I'm going to be print everything. Uh okay. So this is a syntax error. Let me run it now. So training time is around 535 seconds. So if I'm going to be divided uh so how much it would be? Let me check. 535 divided by 60. So if I'm going to be check it is it took around 8 minute okay approximate 9 minute. So peak GPU VM it was around 1. 9 means 2 GB only within 2GB it was able to do it and CPU GM was around this much. So guys uh here you can see uh every sort of a detail like how much time it took and all everything. Now what I'm doing I'm going to be tested. So here I am let me execute it. uh it will take some time and then what I will do guys I am going to be save this particular model and then I can utilize it anywhere so see this is a response guys and now the you can see the response these are input and it's completing the Fibonacci series okay so 1 2 3 5 to 61 okay I think the response is not quite good maybe we'll have to train more that we can do that is not an issue right so yeah this is one thing now what I'm doing I'm going to be save the model. So this is my path Laura model into the current directory. Here it will be saved and yeah let me save that tokenizer and the model both and then I can use it anywhere. So if I will refresh it guys I will be getting my model. I can keep it to the hugging face hub also because hub is nothing. It is just a repository for the model. So see guys my model is available over here. So configuration and the model the save tenses save tensor file. It's a binary file. Okay. So yeah uh guys this is it for this particular video. I hope you understood the unsloth and the complete uses of the unsllo. Now what I'll do I will show you so many thing using the unsloth in the upcoming uh video. Now guys over here uh this is a critical thing uh to setting up this SFT trainer and all everything right to choose the best possible parameter over here. Whatever I have shown you over here as of now it is just a beginner friendly at least you should be aware about this much of parameter. We'll see couple of more and we'll deep dive into each and everything whether it's a hugging face onslaught and all everything. So stay tuned with me for the future. If you haven't subscribed the YouTube channel, please do it because you will see like lots of amazing content in the near future. So thank you guys. Thank you very much. Bye-bye. Take care. Here is all the point guys. Uh so first we'll take a
Enterprise Fine-Tuning via OpenAI API
look over the finetuning documentation. Uh then we'll see a supported method via OpenAI API. uh open a API is supporting so many method like SFT, vision fine-tuning, DPO, RLHF uh we'll take a look onto each and every method but guys at the end we'll perform only supervised fine tuning. Okay. Uh then we'll see uh how we can fine-tune via dashboard and uh via Python API. I will show you both method but uh mainly I will focus on the Python API not over the dashboard itself because uh the same job we can perform using the dashboard uh but we'll explore the Python API because as a programmer we have to focus on this side uh then finetuning step-by-step process. So these many process are involved when you are going to be fine-tune any LLM model using the open AI API like collect a data set example format a data set into the JSON then uh data set format validation token counting cost estimation uh then how to upload the data set using Python API how to create a finetuning jobs start the finetuning evaluating a model everything guys everything will come inside this video itself then a fine-tuning best practices from the open API So we'll try to explore each and every model. I will give you the quick walk through of the entire documentation. There we'll focus on the data quality. What kind of data actually you need to be have. Uh then hyper hyperparameter tuning. What all like hyperparameter we have and what value we can keep. Uh then total limit right. So every model is having their own total limit. So we'll discuss onto that. So guys these many points we are going to discuss throughout this video. So if you want to become master in uh OpenAI API fine-tuning then this video is for you. So please watch this video till the end so that uh you can fine-tune any GPD model using the open AI API. Uh now guys uh one more thing many people uh like asking their doubt over the LinkedIn and they are mailing to me continuously. So uh for those folks for those people guys I have created this uh topmate link. So if you have any sort of a doubt guys just go through with this topmate link and here I have like given you the different services the various services uh like quick chat rum review mock interview preparation tips career guidance genative generative uh AI interview preparation. So guys according to your requirement you can connect with me. Okay. Now uh let's start with the fine tuning. First take a look over the documentation and then uh step by step one by one we'll perform the entire practical guys. So guys uh for accessing the documentation you just need to write open API platform in any browser. So I'm using brave browser. You can use any browser. Now once uh you will write this openi API platform you will get this openi. com now just click on it just open this open api openaiapi. com now here they have given you the login this login option now just click on this login here you will get the three option one is the chat gpt second is the API platform and third is sora okay so I want to access this API platform so I will click on this API platform uh now after clicking you will find out the entire documentation. So this documentation is very huge. There are lots of thing. Uh so if you're going through with this documentation, you will understand how to access the open API key, various model, the core concept of the open API, then agents, tools, uh evaluation, uh so many thing basically they have mentioned over here, right? But uh here our aim to understand the finetuning and generate the open API key so that using that we can access the uh different model and we can fine-tune those model. So first guys I will show you how you can generate a key how you can keep how you can basically recharge your openi API account uh and then I will show you the finetuning. Now uh guys uh if you will scroll down uh onto this documentation. So inside this evaluation section. Okay let me show you. So here is the evaluation sorry model optimization. So under this model optimization actually you will get this finetuning. Okay. So once you will click on this dropdown see here uh they have given you the option to perform the supervised finetuning means how you can perform the supervised finetuning. They have given you the complete step. uh so you just need to go through with this each and every step and easily you can fine-tune your model. Okay, I will show you what all model you can fine-tune. I will give you the complete guide of all those model along with the costing. Uh apart from that you can perform the vision fine-tuning. If you have vision data you can do that also. See this is the model. Then uh you can perform the direct preference optimization. See this is the model there you can perform the DPO reinforcement finetuning. Yes, that is also available uh with this model. So just go through with this documentation guys, you will get the complete detail of the finetuning. Don't worry uh after generating a key okay and after adding some credential inside my account I will give you the walkthrough of this finetuning pages okay of this documentation itself. Uh now guys what you have to do you just need to click on this uh quick start. Now once you will click on this quick start here you will get a option to create an API key. So just click on this Now after clicking key you will get a option to generate the API key. Okay. So it is loading uh for me. Let it load. Uh still loading. It should not take this much of time. Yeah. So guys, I got my API key, right? So I already generated one API key. So I have my API key over here. So using this API key, I can access the different model and then I can perform the finetuning. But if you don't have any API key, then you can click on this create a new secret. Okay, once you will click over here, you will get a option to create a new secret key. So just write the name whatever name you want to be write in under what pro under which project you want to be create that just write the project name and then create a secret key okay uh now guys a very important thing so after creating this key can you access any model from the open API the answer is no you cannot access the model until you don't have money inside your openi API account so how to add the money so let me show you that so once you will click on uses. Okay. So after clicking on this uses, you will get the various option over here. So it will give you the complete metrics of your uses. How many uh tokens you are using while you are using the chat completion API while you are generating a images, file search, web search, moderation, embedding, every sort of a thing you will get over here. here regarding your money, right? Regarding your tokens, regarding your tokens count. So you can see over here the firmware budget. uh the forary budget is $120. Okay. And I spent $0. I haven't used this API. Okay. Uh now guys, this is not a money actually. This is a budget. I can decide the budget and then according to my requirement, I can add the money inside my account and then basically I can use it. So how to add the money inside the account? So for that there is a option. So you just need to click on this edit budget. So once you will Okay. So here you can see uh you can edit your budget right. So uh you can add the alerts, you can edit the budget. Uh so apart from this you can explore the model right. So token limit of every model. TPM means a token per minute. Okay. Uh so rate per minute token per day. Okay. So this is the full form of this specific term TPM, RPM and TPD. You can explore more about it. Right? As of now, I'm not going into these detail. I will more focus on the finetuning. Now guys, you can see the users limit. So maximum I can uh use $1. Okay, on one single account I can use one lakh dollar. Means I can set uh the limit up to one lakh over here. Okay, so I can set up to one lakh rupees of budget for my openi API key onto one single account. Now guys, uh here you will get this billing option left hand side. Just focus on this billing. Now once you will click on this billing so see this is my credit actually so I added $10 into my open API account okay and I'm using this uh amount only for my for accessing the model okay for generating the uh responses based on the given request right so if you want to add it the money into your account so here is the option add to credit balance so once you will click on it so here you can write the amount whatever money like whatever like amount you want to be added add. Now just uh add your payment detail, credit card detail. Okay? And then click on this continue. Then guys, what you can do? You can add the money into your OpenAI API account. Now you can enable the auto recharge also. If the money is going to be end, then automatically it will recharge your account. So guys, this money this is your actual money which you have inside your account and then you can like decide the budgets and all right. So whatever budgets you have in your mind, you can keep it. See again I'm saying this is not a money. I can give you a example. Uh let's say you are going to decide a budget for your grocery. Okay. Uh per month you are going to be decide a budget for your grocery. Let's say 5,000 rupees. But in your current account in your current saving account you just have 3,000. So the budget you have decided that is 5,000 that is on paper right this much you are going to be spent. But the actual amount you have inside your account that is 3,000 right? So you can adjust your budget according to your requirement uh whatever you want to be keep over here but this is the actual money uh which you need to be charged right recharged inside your openi API account. I hope uh this thing is clear because this is a very important thing guys if you don't have it then you cannot fine-tune your model even you can keep $5 also but I think minimum is $10 you can explore from your end this one. Okay. Now guys, uh let's uh take a look onto the documentation or the data set and all. Okay. And after that I will show you this entire code. See this is the entire code which I prepared for all of you. Uh definitely one by one uh step by step. Uh we'll do the finetuning using this entire Python code. Now guys uh before starting with the coding part, let's explore the documentation. Uh let's see what all method is being provided by the OpenAI API. uh let's explore the data set format and uh costing of the different model. So guys once you will click on this model optimization and uh if you will scroll down here so you will get this finetun a model section. So let's uh read this paragraph at least and let's see what this openai is saying. So openey models are already pre-trained to perform across a broad range of a subject and task. Finetune lets you take an OpenAI based model provide the kind of input and output you expect in your application and get a model that excel in the task you will use it for. So was it what does it mean guys? So the meaning is very simple. Uh f this GPT model is already trained on a very huge amount of data. It is capable to perform a broad range of task but still if you want to uh fine-tune on your specific data then you can do it. So guys I'm not going to be read each and every line of this documentation. I will highlight only the important point. So guys uh here in order to this uh important point uh this table is very important guys. So they have given you the different methods over here. Supervised method vision finetuning direct preference optimization reinforcement finetuning and they have given you the model name also with whatever model you can use it. Okay use this different method. So if you want to perform the supervised finetuning you can use this model. If you want to perform the vision finetuning you can use this model for the DPO this model. And for the reinforcement fine-tuning this model if you don't know about these particular method you can go and check with my playlist already I have discussed these method in a very detailed manner. You can follow this video number 14 15 and 16 or else you can follow this crash course. Got it guys? Now guys let's uh come to the supervised finetuning. So here is a complete overview like how we can perform the supervised fine-tuning. So we have to build our own data set. Then we'll have to upload our data set. Okay. The data set will be in the prompt formatting. Uh I will show you how the data set looks like. Then you have to create the finetuning job. evaluate the model after the finetuning. Now here guys uh this is the complete detail how you can build your data set. Now minimum how many example you can keep? So minimum you can keep 10 examples and maximum you can keep 15 to 100 and 50 to 100 example are the good one. Okay. So if you want to be really improve the uh if you really want to be improve the answer the output of the model then at least you should have 15 to 100 example. You can read this entire documentation. It will give you the complete and the detailed idea about the data set format and the data preparation and all. But guys uh this much information is not required. Once follow this video till the end after following this video after performing the practical and all uh then you can go through with this entire documentation and the entire page and all right so that your understanding will be more comprehensive and the more concrete. Now guys this is the format of the data set. Uh supervised data set. If you want to explore one single row you can simply click on this corresponding JSON data set. Now once you will click over here you will get the format of the one single row. So this is the JSON format guys. Now inside this JSON format we have a key. So the key name is the message and the value will be the list. Now inside this list you will be having the different role like user assistant system. Okay. And then you can keep the content. So content could be anything. So over here you can see so we have a role user. This is the content. Content is nothing just a question or whatever you want to be like pass to the model. uh then role is assistant and here is the content. The content is a tool calling. So either you can write a simple message or you can define your tool calling and all. Right? So both is fine. Uh in our finetuning we are not going to be uh fine-tune our model on a specific tool data. I'm just going to be fine tune on a simple chatting. Let me show you my data set how I prepared my data set. Okay. So guys uh now here if you will scroll down you will get like more detail about the finetuning jobs and all. All right. So definitely you can go through with uh you can go through with this documentation for the uh more understanding. Right. It is just for your self learning selfstudy. Now guys let me show you how I prepared my data set. So once you will go through with my uh GitHub guys this is my GitHub finetuning GitHub. Now inside this GitHub I created one folder. So the folder name is LLM finetuning 20 GPT uh LM finetuning 20 GPT finetuning. So just open this folder. Now over here you will get this data set data dot JSON. Okay. JSON means what? JSON L. L is representing to the new line. Okay. So as many as JSON object you can keep which is separated by the new line. So this is the data set guys which I
Preparing & Validating JSONL Data for OpenAI
created for the finetuning. At minimum I can keep 10 rows. So I just kept the 10 rows just to demon demonstrate you. But if you are doing it in a real time in that case guys you will have to keep at least 50 to 100 rows for the better output. Uh now guys uh here uh this is the data set guys which I opened in the VS code just to show you how it looks like. So this is the one single row. So inside this row I have a key. Key name is message. Then we have a value. Value is the list. Now inside this list we have a system. Okay. Then we have a user. Now here we have a assistant. So yes like regarding each and every role I have written their corresponding messages. I will again come to this particular data set. I will explain you that why I have written these many me these messages. What is the meaning of it and on which what kind of data set I am fine-tuning my model. Okay. I hope you got the understanding of the data set. Okay. Now guys, so if you want to explore the other data set, you can go through with the different pages like vision finetuning. So here you can see uh the data set format of the vision uh for the vision finetuning. So this is the data set format. If you want to prepare your data set for the vision fine-tuning, then you can follow this particular format. Uh if you want to prepare your data set for the DPO, you can follow this particular format. See here is a format. If you want to prepare your data for the reinforcement learning, then you can follow this specific format. So in the upcoming classes in the upcoming video definitely I'll show you how you can fine-tune uh your model with the different methods with the different techniques. Uh definitely I will show you in my upcoming video. Now guys for the reinforcement learning guys we required few additional thing like a grader and all. So if you want to manually grade the output whether it is a good or bad you can do otherwise you can use the LLM model. Okay, LLM as a grader. So this is a separate thing once I will come to the reinforcement learning definitely I will show you this as also. Uh now here is some best practices. So definitely we'll explore inside this video itself. I will give you the quick walkthrough of this best practices. What should be the data quality uh and how we can calculate the end cost? What is the hyperparameter tuning and all we can perform. Now guys uh this is all about the data set. Now if you want to know about the model guys so what you can do so you can uh simply click on this pricing. So just Now after clicking on this pricing guys uh here you will get the pricing of each and every model. Okay regarding the different task. Now guys once you will scroll down over here see here you will get this finetuning this one. So just click on this finetuning. Now after clicking on this finetuning you will get the pricing of each and every model with respect to the finetuning. So these many model we can finetune like 04 mini okay this is the date which when this model was like published then here is a GPD 4. 1 mini nano 40 mini and the other model also now guys here you can see so this is the trading cost this is per our r basis now this is the input cost so the input cost means the message which you are providing to the LLM okay so uh this is the input cost this is Cach a cost means if you're going to be provide a same input again so open is going to be picked that particular input from the cache memory. So this is the cost regarding the cache. Now this is the output cost guys. So here you can see the cost the pricing it is per 1 million token on per 10 lakhs token. So this is the training cost with respect to the finetuning guys. Now here is the cost for the inferencing. So after the finetuning whenever we are going to be inference the model whenever we are performing the inferencing the prediction then this will be the cost uh this cost will come from the input cache input and the output. So in this video I will show you the finetuning using this GPT 4. 1 nano because it is having the minimum pricing okay 1 uh $1. 50 per hour. I hope guys this thing is clear. You understood about the data set format. different methods of the finetuning in open API and you understood about the pricing part. Now let's uh start with the practical and whatever things will come in between are definitely we'll explore through the documentation itself. Okay guys, so the entire practical will perform in the Google collab. Uh but you can perform this practical anywhere on any server. If you want to do in your local you can do uh if you want to do on any cloud server you can perform there as well. So feel free to perform this practical anywhere. So I am doing it over the Google Collab. So first of all guys uh I will have to connect with my runtime. So here I will select my runtime. So runtime wise I'm not going to select the GPU this time because I'm not going to perform any training on my server. So the training will be performed over the OpenAI server. I just need to configure the training using the Python API. Uh now guys what I will do? So first I will select the CPU then I will connect and now I will install the open AI SDK. So for installing the open SDK I will simply write pip install open AI. So once I will uh write this pip install openai and I will install it. So yeah it is getting installed. Now after that guys I required my openi key. So I shown you how to get the open AI key. So in the same way you have to generate a open AI key and you have to keep it inside this key. Okay. So you can uh add a new secret. You can click on this add a secret. Okay. You just need to write a name openi API key and then paste the actual key over here and then save it. That's it guys. Nothing else. So I already did it. So I just need to activate it. See here is my openi key. This is the value of it. Now what I will do guys, I will read the key over here. So for reading a key, what I will do? I will simply uh copy and paste this code snippet. Uh Google collab import user data. Now uh user data. get open AI API key. So I will get the open API key. Uh see the key is available inside this particular variable. Now what I will do guys, I will set this uh key as a environment variable. So for that guys, I will import OS. Now I will call uh this method OS dot environment and then I will write this open AAI API key. Okay. Uh this is my variable name open a API key. Now I will give the value of it. So this is the value open AI API key. I'll mention the value over here. And now I will run it. So see guys I set the uh open API key as a environment variable. Now guys what I will do? I will import the OpenAI class from the OpenAI itself. So from open AI import open AI. Okay open AI. Now what I will do guys uh I will import the open AI. Now I will create a object of this open AI. So here is a class. I'm going to be create a object of this class and the object name is going to be client. C L I E N T. Okay. Now what I will do guys the client is there. Client is ready. Now I will check whether my model is working or not. So here I will uh call this method this chat completion method. client dot chat completion dotcreate. Okay. And this is my model name. Now here's my message. So what is a champions trophy in the uh in the cricket and how it is different from the world cup. So this is my message. A user is asking this particular question to my model to the model and this is the model guys. I can use any model but yeah I'm just checking with this particular model whether I'm able to hit the API or not. Then later on I will find fine tune. Now uh if I will hit it guys I will get a response over here. So I can get a response. I can simply call this uh chat completion choice message and content. Now uh see guys this is the message means we are able to uh hit the model and get the response. So yeah my model is working fine. Now what I will do guys I will take a data set and uh first I will check whether the data set correct or not. then I will count the token and then basically we'll perform the finetuning on top of that particular data set. Now guys uh we'll load the data set. So I already shown you the data set. See this is our data set data dot JSON. Uh JSON means J S. JSON I think you know about the JSON right? So it's a dictionary object which we keep inside the file inside the physical file. uh JSON means you can keep as many as JSON object which you can separate via new line. So if you will see that kind of data inside any file. So uh this is the extension for it. Uh JSON. Okay, this L this is L actually. Uh now let me show you the data set data. json if I'm if I can open it. See here is our 10 rows 10 JSON object. I think I already shown you this data uh and uh you can see this data actually it is all about the smartphone detail. I will come to that what kind of data basically I cap and like how we can perform the training. First of all before performing the training let's do the validation of the data set. So what I'm doing guys so here I'm going to load the data set. So for loading a data set guys what I will do I will open this file. So this is the code for it. Uh let me give you the code. See here is a code import JSON. Uh then you can uh give the path of the file content data do JSON. I created one more file this data 2. jl. I will come to this file while why I created it. Uh definitely I'll show you use of this as well. Okay. This another file because inside this file actually I missed some data points. So while I will show you the validation I will show you with the both file. first with the correct data and second with the incorrect data. Uh so here I create here I kept the path content data dojson. Now here is the encoding. Encoding is equal to UTF8. Okay. Uh this is the universal encoding. Keep this only if you're going to be read your data inside the collab or in your local. Uh now I'm going to be open the file. Now what I will do guys? I will iterate on top of this file object. Okay. And then I will keep it inside the list. So this is the further code for it. Uh I will iterate on top of this file object. Okay, I will keep it inside the line variable. Then uh I'm going to be loaded using this JSON. loads. So I will not get a string. I will get a proper JSON object means the dictionary. In Python, you can say it's a dictionary. Uh now let me do it. Let me load it guys. So if I can show you the data. See here is a data guys. Inside this particular data we have 10 rows. So at least we'll have to keep 10 rows. Okay. Inside the file if you want to fine-tune the GPD model. If you're going to keep below 10 then it's not going to fine-tune. Okay, it will generate the error. It will give you the error that okay you your data set is not having 10 rows please increase the number of rows. Uh now uh I think so you got the data. Now if I want to check the one single row of the data I can simply write data zero. So here I will get the one single row inside this particular data inside this particular object inside the JSON object we have message key. Under this message key guys uh you will find out the different role like system uh user and you will find out the assistant. Okay role is there then content is there. So there is two key okay role and the content inside this particular d inside uh this particular list. Okay inside this particular list we have one more uh dictionary object. Okay this one this is a dictionary then this is a dictionary. So every role guys it is separated inside the dictionary only. uh now what I'm doing guys if I if you want to check the number of example that how many number of examples we have so simply you can uh call the length on top of the data because it is a uh it is a list guys here you can see this is a list so inside this list only I kept the entire object okay this JSON object so if I can check how many JSON object we have so you will get the number so number of example is 10 okay I hope this thing is clear now how we will validate the data so for validating a data we require add a couple of more import statement. So here I'm going to keep all the import statement like tick token. Uh this is for token counting. So we are counting the token. Okay. So if you want to count the token so we'll use this tick token module. Then we have one more module that is numpy. Okay. So if you want to convert anything into the array right then you can use this numpy. Uh then we have one more uh we have one more module that is collection and from this collection we are importing this default date. I will show you the use of this default act that where we are using it. Now what thing we are going to validate over here. So guys uh here I can make the heading. So the heading is very simple uh data validation. Data validation means uh we are checking the format of the data whether is correct or not. So I can also write over here format validation. I hope this thing is clear. So format validation or the data validation anything you can say. So we are just checking the format of the data. uh the data is correct or not. Now uh here what I will do guys, I will uh I will keep one code. I will write one code. Okay. And using that particular code we are going to validate the data. Now what thing we are going to validate? So you should be aware about that also. So here I'm going to copy and paste. Uh so this is the entire table guys. Please read out this table very carefully so that you won't face any difficulty while you are understanding the code. So we are going to validate the example type means uh this one example. See guys uh this one data row actually it is also called example understood this one data row okay where we have the message then we have a role like system user and the assistant and we have a content regarding each and every role. So guys uh this particular this single object actually it is also called the example. I hope it is clear. So how many in total example we have? So we have 10 example 10 in total example. So first we are checking the example type whether it is correct or not. Okay. So whether it is a dictionary or not whether it is a uh like the JSON object or not right the JSON object which is separated by the line. So we have 10 JSON object you can say JSON object or in Python it is a dictionary. So we are checking that. Then we are checking message keys whether the message key exist or not. Then we're checking the required key. Okay, role and content. Then we are checking there is no extra key. Then we are checking role. Okay, like system, user, assistant, function. We are checking all those role. Then we are checking the valid content means uh there is no empty string. Okay. Uh then we are checking assist assistant present. At least one assistant role should be there inside one JSON object. So this is one JSON object. Okay. If you are not keeping assistant over here, in that case this data set format is wrong. So at least one assistant should be there. Okay, you can keep as many but yeah, at least one assistant should be there. Okay, inside one JSON object. Now guys, uh I hope this thing is clear. Now what I will do guys, I will create a object of the default dict. Default dict means it will give you one dictionary actually nothing else. So here what I'm doing, I'm going to be create a default dict and here I will keep it inside the variable. So variable name is what? Errors. Okay. So I'm initializing one dictionary and uh I will keep all the error and all everything inside this particular dictionary. So this is the code guys which I written. Let me show you the code. So with this particular code you can easily understand what thing we are going to validate. So let's start over here. So we'll iterate over the data set. The example will come over here. We are checking the type of the example whether it is a dict or not. So if it is not a dict one then we'll say errors data type is equal to one. Means we'll say over here like the data type is equal data type is a key and the value will be one. Means inside the error dictionary we are going to keep the error. Okay the error basically it is related the data type you will get to know I will show you the end output don't worry. Uh then we have example get so here we are fetching the detail of the message. So and we are checking okay if the message is not there in that case also again we'll log the error inside the dictionary. Uh then we are iterating on top of the messages we are checking ro and content is present or not. If the role and content are missing then again we are logging the error inside the dictionary then guys we are checking ro content name function call weights everything we are checking inside the particular message okay if it is missing then we can say message unrecognized key right so message is a unrecognized key over there then we are checking system user assistant function okay if this is not a role in that case again we are going to log the error okay that unrecognized role If we are checking the content okay if the content is a function call right if it so we are checking uh the content inside the function call if it is missing then we are saying missing content so you can go through with this code you can understand what basically I'm trying to say over here how I am formatting the data sorry how I am checking the validation against the formatting of the data which we are about to pass for the finetuning to the open AI guys okay I hope it is clear If there is a error, if we have something inside the dictionary, then we are saying found error and then we'll represent the error. We'll show the error. If there is no such error, then we simply print no error form. So, let me execute it. Uh I think you will understand in a better way once I will uh execute it. Okay. So, uh here you can see. So, once I execute it guys, with respect to this data, so it is saying no error found means in my data everything is perfect. Everything is clear. But guys uh here I kept one more data 2. json. Now inside this particular data I haven't created one role. So let me show you this particular data with that you will get a very good understanding. So we have message okay message then we have role is a system then content. This is the content. Then guys you can see so we have role is a user and this is the content. Now if you will check with this particular data. So we don't have assistant over here. Okay. So now we are checking this particular data whether this data correct or not. Okay this particular code against this code we are checking our data whether the data is correct or not. So what I will do see we don't have any sort of a error error with this data data do JSON I think you understood about it but if you are going to be check with this data 2 dol let's see what we'll be getting what we will be getting as a final output. So here what I'm doing guys I'm going to be write data 2 dot jsonl. Okay. Now let me execute it. So here is my data. Now you can check the data. See in the first message itself we don't have assistant. Now number of example will be same data validation. This is a complete theoretical point. You can read it by your from your end just to get a more understanding. Then uh here is my uh like input statement. This is my by default dictionary. Okay. You can think it is a empty dictionary. Right. Then guys we are going to be iterate on top of the data. Example will come over here. It is going to be check the data type. Then guys here you can see it is checking the missing message list misses missing message key missing message unrecognized key unrecognized role function call okay so many thing it is checking now if I will execute it see what you will get so guys here I'm getting one uh error found one error example missing assistant message one so it is saying in all the example in all 10 example at one place okay this assistant is missing the role assistant is missing I hope guys this entire thing is clear. So now what I will do guys I will show you how you can count the token. Okay token counting uh token counting utilities. Uh I will tell you now and then we'll come to the final training call. Okay. So after completing this one we'll do the final training call guys. Now guys uh let's perform the token counting and the cost estimation. Uh so guys uh here I shown you the pricing page. So uh here you can see uh there is a different model and the pricing of that model. So this is a training price uh this is the training price means uh actually it's a cost of the GPU on a hourly basis. Uh this is the input uh price input token price and the output token price per 1 million token. So guys as I told you this is a inferencing input and output token price. But guys uh this statement was the wrong. So this uh input and output token price it is with respect to the training only. Uh if you have trained any model or any classical ML and DL model uh there what we do we provide the data we provide the input to the model and model predicts some output. Okay. And based on that loss and all we basically estimate right how my model is performing uh so and then we perform the inferencing on top of that train model right so this is the like simple uh training mechanism if we will perform training of any model not only the LLM so we are going to do in the same way we provide the input then model predicts some output we calculate the loss and we try to correct that loss okay like uh like that only we train any model. So uh this is the uh input and output of the training data set. So guys uh here what I'm doing uh let me show you. So first guys I'm going to be load the uh encoding model. If you don't know about it guys I will create a separate video of it. What is this encoding model and how basically it's going to perform the encoding. Uh if you don't know much about it so what you can do you can check out with my hugging face tutorial. I recorded one crash course over the hugging face. uh there I discuss how you can load any transformerbased model and how you can perform the uh encoding using that model okay and how you can uh get how you can assign the uh encoding ids right token ids uh to those specific sentence and all you can check over there right so what I'm doing guys I'm going to be use the open specific encoding model so open provides you one library the library name is stick token so uh using this token I'm going to be load this model CL1 uh sorry CL 100K base model. So this is my encoding model guys. What it will do? It will perform the uh token. It will create a token out of this sentence and it will assign a ID okay to this particular token to the specific token. Okay. So this is also a transformer based model. Again you can check out that video or else I will create a separate video. So this is my encoding model. I'm going to be loaded. Now here I'm this is my text guys. uh I'm just showing you how it is going to perform the encoding okay and how it's going to be assigned a proper ID okay token ID to that and then I will show you the uh tokenization of my actual data set so uh here is my text guys so I took this particular example hello how are you and I'm passing to this particular method encoding encode text now what it will do it will create a tokens okay so uh tok uh and I it will provide me a token id so this is the token id case as you can see over here. So this is the meaning of each and every ID. So hello is being represented by this 9906. A comma 11. How is being represented by this 12868 then r then u and then uh this question mark. Now if you want to decode that uh sentence right so you can simply call encoding decode and then you can provide this token ID. So you will get your text back. So here is your text right? So what you are doing guys? So you have a text you are going to be tokenize the text. Okay. So once you will tokenize the text you will get the token id and uh then simply you can decode and using which model we are doing using this uh model we are doing. So this model is available under the stick token library which is created by the openi. Uh now guys what I'm doing I'm going to be check like how many tokens are there inside my data set and on top of it only we'll try to check the estimation. Okay. So, uh what like the cost estimation. Now, one more thing guys, uh this is a pricing page. Here, uh they have listed all the pricing and all regarding each and every model of the finetuning. Uh but apart from this, we have one more like page. Okay. So, this is again from the openi itself. So, the uh like the address of this page is cookbook. openai. com. So, OpenAI is providing you the different cookbook where they are providing you the readymate code. Okay. So you can directly utilize that code uh inside your examples inside your like development. So uh I'm taking a reference of this code only. So if you will go through with this particular page. So here only they have given you the code of the format validation. Uh just now I have shown you the format validation. Right. So I took the code from here itself and now I'm going to be calculate the counting the token and I'm going to be counting the calculating the cost. Right? So I'm taking a reference of this particular code itself. So guys uh here I'm taking a reference of this entire code and I'm making it making that easy. But if you want to explore everything in a very detail then uh definitely you can check out with the cookbook and uh you can understand uh each and everything in a detail. But guys here also I try to decode everything in a detail. Uh means I try to like uh give you the summary of each and everything. So yeah first you can go through with it. you can understand the process and then for the like more detail you can check out with their own specific page. Okay. Uh so this is the uh like this is my two list one is the to total token and the second is the assistant token. Uh this assistant token is a output token. Okay. So first uh let me initialize this two list. Uh now what I'm doing guys I'm going to be create two functions. So this is my function guys. Uh the first function is a count total token. Now here what I'm doing I'm iterating over the messages. So I will be getting this messages. Now from here I'm getting this content. Okay. Now I'm going to be encode that content and then I'm checking the sum. Okay. Now if you don't know about it simply you can check out the data. So what you can do you can uh write the data. So you will get the complete data. Now if you want to check the first message write the zero over here. See this is the first message guys. Uh message. Okay. So how you will get a content guys? See this is the content. Okay. So you are checking the content uh like size of the token. Okay this is the content. So what you are doing we are going to be converted to the token and you are checking the sum of it. I hope you understood it. So the same thing we are doing over here. So inside one message how many tokens are there? So we are checking that using this particular code. Yes, this is fine. Now what I'm doing guys? So here again I'm iterating over the message. Uh now if the role is a assistant so then only we are checking uh going to be uh encoding it means we are checking the token okay we are counting the token and we are doing the sum of it right. So here counting assistant token. So this two function one is giving me the total token one is giving the assistant token with that actually we can check how many total token how many input token and how many uh output token are there. So let me execute it. So here I'm passing the uh here I'm iterating on top of the data. So uh I will be getting example. So from the example I'm passing the message. Okay I'm passing a message to this method as well as to this method. This is a simple Python code. Right now let me exh execute it and see here is a total token. See in first message how many total token is there? In second third message, fourth message, fifth message. In all the 10 messages these many tokens are there. Okay. Then assistant token. So here uh the this is the output token actually. So in uh every message how many output tokens are there. Okay. So simply we are able to calculate it. Now here is some few more statistic. So average token per example I can calculate the average token. I can check with the maximum token. So here is the average token per example is 56 around 56. Average token is there in every example and the maximum token is 62. uh now here average token in uh assistant to average assistant token and maximum assistant token. So here I'm checking average assistant token which is around 21 token in every uh output message there is on an average 21 tokens and maximum is around 25. So this is like some more analysis again I'm again this is not like having any meaning but yeah this is just for the analysis. Okay. Now what I'm doing guys I'm checking the total tokens. So it will provide me the total tokens. Okay. So I will sum of this total token of this particular list. So it will provide me the total token. So how many total tokens we have? So we have uh here you can see we have 562 tokens in my data set. Now I let me check the output token. So here is my output token guys. See this is my output token. So how many output tokens we have? So let me show you the output token also. So output token is 212. I can check the input token. So let me here is the input token. So guys likewise uh see what we are able to figure out over here. So total tokens, output tokens and the input tokens. Okay. Uh now this is the pricing of this particular model. So we are fine-tuning this model GBD 4. 1 nano 20250414. Uh you can check out with this model over here. See this is the model guys. This particular model GPD4 4. 1 nano. Okay. Now what I'm doing guys so here uh this is a pricing. So pricing for for 1 hour, right? So $1. 5 for using the GPU. Uh input cost $0. 2 per 1 million token. This is the cache cost and then output cost. So this is the input rate guys. This is the output rate. Okay, here I mentioned the output rate and this is the hourly rate, right? Per our training compute. Now what I'm doing guys, I'm checking the uh token cost. So this is my token per 1 million and then input rate multiply by input rate. Then output token per 1 million and then output rate. Okay. So likewise you'll be able to get the token cost. So this is the token cost guys. Let me show you the token cost. So 0. 23 something like that. Now training let's say my training is going to be run for the half an hour. It could be run for 1 hour, 2 hour, 3 hour it depends but I'm taking the bare minimum time. Let's say my training is running for the half an hour. Okay. So according to that uh my total cost will be how much? So here is my training cost guys. This is my training cost. Uh this is the training cost $0. 75. Now what is the total cost guys? So the total cost will be this one. So let me show you the total cost. Okay. So this is the total cost 07 0. 702396. So if I am uh running the training okay using uh this model guys. Which model guys? using this uh gibbre 4. 1 nano and uh the with the same data set the data set which I shown you this data dojson uh where I am having 10 rows so the training cost would be around this much okay it is a rough cost guys again I'm saying 0. 75 you can multiply it with a like uh 91 so multiply with the 91 this is the dollar rate current dollar rate so it is around 68 rupees or 69 so roughly 69 to 70 rupees I will get okay this much cost I will be getting if I'm going to be fine- tune my this model on top of uh this data okay 10 rows so here is the message guys you can check so this is the total tokens and this is the roughly cost I hope guys you understood how to calculate the cost maybe it might be wrong or it might be more and less I just did the rough estimation now uh like rest of the thing you can explore I shown you each and everything how to calculate the cost uh like how to go through with this pricing documentation and uh this particular cookbook. Okay. Now let's do one thing guys. Let's perform the finetuning and after that guys I will go through with the API uh and uh then we'll look this then guys we'll look into the dashboard right how you can perform the finetuning through the dashboard itself. Now guys uh your actual training will start from here. So uh you know I initialized the client. I created a client guys. Here I can show you. So this was my client. I created a object of this open AI class. Now what I will do guys using this client only I will call some function some method. So the first method the first function is going to be client do. file dotcreate. Okay. So what I will do guys I will call
Creating and Monitoring OpenAI Fine-Tuning Jobs
this particular method client do. file file. create. Uh this is my file. So content data dol this file could be available anywhere. Okay. So this file as of now this file is available over here inside this uh collab inside this collab workspace. So I just copied from here. Okay. I just keep copied path from here and I paste it over here. Okay. So what I have this file. This is my data. I already like gone through with the data. I already understood the data. each and everything we have done. Now what I'm doing guys? So here I'm writing a purpose. So what is my purpose? My purpose is a fine query. So first I will do what I will do guys. First I will upload the file. So using this method client dofile. create I can upload my data to the openi. Okay. Uh now once I will run it guys. So see my file object is created. So this is my file ID. This file lsxqm this this right? So this is very important. So this uh file ID is required. Uh this one this particular ID will be required. Now if you want to see right list your all the file whatever you have uploaded over the open a platform you can do that. So for that what I will have to do take this client again and now what here I will have to call this files. Okay. Uh then uh here I will have to call one more method that is list. Now once I will run it guys I will be able to get all the file whatever I have uploaded so far. So see I have done like three to four times. So yes I'm getting all the file object means whenever you will upload any file so it will create a file object and it will assign one id to that right. So let me do one thing. Let me iterate on top of this files. Let me show you what all files we have. Whatever files basically we have over here. Whatever file I have uploaded over there. And uh this is the latest one which I uploaded just now. Okay. So here I'm saying files and this will be my files. From here I'm taking the ID, I'm taking the purpose and this will be my file. Now let me run it guys. So see over here it is saying files is not there. So let me keep it inside the files. Okay, I'm just going to be keep inside the variable. Right now what I can do I can iterate on top of it. So see so far I have uploaded four times. So I am getting four ID this and this. This is the latest one. Okay. The first one I have I had uploaded this one then this one and this one. So four time I have performed the finetuning means three finetuning. So this is from the last three time and this is the latest one. Okay. So I required this particular ID. I hope you got it. Now what is the next thing? So here guys I can create a variable. See this ID will be required. So I'm just going to be copy over here and I'm keeping it inside the variable. So the variable name is going to be training file ID. Okay. Uh now let me execute it. So I got the training file ID. Now I required one more thing. Uh so I'm going to be create one more variable. The variable name is suffix name. So I can write over here custom YT. Okay. YT class finetune model. So this will be my suffix name. So after the model whatever my whatever model I will be choosing. So along with that model okay this uh suffix name will be added okay at the end. So this is my suffix name what now what I'm doing guys. So here I'm going to be call the finetuning jobs. So this is very easy. So what I'm doing here I'm going to be call one method client dofinetuning do job dot create. Now here I'm passing my training file id. So I'm saying on top of this file I want to fine-tune my model. Now which model? I don't want to fine-tune the GPD 40. I want to finetune the GP nano. Okay. Uh this particular model. So I'm going to copy the name of it and then I'm passing it over here. This one GPD 4. 1 nano 2025414. Then suffix name. So this will my suffix name. So after the finetuning guys, what I will get? I will get the model as along with this suffix name. Okay. So that I can easily identify my model. Now this is my uh type. So which what kind of uh like finetuning I'm going to perform. I'm going to perform the supervised finetuning according to that only I have prepared my data. Then uh guys here is a hyperparameter. So batch size is 16 by means in how many batches we are passing the data in like in one batch we are passing 16 rows. But guys this is irrelevant as of now because I just have 10 rows right now. Okay. The learning rate multiplier. So yes this is 1. 0 zero learning rate you know to stabilize the training uh this is again a mathematical concept of the uh gradient okay uh gradient of this model the neural network so definitely we can understand that while I will teach you the neural network then number of epochs so for how many epochs you are running the training I'm running it for the three epochs right so this is all the hyperparameters so in this particular points I have also mentioned hyperparameter tuning so you can uh play with those hyperparameter total limit I'll come to that and the data quality I already taught you what kind of data you have to keep and how to format the data now if I will run it guys so what I will be getting I will be creating the fine-tune job in a back end okay so my job is created means now the back in the back end the finetuning has started how we can check that I will show you in some time uh now guys uh if you want to list your all the job okay whatever job see again uh whenever you uploaded the file you got this uh you got this ID right uh this is the ID regarding the file whatever file you have uploaded now whenever you will list the job okay whenever you will create the job the finetuning job again one ID will be assigned to you so this is the id guys this one now if you want to check your all the jobs whatever jobs you have created so far so for that you can simply call client dofinetuning jobs do list so once you will call it guys so here you will get list of all the jobs whatever you have created so as I told you before this tutorial I have executed it three times. So I'm getting to in total four job. Okay along with this current job. So I hope uh this thing is clear. You can list all your jobs. Now uh here guys you can see. So this will give you a fine tune model. This particular code snippet will give you a finetune model. So I'm calling client. finetuning jobs list. Okay. Then jobs will be there and then from the job actually I'm going to be check the finetune model. So regarding each and every job one fine-tune model will be associated. I will get one finetune model. So I can get that finetune model from here. So let me run it. So over here you can see. So uh sorry I run it uh three times. Okay along with this. So here you can see none none. Okay this is from the second time right? and after the finetuning guys I will get my latest model over here. As of now I'm getting none because the finetuning is happening in back end. As of now it is not completed. So once it will be completed I will get my model over here. Okay. So one first time when I started the finetuning before this tutorial I cancel the job. Second time I have completed the job. Okay. This is my finetune model. Now this time in this tutorial again I started the finetuning. It is running in a back end but still I didn't get a model. So once I get a once I will get a model. Okay. So the model name will be reflected over here. Everything I will show you from the dashboard don't worry. Uh so yeah this is uh it guys for the fine tuning. Now if you want to chat with your model so here is the model guys. So you can keep this model you can copy the model name like this and you can keep it over here this particular model right. So here is a model this is the role then there is a content there's the like user and here is a uh like question from the user. Okay. So I hope uh this thing is clear like how to perform the finetuning. Now let me show you how where the fine-tuning job is going to be listed. So once you will go through with the dashboard. So just uh open the dashboard guys uh where you will get it. Let me show you. So just click on this quick start. Then click on this create an API. Okay. Then over here uh once you will scroll down. So left hand side you will get this finetuning. So just click on this finetuning. And here guys see your finetuning is happening regarding this particular model. You understood guys see first time this was my finetune finetuning I cancel the job. Second time my finetuning job got successful. Okay means this is the second time again I finetune with one more data set. So yeah this is my model. Now this is I'm doing in front of you. Okay this is your model which I'm finetuning. So here you can see this is the model name is status it is running. Then this is a job ID. Then training method is a supervised suffix name is this one. Okay, this is a base model name created at this time. Then data sharing is private. Okay, epox is three, batch size 16, learning rate multiplier is one, seed is this one. Okay, then the other detail. So here guys, you can trace the everything right and yes, my finetuning is running. I hope you got it what I'm doing now. Now if you want to do the finetuning from the dashboard itself without this Python code see here I'm doing the finetuning using the Python code. So if you want to avoid this process if you don't want to use this Python code simply you can fine-tune it from the uh dashboard also. So see right hand side you can see the option this create one. So just click on this create. Now once you will click on the create see you just need to fill out this particular form. So method is supervised. You can select the other method also. Then after that you can select the base model. So select the base model then suffix name then seed uh just to like avoid the randomness then training data upload your training data then validation data upload the validation data configure some hyperparameter and then create the job guys that's it nothing else and then you can perform the fine tuning so guys this finetuning will take some time uh maybe it will take 15 to 20 minute so last time when I did it so it took around 10 to 15 minute only so let me again give you the quick recap all. So the training is going to be start from here and it is very easy to understand. So this is my client. So I just uploaded my file. So once I will upload the file, it will provide me a unique ID regarding that file. So as many as time you will upload the file. You will get the unique ID. Okay. So far I have uploaded four times. So I'm getting I get I got four unique ID. This is the latest one which I uploaded inside this tutorial. Okay. Uh then guys, this is my training file ID which I uploaded. Now this is my suffix name. So I'm performing a finetuning of this model. Okay. Once I will get the finetuned model. So this name will be associated with this particular model name. This is my hyperparameter. Okay. I think you understood all the hyperparameter. See this is my training job. Uh this is my training job guys which I created. Okay. Again I got a ID. So I can list my all the training job whatever I have done so far. So you can see over the dashboard I have performed the finetuning three time. This is the latest one inside this tutorial. This is this I have done like just for the practice last time. So here you can see I have done on 16th of January. Then this I have done again on the last time 9th of January. Okay. So all the three uh object ID I'm getting over here. Finetuning job So if I want to check the model so yes I can uh run it. I can uh like basically run this code snippet. So job. finetune model. So first model I cancel the job. Second was completed. So this was the final model. After the finetuning I got this model. This was the third one. Okay. So which is still running. If you will again check you won't get anything because the job is still running over here. Once this will be completed you can access your model over here. Then guys after accessing the after getting the model you can check with your model. So here is your model guys you can provide the model. Here is a message system message and this is the uh user message. So once I will run it guys. So I'm just checking with the previous model. This is my previous model which I fine tuned. So I'm just checking with the previous model and here let's see whether it will be able to answer to me or not. So yes it is running. See I'm able to get an answer guys. So see this is my final answer. So like uh so just understand about the data guys. So if you will go and check the data. See this was the data guys. Uh just a second. This one. So just understand about the data. This data set is all about the uh smartphone. So just assume that your uh GP model don't know anything about the smartphone about your shop. What kind of customer is coming to your shop? Okay. What kind of question they are asking? So you are going to be create uh one chatbot for your shop for your local business and this is the data right this is the question answer. uh so you want to be tune your GPT model on top of this data so that whenever someone is visiting your website uh model can reply in a well manner okay so this is all about this is the like use case guys okay so here uh you can see uh yeah so my model is able to generate a response so see this is the response see this is the previous model I finetune it on 16th of January so after completing the training guys after this uh training so as of now it is saying it is in baiting So once it will be completed so you will get this green icon succeed. Then you can access uh this particular model. See this is your output model. Uh this will be your output model guys. Uh you will get over here itself once the training will be completed. Okay. So yeah this is it for this particular video guys. I hope you understood. If you want to access this model guys. So what you will do for that? So you just check you will just check over here. You will just run it. So you will get your latest model. Okay. Instead of none model you can pass that model over here and you can do the chatting it for your business right whatever data you have just format your data and fine-tune your model now guys one more thing uh here you can see I'm going to be call I'm calling a different methods over here client fine-tune jobs uh list right and then here you can see I'm going to be call this client file list so if you want to deep dive into each and every method so what you can do you can simply Click on this API reference. Now after clicking on this API reference, just scroll down over here and you will get this finetuning. So just uh scroll down right. So see all the parameter and all everything all the method function and uh like all the parameter of each and every method and function you will get over here. So guys uh if you want to explore uh each and every method function in a detail regarding the finetuning then go and check over here. So yeah, I uh shown you each and everything guys. Now I hope everything is clear to all of you. My training is still running. Uh and yes, it will take some time for you as well. But yeah, how to access the model and all everything I shown you. So yeah, this is it for this particular video. I hope you understood how to fine-tune the GPD model using the open API. In the next uh video, I will show you how to fine-tune the Jimny based model using the Vortex AI API. Until thank you. Bye-bye. Take care, guys. Hey, hello everyone. Welcome back to my YouTube channel. My name is Sunonny and I'm back with another important video. So guys, in this video, we'll see how we can fine-tune the Gymni model using the vortex AI. Yes guys, so in the previous video, I shown you how you can fine-tune the GPT model using the OpenAI API. Uh now in this uh video I will show you how you can uh fine-tune any gymnast model using a vortex API. Hey hello everyone welcome back to my channel. So guys in this video we'll see how we can fine-tune the Gymni model using the Vortex AI. Yes guys, so in the previous video I shown you how you can fine-tune the GPT model using the OpenAI API. Uh now in this uh video I will show you how you can uh fine-tune any Gemini model using vortex API. So uh guys if you don't know I started with this end to end fine-tuning playlist where I uploaded uh 20 videos so far. So in the last video I shown you the GPD fine-tuning. If you haven't seen this video, please go and check. Now before that, I uh discuss a different framework with respect to the LLM finetuning. And uh before that guys, I discuss the fundamental of the LLM fine-tuning. So guys, uh if you don't know anything in the LM finetuning, then this playlist could be one-stop solution for all of you. I will highly recommend at least this three video from my playlist, video number 14, 15 and the 16. or else you can follow this LLM fine-tuning crash course so that your all the fundamental of the finetuning will be clarified. So where you will get this playlist guys? Uh once you will visit my YouTube channel and if you will check with the playlist section. So there only uh you can check with this end to end fine-tuning playlist. Not only fine-tuning playlist uh I have so many other playlist like LM ops, lang chain course, langraph course, advanced rag, basic rag, multimodel rag. Everything guys you will get on my YouTube channel with respect to the generative AI. So if you are willing to learn generative AI then please go and check with my YouTube channel. Now guys uh let me show you that what all thing what all points I'm going to discuss inside this particular video and then step by step one by one we'll try to cover up. So uh first guys I will give you the walk through of the Jimny API uh Google AI studio documentation. Uh then I will give you the walkthrough of the vortex AI documentation. uh then uh I will explain about the fine-tuning method the different fine-tuning method which is being supported by the vortex AI then uh I will cover the data set format how basically you can format the data set for the Jimny finetuning then I will show you the costing token tokenization and all everything so we'll see how many tokens are present in my data set and I will show you the cost of the model whatever model basically we are going to fine-tune through the vortex AI uh then guys I will show few models supported for the finetuning that what model being supported by the Gemini API by the vortex AI. Okay, both are the different thing I will discuss about both thing what is the gymn API and what is the vortex AI or vortex API. Uh then I will demonstrate the fine-tuning via Python API or via Python SDK. So I will show you the end to end process how to like upload the data set how to start the finetuning job how to monitor that how to get the test endpoint and then finally we'll do the inferencing. So these many thing we are going to discuss throughout this video guys. So if you want to become champion in the jimny finetuning then this video could be a one-stop solution and not only for the learning guys you can use it uh in your enterprise solution. So if you are building any enterprise solution so this uh sol this fine-tuning could be very useful. You can uh train your uh domain specific model and then you can utilize it. Again guys this is not a open-source model. This is a closed source. It is being provided by the Google. So we don't have access like where we can download the model. But yeah we can access the model via API. So uh guys I hope uh the agenda is clear everything is clear. Now let's start let's begin with the video. So whenever we want to access the Jimny model so how we are accessing that we are simply writing Google AI studio. So guys uh here is a Google AI studio. Now once you will open it uh now uh so guys uh this is a Google AI studio uh where actually you can access the different model you can wipe code AI app or uh you can get the Jimny API key and even uh you can explore their documentation. So uh let's click on this explore documentation. Now once you will documentation you will uh redirecting to this page. Now here you can get the complete overview of the Jimny API. Uh you can uh quick start if you want to quick start in any sort of a language like Python, JavaScript, Go, Java, C. Okay. Uh you can get the API key from here as well. So they are giving you the option to generate a Jimny API key. Uh then you can access the different models. So the different variant of the Jimny is available over here. Uh Jimny 3 Pro flash 2. 5, 2. 5 Pro, 2. 0 O flash flashlight flash light. Okay. Uh apart from this you can check with this nano banana. So this is the very popular model for generating a images. So you can access this particular model also. Uh then a couple of more multimodel like Vo for generating the video for generating the lyrics. This is the model Laria. Uh for generating a image there is one more model image gen. You can explore this model right? Uh you can uh explore the embedding related model also. So if you want to generate a embedding for your rack system uh then the other multimodel for the different task right uh you can explore the pricing also. So they are giving free tire. So if you are learner if you are a student then you can avail the free tire but uh here you will get everything in a limited uh access means you will you can access the limited model for the limited period of time with a limited token. So if you are willing to uh create something serious then you can go through with the spade version or else you can take this enterprise version. Uh guys uh this is all about the Jimny API Google AI studio. But guys apart from this platform Google is providing you one more uh platform that is called the vortex AI. Now uh guys this vortex AI actually you will get it over the GCP over the Google cloud platform. Uh so uh Google is not giving you the fine-tuning support over here over this uh Jimny API. uh if you want to fine-tune your model then for that you will have to explore the vortex AI. So vortex AI it is a similar platform like AWS bedrock. If you know the AWS bedrock Azure cloud foundry so it is a similar to that only. So if you someone don't know about the vortex AI you can go and search it is a complete uh and the unified platform for building the AI related application over the Google okay over the GCP over the Google cloud platform. So yeah definitely I'll give you the quick walk through of the vortex AI. What is a vortex AI? I will show you that and uh then uh guys step by step one by one we'll try to fine-tune uh the Jimny model. uh nowadays if you're writing uh Jimny finetuning over the Google Jimny finetuning so you will get uh this link right so AI. google and here they have clearly uh written with the deprecation of the jimny 1. 5 flash in May 25 we no longer have a model available which support fine-tuning in the jimny API or AI studio uh but it support in the vortex AI. So guys uh if you want to find you the model then you will have to go through the vortex AI. Now you uh you open the vortex AI open this hyperlink. Okay. So you will be redirecting to the dashboard. This is the uh sorry you will be redirecting to the documentation. So this is a documentation guys. Here they have given you the complete guide uh complete uh basically detailed documentation of the finetuning. Uh so this uh basically documentation will help us a lot. they have given everything in a very detailed over here. So uh definitely we'll follow step by step but guys it is not that much easy. I will show you how to follow it and how to perform the finetuning because apart from this particular code snippet and all we required a few more thing few more setup related step. So uh I will guide you related to that. So uh guys, I hope this thing is clear. You understood that Jimny API is not supporting to the finetuning. For that, we'll have to go through to the vortex API. Uh and uh here is a documentation of it. So I will give you each and every link in the description so that you can follow. Uh now guys, uh first of all, we have to uh go through the console. Let me guide you from a scratch. So guys, if you are writing over the Google GCP, okay, then uh you will get this particular link uh this particular website cloud. goo. google. com. Uh now once you will open this cloud. google. com uh then uh you will get this page. Now this is the homepage actually. So from here only you can access the GCP documentation. See this is the complete documentation. So you can navigate to this uh page uh this page basically which we have opened right from here also. See this is the complete navigation. So from here also you can navigate it. Uh and apart from this one guys uh this console also is very much important. So just click on the console. uh this console basically uh this particular one this console basically it is similar to the AWS console the homepage from here only we can uh navigate to each and everything. Uh I hope guys you understood everything uh like how to navigate to the GCP console uh to the GCP documentation and what is the meaning of this particular documentation. Now let's explore uh step by step couple of more thing uh then basically uh I will show you the finetuning. So guys uh we'll do the complete practical in the Google collab itself. So here I have opened one new Google collab and I'm writing the name of it. The name is Jimny with vortex AI. Okay. So, Jimny finetuning with the vortex AI. Now, uh I shown you guys uh this is the documentation. So, first uh let's take a quick walk through of this documentation then I will come to the practical. So uh here guys you can see this is the section model tuning. Now here only they have given you the complete detail about the finetuning. So what it is and what it is about. So you can read this particular documentation for the more detail for the self-arning for the self understanding. Now what model is supporting? So uh this these are the model guys. GPD 2. 5 pro uh GPD 2. 5 flash light uh 2. 0 0 flash and 2. 0 flash light. So these many model is supporting for the finetuning or you can only fine-tune these mentioned model. Uh now apart from this one guys you can check out like what all type of method they are supporting. So for that you can click on this tuning jimny model. Now here basically you can check out this supervised finetuning and this preference tuning. So as of now they are just supporting two method. One is the supervised finetuning and second is the preference tuning. So if you don't know about this supervised finetuning and the preference tuning then you can check out with my previous videos the crash course which I uploaded guys. Uh there I already discuss about this uh supervised finetuning as well as the preference tuning. Uh now uh in this video I will show you how you can perform the supervised finetuning. So once I will click on the supervised finetuning see I will get the complete detail of the supervised finetuning. Uh now apart from this one guys I will get the complete detail like how I have to prepare the data. So uh I can prepare my data in this particular format. The format basically they are providing to me. Uh definitely I will show you the data. I already prepare a data. Uh then guys uh this is a complete guide of the supervised fine-tuning. So yeah step by step one by one we'll follow each and every step. Uh we'll I will take a reference of this uh documentation only. Now supported modality guys. So they are supporting to the text tuning means we can simply give the conversational data uh simple text only uh in the JSON file in the JSON file. We can provide the document also. So if we are directly providing a document any document PDF or document or any docx file in that case also we will be able to fine-tune our model. See here they are giving you the complete detail regarding that. Uh if you are providing the images, audio, video, so in that case also you can fine-tune your model. So guys, not only the text uh we can give the different type of data and using those type of data we can fine-tune our model. Okay. Uh now preference tuning guys. So you know preference tuning. So this preference tuning we can do using the RLHF or we have the latest technique that is called the DPO direct preference optimization. So using the DPO using the DLHF we can perform this preference tuning. So here is a complete detail and a complete guide of the preference tuning. So for definitely in the upcoming videos I will talk about it. Uh now guys I be talking about the introduction of the tuning. So in tuning only they have mentioned. So they are supporting two approaches. One they are first is the parameter efficient finetuning and second is the full fine tuning. Okay. So I already discussed about these two method. What is the paft PFT? What is the full fine tuning? If you don't know about these thing you can go and check with my previous video. I already discussed about the paft and the full finetuning. So guys they are supporting two finetuning again I'm summarizing one is the SFT supervised finetuning and second is the preference tuning. Now how we can do it? So we can do in a two-way okay we can take two approaches either we can fine-tune the all the weight okay that is called full fine-tuning or else we can fine-tune the subset of the weight that is called parameter efficient finetuning. LoRa is one of the technique where we achieve this parameter efficient finetuning means using the Lora technique we can implement the PET okay parameter efficient tuning I hope guys this entire thing is clear to all of you now let's come to the uh practical part so guys if you want to access any model from the vortex AI so you will have to follow
Google Cloud Vertex AI: Fine-Tuning Gemini Models
some additional step so let me guide you through uh those step so uh guys uh once you will go through with this particular documentation And if you will check over here the supervised tuning let me show you the supervised tuning. So they are giving you the different option to perform the supervised tuning. So uh you can check over here how you can create the tuning job or you can create via console Google geni SDK you can create via vortexi SDK for python. You can create via rest api or via collab enterprise. So guys this collab also it is a uh product of the Google. So they are giving a direct support to perform the finetuning via collab enterprise. So guys as of now I'm not going into this collab enterprise using the rest API. Okay using this vortex SDK for Python or console. I will perform through the Google geni SDK. So I will choose this Google geni SDK. Now using this Google geni SDK only I'm going to perform the finetuning. Okay. So I can show you how to do that uh using this Google geni SDK. If you want to perform using this vortex SDK, you can do that. So using the Google geni SDK, you can it is similar to the Google AI studio. Uh but that is a different platform. Now this Google GI SDK, it is under the vortex AI. So yeah, we can directly access the Jimny model, the different uh variant of the Jimny model and we can fine-tune it. If you are going for this vortex AI, so along with the Jimny model, you can do few more thing over here. Means you can access the few different model few different uh services of the vortex AI. If you don't know about the vortex AI guys I can show you from the console. I can give you the quick walk through of it. So uh here over the console you can uh simply search the vortex AI. So once you will write the vortex AI you will get the vortex AI. See this is the vortex AI. Now just click on it and see this is the complete platform of the vortex AI. they are giving you the different things. See this is the vortex AI studio chat similar to the Google AI studio. Uh you can test out the different model over here. Whatever model are available over the vortex CI but if you want to check the homepage home of the vortex CI. So you just need to click on the vortex AI here and then see this is the option they are giving you the dashboard model garden in the model garden actually you can see uh the different model actually Jimny 3 image gen 4 v3 llama 4 uh even they are supporting to the different other platform like anthropic meta hugging face mist AI2 AI21 lab so many uh thing they are supporting over here now apart from this one guys you can see the other option they are giving the option to evaluate the model. They are giving you the tuning. Okay, the tuning basically which I was talking about. Uh agent builder. So agent designer is also there. Then here they are giving you some notebook option. You can launch the notebook from here itself and then you can start working over here. Then uh they are giving you the other option regarding the model development like feature store, data set, training, experiment, metadata. So this vortex AI is a full-fledged platform for managing the AI related model for deploying the AI related model. Okay. So you can do everything over here with respect to the artificial intelligence. But again guys you will have to pay something for this particular platform. If you are going to use this platform freely then you cannot access anything from here. Uh first of all you will have to add the payment method then only you can access the services from the vortex AI. It is similar to the Google uh sorry it is similar to the Amazon badrog and the Azure cloud foundry. So I hope guys you understood about the vortexi platform. I given you the quick walk through of it. the vortexi documentation with respect to the finetuning and yes we are going to use this Google geni SDK for perform the finetuning. So let's begin guys. Let's start uh let's uh do the finetuning step by step. one by one we'll do the complete practical and whatever thing will come into in between uh definitely I will uh explain you that part through the documentation or through the GCP itself. So first guys I will install the Google ji SDK. So uh here is the package name is Google geni. I written this pip install upgrade Google ji and first let me connect with my runtime. So I'm just changing my runtime. I will select the CPU only because I don't require any GPU here because I'm not going to train the model on my own server. Uh the model is being trained over the Google uh server only. I'm just hitting it through the Google API. So uh guys, yeah, first I will select the CPU and then I will connect make a connectivity install this particular package. Now after that guys, what I will do? I will uh write the project ID. I will write the location and I will uh write the model name that which model we are going to find you. Now guys uh here uh you can see so I installed this particular package. Now after installing this package, it is giving me a warning that okay you have installed the package but please restart the runtime. So you just need to click on this restart session. Uh you can restart the session guys. See my session is getting restarted now. after restarting the session I can uh simply load this project ID location in the model. Now you must be thinking Sunonny from where we got from where you got this project ID location in the model. So guys that's why I was saying this finetuning is not very straightforward whatever code they have given you in the uh documentation if you're directly going to be executed it will not work until and until unless you are not doing a proper setup. So guys uh how you will get this project ID location in the model. So first of all you will have to go through your Google uh console. So just open your Google console. You can directly write the Google console in the Google uh browser itself you will get it. Uh now here guys you can see so once you will create account right once you will log with your account. So guys you will get this project ID this one. So just you just need to copy this project ID and you need to keep it over here. See I already kept this project ID over here. It is the same project ID which I copied over here. Okay. So guys what you have to do you just have to copy the project ID and you have to keep it over here. Now location wise guys you can choose any location uh wherever basically from wherever whichever location you are going to be access the model. So what you have to do you just have to go through the vortex API uh dashboard. So just click on the dashboard. Now once you will scroll down guys. So here only you will get a option to select the location. So this US central one is a by default location and I selected this by default location only. uh you can simply check out over here you can uh simply check out the other location if you want if you're willing to select any other location you can select that location and you can mention over there okay so one is the project ID and second is the location now guys the third thing is what the model name so as I told you uh we are having a option to finetune a different model so they have given you the option to finetune a different model over here itself see uh they have mentioned the name as well uh I can show you with the introduction page over the introduction page only they have mentioned the name. So the name is uh Jimny 2. 5 Pro flash and the flashlight 2. 0 flash and flashlight. So which model I'm going to fine-tune? So guys I'm going to fine-tune this Jimny 2. 5 flash. Okay. Now why I selected this model? Uh so guys I would like to show you one more thing the pricing of the model. So I already open Let me uh show you the pricing of the model. So guys uh here is the pricing uh the pricing for the model tuning. Uh don't worry guys I will give you this each and every link. Uh you can navigate to this each and every link from your end as well. But guys uh it is like little hard if you are doing it first time. So don't worry I will mention it inside the documentation or I will give you inside the notebook itself. You can directly download the material from my GitHub. So guys this is the pricing for the model. So, Jim 2. 5 Pro around $25 for the 1 million token, $2. 5 flesh, $5, $2. 5 light, $1. 5. Uh, and then the other opensource model like Gimma Llama like they are giving us support for the different other model as well. Uh, now guys, I'm selected this Jimny 2. 5 flesh. So, if you will check the pricing of it. So, the pricing is around $5 for the 1 million token. Uh, obviously in my data set, I don't have 1 million token. uh in input and output I will be hardly I would be having 600 to 1,000 token. That's it guys. Uh now uh this is all about the pricing guys. Now what I will do? So first what I will do I will initialize this variable. Uh so my variable got initialized. Now after that guys I will authenticate from my Google collab to GCP. So for authentication guys you require this particular module O and then you will call this authenticate user. So once user so it will authenticate your Google collab okay Google it will make a connection between the Google collab to uh GCP whether you are able to access or not okay it will ask you certain permission and all uh now one more thing I would like to mention over here guys if you are logging to the GCP right so please create a notebook with the same ID so here you can see I logging over the GCP with this uh ID okay with the same ID this ng sunny 3365 type uh now with the same ID basically I created this notebook okay so I open this Google collab notebook so please keep this thing in your mind otherwise guys you will face a issue trouble and you will not be able to authenticate properly in your local you can do simply uh but guys if you are doing it in a collab means in local this thing is not required but if you're doing this thing in a collab then please remember this thing it is very much important otherwise you will get a issue guys now Guys, uh just uh run this cell and authenticate Google Collab. Uh so it will ask it will allow sorry it will ask the access. So just click on this allow. Uh so this pop-up will be there. You just need to click on continue and uh give the permission. That's it guys. Nothing else. Now you can access anything from the Google Collab. Sorry, Google uh cloud platform. Uh you successfully authenticate. Uh now after that what you have to do? So after that guys you have to import couple of uh module. So the first thing is the time uh the second is the jai. Okay this class we are going to be import from the google. Uh then I'm going to be import this http option for making a connection making a request between the vortex API and this vortex API in this local sorry on this from this collab. Okay. So this uh HTTP option will be required not only the collab from wherever you are making a connection. Okay, between the GCP, GCP vortex AP vortex AI or this uh server uh you will have to import this HTTP option. Now guys, if I'm saying GCP or Vortex AI, then both are same, right? And we have two way to access the Vortex AI. The first using the Google Genai SDK. The second is Vortex AI SDK. Understood guys, don't be confused here. Okay, please uh like uh this is this could be the confusion for all for most of the people. So GCP is a cloud platform over the GCP you will get the vortex AI. Okay, this is the service. Uh now this Vortex AI you can access in a two-way. The model over the first is the Google geni SDK. So here we are using Google geni SDK. I hope now it is clear. So uh the another one is the creating tuning job. So if you want to create a job guys, so this is a module for you. Then the next is a tuning data set. So yeah, this is for the data set. Uh if you want to configure the data set, I will show you how you can configure the data set. Google Collab sorry Google uh this Vortex AI GCP actually will suggest you to keep the data in their own storage and then access the data set. uh I'm not going to be keeping my local server or over the Google drive. Uh I will just take the data I will just keep the data over the local server for over the collab just to validate it. That's it. Nothing else. Okay. Just to check the token and all that's it. Uh now here you can see the AI platform. So this AI platform is one more class actually under this Google cloud module. Uh this is for the cleaning purpose. I will come to that. Uh and even I will give you the description of this each and every module. Now after that guys what I will do? I will define my client uh client basically to access my uh model. So jiclient I will call this particular method. Then I will initialize the different uh parameter like vort. xi true uh then project id then location and then http option. So I am saying http option and I'm mentioning this v1 vita 1. So it is uh just like uh to communicate with the vortex API. That's it guys. So you just need to mention this specific detail. Okay, this specific object. Now I let me initialize the client guys. And after initializing a client, what I can do? I can check whether my model is working or not. Uh the model basically which I want to access uh this Jimny flash to Jimny 2. 5 flash whether it is working or not. So here I am calling client domodel. generate content. Here I'm mentioning my model name and here I'm giving my content. Now once I will run it guys. So if everything is fine I will be getting my response. So let me check whether I'm getting my response or not. So yes uh here actually I'm getting my response means my model is working fine. But guys uh this is not correct for everyone means uh you might get the issue means error over here. Now what kind of error you might get over here? The error with respect to the billing. Okay. So as I told you guys this GCP is providing you some free credential but it is not applicable for the vortex AI uh or for accessing this model the model from the vortex AI model garden right the model garden which I shown you just now right uh 2 to 3 minutes back. So guys if you want to access this model then for that you will have to enable your billing. So for enable your billing you just have to go through your console. So first uh click on the console. See where is the console? This is a console guys. Now over the console you just need to click on this billing. Now after clicking on this billing guys. Uh let me click on the billing. See I already created my billing account over here. Okay. So here guys. And you can see my billing account is activate right. So far I got 10 rupees of cost. See you won't get too much cost. And to set up this billing account is also very easy. very easy guys. So what you have to do you just have to create the billing account over here. Uh I already created a billing account so I cannot show you but it is very easy guys. Uh means you will just get a option over here to create a billing account. Just click on that and guys you won't believe you don't need to add any credit card and all you just need to mandate it from your G API Google API. Yes. Okay. So just uh you will see once you will create account. Let me check if there is a option to show you one more time. I will have to check that billing is here. Okay guys, you can check. Okay, so you will get option to add one billing account. I already added that's why I'm not getting. So uh you will get one QR code. Okay, while you are setting up the billing account, just scan this that QR code and automatically that uh automatically that auto pay will be set in your GP in your Google pay like we are setting up for the Netflix for the prime right for the basically hot star right for whatever in the same way basically you can set up the autoay for the Google cloud platform also and you won't get much cost guys just 5 to 10 rupees okay uh even in the finetuning also I'll show you very minimum cost 10 to 15 rupees that's it because we are just learning we are just testing we are not creating a enterprise level application the cost so that's why the cost won't go in the lakhs but guys again after uh like basically finetune clean up everything that is required otherwise the cost would be there okay the cost will be the uh increasing by the time uh now here you can see so we are able to get the answer but if you are getting any error related to the billing or something then guys of over your account you will have to set up your billing uh otherwise you won't be able to access this particular model even for the uh even for generating the output or for the finetuning. Okay. Neither you can generate the output nor you can perform the finetuning. Nothing you can do until and unless you are not setting up the billing account. Now uh let's begin. Now guys uh before uh proceeding let me tell you one more thing guys. Uh you know uh in my past days I have created one video on top of the generative AI road map. So see this was a video generative road map 2026. So guys I create I launch one GNAI boot camp. Okay. So I launched one genai boot camp. Uh let me show you that boot camp. So I collaborated with Kish Nyak. Uh you know right you know Kish Nyak. So I uh launched this full stack genai boot camp along with a Krish Nyak. Here is a complete detail. detail of this course. You can uh go and check out this particular course. And uh here is a complete syllabus of this course guys. So this course will take five to 6 month to complete and it is full stack genai boot camp which I created. Okay, which I am going to take uh behalf on this road map the complete end to end geni road map. If you forget about this road map uh let me show you the uh the points what are points I have discussed over there. So these many modules these many points I have discussed 1 2 3 4 5 till 17 till 18 guys. So the all these modules I'm going to cover inside this particular course. Okay. So I will give you the complete detail of this course in my description. Uh you can uh definitely check out this full ST generative AI boot camp 26. It is for those people who are willing to learn the complete gen AI from scratch to advance. Okay. Uh now coming back to my video. So here guys you can see. So now let's perform the finetuning. So what I can do guys I can check whether I already have some job or not some already running job or not because before this video I tested actually I performed some few more fine tunings actually. So let me show you all the job basically which I performed so far. So once I will call this client doturing. list. So I will be getting my jobs. Now I can iterate on top of this jobs. Uh so here I can write uh jobs then here I will get my job. Uh now I can write this job. Okay. Now see guys so these two job I already executed uh means uh just for the practice before this video. So if you want to check your previous jobs uh your previous finetuning job then you can check out like this. Now if you want to initiate the new job uh new fine-tuning job how you will do that? I will show you. But before that guys, let me show you how you can format the data set. So guys, you know uh you know how to format the data set for the uh for the GPT. See this was the data set basically which we have formatted for the GPT. Uh I think you all are familiar if you have seen my previous video. So we have the role uh then contain then role then contain role will be system uh then role will be the user assistant and everything is going to be wrapped up into this single JSON object and we have multiple JSON object which is separated by the new line. So the file name was the data dojson. Okay. Now guys uh let me show you how to uh create a data set for the Jimny finetuning. So this is the file uh this is the data set for the Jimny finetuning. The format is a little bit different over here. Just check out over here. So we have system instruction in instead of the message. Now role will be the system. Then apart from this we have one more key that is part. Now under the part actually we will be having the text. So here guys uh you will get the system message. Okay. Under this part then we have a content. So under the content actually you will get a user message and then you will get the and then again we will be having part. So under the part basically you will get the assistant message. So likewise we are going to format. If you are getting confused just read it out from your end you will understand and just make a differences between the openi format and this format. And believe me guys uh once you will make a differences once you will keep this uh format and that format easily you will understand because I know the open format was a little easier one compared to this one. So uh guys here we have a system instruction then we have a role okay uh okay under the role basically we have a parts now under the part only we have defined the me actual content uh so you can see the role is the user then role again one more role is a model so role user means uh user is asking a question role model means model is generating a answer okay so this is my output and this is my user question. Now once you will read it from your end guys uh definitely you will understand what it is and uh how basically we have created what I'm doing guys I'm just going to be check with this data set. So I'm uploading it over here and I'm checking how many tokens I have and then what will be the price basically. So I'm uploading my data set over here over the server. So let it upload just okay. So I got my data set data dojl. Now first uh guys I will check uh with all the tokens and all. So for that I already created one function. Uh let me show you that particular function. Uh this is the function guys. Uh let me copy and paste. Uh yeah this is the function. Just a second it is not getting copy. Yeah I created this function this one. So this function uh part from the text. We are checking part then content from the role and text. Okay. then uh example to content. So likewise guys what we are doing we are going to be check the complete data. Okay data part content and then the entire content. Now what I will do guys I will call this particular method. Let me uh give you one more method so that you will get a clearcut understanding that what I'm doing. So I have one master method count token for JSON. So I'm giving my JSON path over here. I'm giving my model basically it will perform the tokenization. uh then uh shown top end okay now here guys you can see this is not going to be written anything here I will be giving my path I'm checking whether the path exist or not okay then per row how many tokens is there we are going to be check that uh we'll open the path then here you can see we are going to be read the line the one single row one single JSON object is called the example so example to content we are going to be check the content then we are going to be calculate the tokens you know how to calculate the tokens in the previous video also in the open eye video also I explain you this thing if you don't know guys you can go and check I use one model over there and using uh that particular model I have performed the tokenization so here for the tokenization guys I'm going to use the same model this Jimny 2. 5 flesh uh if you want to understand more about it so here is the uh like page okay uh it's a official Google page uh I can give you this particular page where you can understand the count of the token. How basically they are going to be count the token. So uh they are using this model only Jimny 2. 0 flash Jimny 2. 5 flash only to uh convert our data into the token. Okay. So you can pass any sort of a prompt you can convert into the token and then you can count the token. If you will go and check with my previous video there I have used a different model other than GPT. So OpenAI is providing with a different model for performing the tokenization and assigning the ids. Okay. But uh guys this Google geni it is providing you the uh this model only the Jimny model only to perform the tokenization and to assign the ID. If you not if you're not familiar to this token tokenization and after the tokenization how to assign the numeric ID and all then you can check out with my finetuning playlist I uploaded one more video over there the complete hugging face crash course. There I have explained everything about the tokenization and all. Okay. Now what I will do guys? So here uh this is the uh I'm going to perform the tokenization and after that guys what I will do I will check with all this parameter. So I will give you this particular method you just you can simply check out check it out from your end. This is not very much important. This is just a custom method which I have written to give you the detailed understanding of the data. So once you will run it guys uh you will uh get the method. Okay sorry you will get the different matrices about the data. So let me run it and let me show you. So here is my file data. json JSON which I already uploaded over here. Now how many example we have? 10 rows. In total 10 rows we have this is the total number of tokens 5 64. Now minimum number of token in the example 51. 62 is a maximum one and 56 is the average token. In first line, second line, fourth line, how many tokens are there? So here you can check that. Okay. So guys uh it is in ascending order. So in which row we have a maximum token? Uh top 10 largest. example here I have like shown. Okay. So this is a complete detail of the data means in total we have 564 token inside my data. json inside uh this particular file. So guys, I hope most of the thing is clear and guys this uh data set actually it is all about the uh mobile okay so mobile customer support you can imagine in such a way that this Jimny model don't know about my per about my private business so I'm running my private business uh like mobile shop or something for that actually I want to create one customer bot based on my previous conversation with the customer so this data is all about the private convers conversation with my customer and uh on top of this data only I want to fine-tune my model so that I can utilize it in my chatbot. Okay, which further will assist to my customer. Now uh here guys uh so everything is clear. I hope you understood about the data set. Now let me show you one more thing. So we are going to check the costing. So for the costing also I written one more function. Let me give you the quick walk through. Guys, if you're not getting this particular function means uh if you got the confusion then don't worry just go through with it step by step. you will get it. Uh again it is not very much important. The main thing is the finetuning which I will show you after this one. Uh now here you can see we are going to be create a class. Uh this is my uh like data class. Now here I'm I have a pricing. So Jimny price Jimny 2. 5 flash pricing. Jim 2. 5 pro and Jimny 2. 5 flashlight. So I kept the pricing like this. So I took this pricing from the documentation itself. Uh once like I shown you the documentation. Okay. then training cost in USD and training cost for the model. So I will get the complete uh cost. So once I will call this particular method. So here you can see I have 564 token uh model is this one Jimny 2. 5 flash. I'm using it for the SFT for the supervised finetuning. This is the actual cost for the model and this is the estimated cost for my tokens. So guys you can utilize this particular method for counting the token inside your data and to check the estimated cost. Okay. So this two function I have written you can just go through with it and you can check uh again this is not very much important so I'm not putting too much effort over here. Now coming to the next part. So how to perform the uh finetuning guys? How to uh basically fine-tune that specific model. Now I will just take uh 5 to 10 more minute and we can wrap it up guys. Okay guys so the next thing is the data. So uh here you can see I cap the data over the local server of the Google collab but guys uh this uh Google cloud platform is not recommending this one means this vortex one. So what they are saying if you wanted to use the data then you will have to keep it inside the Google cloud storage. So how to keep the data inside the Google cloud storage. Now let me show you that uh that's why guys I told you this uh finetuning is not a like very straightforward what in whatever way they have given inside the documentation. So what you will do guys you will just go through with the console just uh click on the console. Now over here only you will get this cloud storage option. Now just click on this cloud storage. After that guys uh here is the option to create a bucket. Just click on this bucket. Uh and uh I see I already created a bucket uh Jimny SFT custom. So if I will click on it. Jimny custom exception sorry Jimny SFT uh custom. This is a this is my bucket. I created that bucket. You know about the S3 bucket. It is similar to that. So here I kept my data do. json. Uh so what you can do guys you can create your own bucket and then you can keep the data over there. So if you don't know how to create a bucket so it is very easy to create just click on this create then write a name click on the continue and then create okay that's it guys nothing else you no need to do
Data Management in Google Cloud Storage Buckets
anything over here so here you can see I already created this bucket Jimny s custom and inside this bucket I already kept my data so yeah in a same way actually you have to do it you have to keep the data so GS means Google storage then jimny sfd custom this is my folder This is my bucket name and under this bucket, this is my data set. Now what I will do guys, I will initialize this training data set and here you can see uh my training data set. Okay, so this object is being created. Now what I will do guys, I will create my job. So here I'm going to create my job client. tuning. tune. Uh I will pass my model which model I want to be fine-tuned. Now here is my data set. Okay, this is my data set and then this is my other uh name. Okay, other configuration actually whatever configuration I wanted to give with respect to my tuning. So I'm just giving my tuned model display name. So what is name YouTube SFT jog. Okay. Uh now what I will do guys I will execute it. So my tuning job will be started. So now see guys. So here once you will click on it you can check your tuning job. So see uh your tuning job is started. See here running. That's it guys. nothing else. With this two step, you can uh basically tune. Okay. And uh here if you want to check the name of your tuning job, then uh let me show you how you can do that. So once you will write this tuning job dot name, this is the object, right? And once you will call this parameter, you will get your name. This is the name actually. Okay. So under this project, this is the ID which is allocated to your location is a UD center tuning job. And this id specific ID will be assigned to you. Now if I will list my all the job. So earlier I was getting two one. Uh let me show you that this one. So earlier I was getting two job. Now let me check how many jobs basically I'll be getting. Uh I can check it out over here jobs. Okay. Again uh maybe we'll have to call this job. So I'm just going to be copy it uh this one. So here I can copy this this this. Yeah, this is fine. Now let me show you. See I'm getting three job. Now this is my latest job. Okay. So let latest job you will get it you will get as a at a first place. Okay. So latest job always you will get as a first get at a first place. This is my like last one and this is the first one. Okay. Like I created back. So I hope guys this is clear. Now you can get the other detail also. Uh so here I can show you one more uh code snippet. uh with this code snippet basically we can get the other detail. Just a second. Uh let me check it out whether it is correct or not. So yeah this is correct. So here is my job state pending. We have two thing job state pending and job state running. So I kept it inside the dictionary. Yeah. Now what I will do guys I will check. So here I am running the while loop. Okay here I'm So tuning uh sorry this tuning job dot state. So if you will check with this particular variable tuning job. So what you will get? You will get this particular object. Okay. Uh either the job is pending or job is completed. So here I am uh running tuning job. In running state okay whatever thing is there inside the running state it will go inside either it will be the pending or running. Okay. So what will happen guys? It will go over here inside the loop. It will print the state then it will take that uh job client. turing. get and job turing job. Okay. And then it will sleep for 60 seconds and then again it will check. So let me show you what I will be getting over here. So running state is not there. This is the running state. This is the tuning job. Now let me check here guys. As you can see, so the state job is pending means the training is running. Okay, the training is still is running. So here they have given you this experiment. You can check out with this widget. So see the training is running. Okay, and you can check out the complete loss evaluation. You can check everything over here through this particular dashboard. So guys uh see this thing is running and uh if I'm going to be print this particular thing, you will not get until the job is not going to be complete. Okay. So it will wait for 1 minute and then again it will print the state. Okay, it will wait for 1 minute and again it will print the state. So in both way actually you can check. So see here the job is running here this experiment is running tuning experiment run. Okay, this is my name. This is the like ID which is being assigned right. So uh here guys you can see this is running uh and once it is going to be execute further you can get the loss and all everything through this particular dashboard and even you can configure the tensorboard also. Okay you can open it inside the tensorboard that option also they are providing you. Now uh see this also this here also the job is running means you can get it. Now uh once you will click on this tuning you will get this entire detail. Now apart from this one guys see once you will scroll down if you will check with this experiment you will get the same thing which I shown you. Okay so this is the running experiment the latest one. Now apart from this if you will check with the endpoint so you will be getting the end point. So automatically it will be deployed and it will give you the end point. Okay. So this is my previous endpoint. So automatically the endpoint will be created once the job will be completed. Understood guys. So likewise you can navigate to each and everything over here over the dashboard itself. So it will take time. Now see it waited for 60 seconds for 1 minute and then again it's shown the status. So it is saying job status pending. Now running. Okay job state running. So I can again uh refresh it and I can check where is my job right now. So once the job will be completed it will show job is 100% completed. Okay means my finetuning is completed. So you can refresh it and then guys I will show you how you can get that model. It will take time. Uh when I executed it first time guys, it took around uh you won't believe it. Took around guys uh 15 to 20 minutes. So you will have to wait maybe for 15 to 20 minutes sometime. Okay. So let me show you again. Uh so here see job is running. First it was showing pending in the first time. Then again it is taking uh like uh wait for the 60cond for 1 minute and then it is printing the state. Okay. current state. You can check out over here view experiment see the complete loss and all everything will be visible over here in some time you can check everything guys even the endpoint and all everything will be visible. So here evaluation fraction of correct next step prediction evaluation number of prediction evaluation total loss training loss right everything guys you will be able to get over here now what I'm doing so let it run uh see it will take time so I'm not going to be completed right now let me show you the inferencing using the uh previous model itself which I trained previously okay that is completed actually and that is deployed as a endpoint so here I shown you the endpoint now this one so this is my end point this So here I shown you my previous experiment as an endpoint. See it is already deployed this example SFT job. Okay. So what I'm doing guys I'm going to be stop it right now and uh what I will do I will take my previous I will get my previous job. Okay. So how I can get my previous job? Let me show you. So this will give you the latest job. Job do. Job/ job square bracket zero dot name. It will give you the latest job. Okay. But I want the uh next job. So what I will do? I will put one over here. Okay, one. So you can see over here how many jobs you have? Three jobs. This is the latest job, current job. This is like second last and this is the last one. Last to last time I have performed. If I will create new job, so that will be the zero index at the first place. So here I'm writing one and then what I what I'm doing I'm calling client. tuning. get. So it will give me the tuning job. Okay, it means tune model. Tuning job means what? Model actually nothing else. So yeah my tune I'm getting my tuning job. So yes, this is done. This is already done. Actually, you can check out the experiment and all everything over here. It is already completed this one. And once I will click on it. So see the loss and all everything is visible over here regarding this one. So if I can show you the matrixes. So you will be able to see the matrixes regarding the previous one. See likewise actually you will be able to get the trading loss and all everything. You can set the epoch and all everything that regarding that also I will guide you later on. Now I got my turing job. Now from here what I have to do? I have to get my endpoint. So I can show you some parameter state, model and endpoint. So this endpoint is very much required. So see uh job is succeed. The previous one which I ran uh before this uh tutorial. This is my model. Okay, this the model basically with this particular name and here is my endpoint. So the endpoint is also deployed. So guys, this is important this endpoint. Using this endpoint only you can access your tune model, right? tune model and here only you provided your uh data set to tune the model. Please check out over here. Okay, don't be confused. If you're getting confused then check out this particular uh like uh check out with this particular solution again. Now I'm doing the inferencing guys. So for the inferencing what I'm doing I'm calling client model generate content model tuning job tune model endpoint. I will pass my uh tune model. Okay. And then I will pass my question. So the question basically I can pass from my data itself. So here I can write most fun include a one-year limited warranty. Uh can you tell me the why most of the phone gives 1 year warranty? Okay. So this is my question. Now let's see what's going to be generated. So I can simply check out with this response. ext. Now see this is not the uh pre-trint model the Jimny model okay this is the fine-tuned model actually I given my data and I fine tuned the model and I'm accessing it I'm accessing through the endpoint this one now if I want to check the response so see this is the response and I'm able to generate the response guys understood guys so I can again give you the quick walk through so what we have done we have used the Google AI genk then we have seted this parameter model and all everything whichever model I want to be fine tuned now here is my authentication. Now this is my import statement. Now here is my client. I'm checking whether I'm able to access the model or not. If you are not able to access then set up the billing. Then I'm checking the previous job means the previous fine tuning if I've done any. Uh then guys here I'm validating the data. I'm checking all the tokens and all. See this is the matrixes I'm checking. Then here I'm checking the pricing. So yes I total I have 564 token in my data set. This is the model which I'm going to be fine- tuned. This is the actual price for the 1 million token. And this is the estimated training cost which I'll be getting. Now here I'm selecting the data. Okay. Uh I'm keeping inside the Google cloud storage. Then uh I'm setting the finetuning job. Okay. Then after that the job will be running. After running the job guys, what you can do? You can access the model. So yeah, this is the complete detail why I'm getting regard the finetuning job and all. Now if you want to access the model, you can simply access like this. Okay. uh with the latest job uh you can put the zero for the latest job and one I put for the second last job okay I'm able to get my model uh how I will be able to access my model through this endpoint I shown you how the endpoint will be created okay then uh I'm giving the endpoint and I'm giving my specific question so I'm able to generate the response that's it guys now if you want to do the cleanup guys so for the cleanup this is the uh this is the code so you can uh import this AI platform you can init initiate uh this AI platform then you can give that tuning job tune model dot model whatever model you want to be uh removed then uh you can uh basically pass it to this AI platform domodel and then model delete so once you will run it guys you will be able to delete your resources from the uh Google from the GCP actually from the vortex AI uh I hope guys this is clear uh everything is clear now uh in the pre next video I will show you how you can fine-tune in any SLM small language model and in the upcoming video I will try to come up with a different other modality like document like the images and all how you can do that and I will give you the comprehensive detail idea of this dashboard also okay what it is saying once we'll deep dive into some mathematics and all then I will come to this part and give you the very detailed idea of it until you can check it from your end uh okay this is for your self-arning now you can go and check I given you the complete guidance from my end. So yeah, that's it guys. Uh now I will see you in the next video. Until unless please like uh run this practical in your own system and if you have any doubt you can ask in a comment section. Thank you guys. Thank you. Bye-bye. Take care. Hey hello everyone. Welcome back to my YouTube channel. My name is Sunonny and I'm back with another exciting and important video. So guys uh in this video we'll discuss about the SLM. SLM stands for small language model. So guys this SLM is a very important topic nowadays. Uh every companies are training their own SLM. Uh so in uh this video I will give you the complete guide how you can download your own SLM and how you can fine-tune that. uh then in the upcoming videos I will uh discuss one end to end project where we are going to be host this SLM somewhere and we are going to access like any API back to the topic so these all are the point which I'm going to discuss throughout this video so first guys I will let you know like what is a LLM I think we all know about the LM it's a quite old topic now uh now we'll discuss we'll focus on the SLM part what is a small language model uh we'll see the differences between the LLM and the SLM. And now guys again this SLM is not a different technology actually it is a same technology but comparatively it is a smaller model like large language model is a very huge model as we know SLM are the small model okay so we'll see why these model are small we'll see the differences I will not go in a mathematical depth I will tell you that in some other video but yeah guys uh in this video I will give you the complete walk through uh complete theoretical understanding I will show you uh like the different research paper SLM leaderboard as I written over here and then we'll see the project implementation where you can uh download any model uh after downloading any model you can perform the finetuning of that uh now guys here I will show you the practical with this unsllo is a very good library if you don't know about it you can go and check with my previous video I already discuss about this unsllo inside this playlist itself uh this is a very good framework uh guys Even I have used this framework this uh video number 18 in my uh production grid solution. So where we have took one model one SLM model only we have fine-tuned on some uh data set domain specific data set and then we have hosted that model on their own server and now we are accessing even the entire organization is accessing that model for creating a chat application and all. So this kind of thing like being implemented by many of the companies guys that's why this thing is very important to understand about the SLM to how to deal with the SLM how to fine-tune that. Okay. Uh that's why guys I'm putting uh like too much effort on this side and I'm creating this end to end video. Uh at this time I don't know how long it will be. Uh now guys uh here uh you can see so I written these many topic and definitely we'll discuss it inside this particular video. Uh now first let's start with the LLM. What is LLM? And then we'll see the definition of the SLM guys. Uh so here you can see I written the definition of the LLM. A large language model is a mathematical model. Mathematical model means it's a transformer based model. Again the transformer actually it's a combination of the self attention and the neural network. uh if you don't know about the transformer uh in the previous video in the playlist itself I have uploaded a different video regarding the transformer and the finetuning of the other model okay so where I have explained the transformer architecture I just given the overview not in depth actually but yeah you can go and check over there so transformer it's a collection of it's a combination of the self attention and the neural network uh so a large language model is a mathematical model with the billions of parameter billions and the trillions of parameter if I'm saying parameter guys, so parameter means weights and biases. Okay. Uh trained on the massive and the diverse internet data. Uh it has trained on the very huge amount of data. Uh I we can say it is it has trained on the entire internet data where actually we have the trillions of token. Okay. Parameter is a different thing. Token we create from the data itself. Okay. And what is a parameter guys? So parameter actually it's a weights and biases. at the mathematical value of the model itself. So please check out with the previous video you will get a great understanding of the transformer so that you can uh like uh understand about the weights and biases also. We should all have this fundamental understanding uh even though we belong of like whoever we are right we are software engineer data scientists AI engineers right so we should have this much of basic understanding uh now guys uh if we're talking about the uh LLMs guys so this is designed or this is trained for the generalpurpose language task now what is a journal purpose language task so means uh it can chat it can write it can read it can perform the logic It can understand the logic. It can perform the reasoning. Okay. It can do the coding means every kind of task general purpose task. So like we human are communicating to each other, right? Uh in a same way this model can communicate to the human. So it is overpowering this human language actually. So that's a main name of this a LLM large language model. Uh now example wise guys this open AI you know about open A right? You know about the cloud A, Google, everyone knows about it. And these are the model from the open AI. cloud A. These are the model from the gymna. And this is the open-source model from the meta. So these all are offering LLM large language model. And we have enough understanding and the decent understanding of the large language model. Now we have to understand about the uh SLM guys. Now guys, uh what is a SLM? That is a small language model. So a small language model is a compact language model. Again it is a language model. It is a subset of the large language model only but it is having less parameter. Whereas this LLM is having a huge number of parameter like 70 billion, 50 billion, 30 billion right comparatively this LLM is SLM is having lesser number of parameter usually under 7 to 9 billion of parameter. This SLM actually it is optimized. It is optimized for the uh efficiency for the speed and for the domain specific task and uh it is often for the finetuning okay for the particular use case and uh the size is small so we can deploy we can easily deploy it on any server okay we can easily bear on any hardware this SLM uh now what is the example of this SLM guys the fi five model from the Microsoft it is a example of the SLM this GMA model it is tiny llama again it's a example of the SLM coin 1. 5B deepseek R1 dist okay it's a dist model again it is example of the SLM uh Neotron H family it is example of the uh SLM so here I tagged one image I think but just by seeing this image you can understand so many thing so just uh see this image lama is providing us SLM uh this Microsoft Google is providing us Mr. Apple everyone's everyone training their own SLMs okay and then they are making it open source and companies are using it companies are using those SLM as I told you uh because of the size because of the number of parameter we can easily bear those SLM small language model on the hardware even though the performance is not similar to the LLM but again guys we can fine-tune for the intended task for the uh domain specific task and then we and utilize it. Uh let's say I'm running one company. pharma company. Uh where basically what I want to do I want one model which can solve any sort of a query regarding those pharma data. Uh it's a internal it could be the internal project. So what I will do I will not consume any API from the uh from the open from the cloud from the Gemini. Instead of that what I will do I will take one SLM uh I will train it on that farmer data and I will host it on my server. Okay. And by the time the performance will be improved of that model as we are getting query and again we are training on the instruction data set. So these the same uh step is being taken care by many of the company and uh even I am a part of those I I'm a part of that project. So that's why guys I'm uh recording this video with my all the experience. So please guys watch this video till the end if you want to master the SLM technology. Okay. So guys here I written uh one uh line also. So before coming to this uh difference is uh let's uh read out the definition from some authentic resources and uh let's go through some uh relevant research paper. Uh so guys here I uh open the different website. So uh here is the hugging face guys. So there is one article a very good article over the a small language model. So they are saying a small language model a comprehensive overview. So uh this article is written by this John Johnson. Uh now just read out this article. It's a very good article uh over the hugging face. Okay. Uh the few past year have been a blast for the artificial intelligence with a large language model uh stunning everyone with their capabilities and powering everything from chatbot to code assistant. uh however not all application demand the massive size and the complexity of the RLM. The computational power required makes them impractical for many use cases. Uh this is why small language model entered the scene to make powerful AI model more accessible by shrinking in size. Means this person is saying large language model are the huge one which is not required at every place. uh the couple of thing right uh which can be done by the uh small model as well. So that's why guys uh the era of the this era actually is going to be a era of the small language model and many companies are going to be adapted in the near future. Uh now guys here you can see what are the small language model it they have highlighted over here. uh now apart from the see here one more thing they have written the SLM type typically range from the 1 million to 10 million of 10 billion of parameter so up to we can consider any model as a SLM model a small language model uh now over here how they have they made it how they made the small one so using the knowledge distillation using the pruning quantization so if you don't know about this topic guys then you can check out with my playlist. I already recorded uh like video about the distillation about the quantization and all. So you will get some understanding about these particular topic. But uh these are not only the thing guys we have so many things so many mathematical thing mathematical parameter using those parameter we are going to be like train a small language model. shrinking the size. We are going to be shrinking the size of the large language model. So that thing I will discuss in one of the video because I analysis that part mathematically I understood what all think like what all think is possible like how we can convert any LLM into the SLM. Okay just by tweaking some parameter just by taking subset of the layer and to implement some mathematics changes over there. Uh now guys example of the small language model. So they have highlighted the example of the small language model like llama 3. 21b 21b quen deepc small uh fi gimma the model name which I was telling you now over here you can see the benefit of using a small language model so it is required low computation it is required lower energy faster inference on device right we can host it on any device uh cheaper deployment customizability so guys these are the point of which you can focus if someone is going to ask you in an interview then you can highlight this point but guys I would suggest you have to like uh perform the practical as well so that you can justify this point not only the theoretical in terms of the practical also you have to be pro. Uh now limitation of the small language model. So yeah we have the advantage then on the other hand we have some limitation also. So these are the limitation it is having narrow scope means we cannot use it everywhere like the LLM. See LLM is a good enough LLM is a decent enough but guys if LM is overpowering something means like if it is not required somewhere where we can done the a small task with the SLM itself then why we have to spend the money okay so that's our main aim that's our main agenda right so limitation of the small language model it is having a narrow scope bias risk reduce complexity and the less robustness so yeah we have to keep this thing in our mind so wherever it is required there only we have to use it otherwise we can skip it we can use our regular LLMs okay now real world application of the small language model so these are the real world application so this is guys very good uh like blog on top of the very good article small language model I will provide you this link you can read it out now one more article which I found from the trustable resource this is from the uh like Microsoft so what are the small language models so here also you will get a overview of the small language model. Now apart from this how does it work guys? So the basic architecture of the small language model. So they have mentioned over here. Now uh the training process. So the training process would be the same one with the lesser data set. So here they have mentioned about it. The advantage of using a small language model. Yes. Uh so the same advantage which I was discussing. So you definitely you can read it uh read all this advantage of the small language model. Uh now apart from this one guys challenges and the limitation of the small language model. So the same thing they are also describing over here. So definitely you can read out this uh challenges and the limitation of the small language model and you can understand okay uh you can understand in detail. Now a type of the small language model. So again guys this is very important. So please focus on this point as of now. Let me give you the quick highlight of it. Dist version of the large language model. Dist version means any model which we have like distalized from the large language model. So I can give you very good example even I have mentioned that uh model name in my notes as well. So just uh read this name deepseek R1 distill 1. 5B. So this model actually this deepseek R1 distriger LLM right. So one kind of uh one kind of SLM are the dist one from the huge model from the large language model. The second basically task specific model. Task specific model means the model which we are training for the task only for the specific task only let's say there is one ABC organization who is training their own specific model on the do on a domain specific task right so this could be one kind of model lightweight model again guys lightweight model means the llama tiny llama okay 51 model so that is again a general purpose model which can do some uh which can do every kind of task in some limit ations. Okay, tiny llama model actually it is not a domain specific model. It is again a general purpose model but that model actually cannot answer similar to the llama 70 uh 70B model similar to the GPT4 or GPT5 model. No, it is not like that. It is a lightweight general purpose model which can do like some chatting, some writing, some reasoning, some logical thinking but not up to the mark. But if we are going to be fine-tuned that for the intended task then it will perform well. So yeah we have three kind of model means first which is distalized then second it intentionally trained for the uh for that domain and the third one is the general purpose lightweighted model okay which is a open-source one. So guys this two article is a very good article on top of the SLM. If you want to some authentic resources then definitely I can share like this uh even in the description. Okay. Uh now one more like link I can show you over here guys. See uh LLM explorer. So here guys this is a complete leaderboard of the not a leaderboard basically it's a complete information of the SLM model over this website actually you will get the complete and detailed information of the SLM. Now just read the model name the different model name they have given over here along with the maintainer size VM quantize license context length likes download modified. So they are capturing each and every kind of information regarding the SLM regarding the small language model. So you can see the different models. See guys here in total you will find out 6,000 model. So they have captured around 6,000 models or definitely we cannot go through with each and every model over here. But guys again at least try to read this name so you so that you will get some understanding okay what are the small language model are available who is providing that right? whether it's a opensource or it is providing by some community bigger giants like Nvidia like openai Google's and all. So just read it out. So model name is 53 mini 4K instruct it is being provided by the Microsoft. Now here you can see the size 4B. Okay. The llama five deepse again from the llama from the quen. Uh then again from the five from the Google. Okay. This GMA is from the Google. Then five from the Microsoft. Okay. Then this you can see from the IBM. So guys so many models you will get over here. Here you can easily compare the different SLM and according to the requirement you can utilize it. So definitely I will provide you this link. Uh I will provide you this link in the description. You can check it out over there. Uh so this is the one thing guys uh I think we have covered about the article uh like this LLM explorer okay where we have so many SLM now let's see the differences between the LLM and SLM let's take a quick walk of it and then guys I will show you one more research paper the research paper name is this SLM are the future of the agentic this is very much important research paper and right after this one we'll jump to the practical so if we talking about the SLM right SLM and the LLM. So see guys, I listed couple of differences over here. Uh you can discuss these differences in the interview as well. If someone is going to be ask you like how you have hosted your LLM, what is the difference between the LLM and the SLM? So model size in the LLM actually the model size will be very large around 7B not 7B actually comes under the SLM only nowadays along according to the definition and all. But yeah after the 10 billion parameter uh those model actually it is called the large language model uh 70 billion parameter 175 billion parameter these are very huge one there in small to medium 0. 5 billion to 7 billion parameter and up to 9 to 10 billion parameter in some research paper they have mentioned that mark okay that benchmark again there is no like certain boundary but yeah most of the research paper we will see the collective results so the collective result are saying up to 9 to 10 billion parameter we can easily host on any server. After that guys it is a little bit challenging. Now primary goal to get a journal intelligence for many unknown tasks. Now uh what is the primary goal of the SLM? High accuracy only for the known specific task. Okay. Uh training data massive multi-dommain and the internet scale data where we have trillions of token. Right. Uh now we're talking about the SLM guys. So it is a small curated and the for and for the domain specific task. Uh training cost in infra extremely expensive large cluster of the GPU and it will take week and months for the training right. Uh on the other side if we are talking about the SLM then it is affordable uh single to few GPU and it takes hour to days only. It is like comparatively very small uh this comparatively very small guys. Now uh inference cost so again very high as we know right we are paying to open AAI cloud A right the we are paying very high cost and here guys uh it is cheap and it is very fast the inferencing also will be very fast because the size is small architecture guys it is having deep transformers type with the many layers so transformer actually it is a backbone of any LLM any large language model so if you want to master the large language model guys. I will highly suggest you to master the transformer architecture. So uh it is having so many ST okay in LLM actually you will be having so many ST along with a different uh like concept of the attention like cross attention self attention. Okay multi-added self attention now here in the SLM actually you have you will be having a fewer layers and the optimize transformer block. Right now performance is strength again strong reasoning open-ended task and the long context on the other side is strong on fixed task limited open regioning. Now deployment wise mostly cloud and API based means we can uh like uh how we can read the LLM. So element through the different APIs right or if we have to be like uh or from the cloud also right so we AWS is providing us Azure is also providing us uh GCP is still like providing us even I have shown in my previous video right so likewise we are accessing the LLM on the other hand if we talking about the SLM guys so it is we can host it on the local server okay on promises server over the edge devices over the single GPUs and all so these are the quick differences between the SLM LM and the LLM. If someone is going to ask you the clearcut differences, then you can talk about it. Okay. So guys, we understood so many things what is SLM, LLM, we have gone through the different research paper, leaderboard and the differences and all. Now let me show you one more research paper and then I will give you one more example and after that we'll move to the practical. So I will just take five more minute and right after that we'll discuss the practical. So guys when this SLM got like the fame so this Nvidia actually they have released one paper the paper name was the L& M small language model at the future of the agenti. Uh so this research paper actually it was released by the Nvidia research uh with the collaboration of the GIA Giorgia Institute of Technology. Uh now guys uh this is a quite interesting and the very good research paper. uh if you want to understand this research paper that definitely go through with it. Uh try to read it. Uh I will give you the link of it. But guys uh we are not uh like able to read the research paper right and we know the we know this bitter truth. Uh so for all of you guys I created the summary of this research paper. Here you can see the complete summary of this research paper. So uh instead of going through this research paper the entire research paper you can download my notes from the GitHub and you can look into this summary. Okay. So let me highlight what all thing have been discussed inside the research paper and then guys we'll take one more example and right after that we'll come to the practical. So guys this research paper was released in 25 itself. So here if you will check the date. So the date is 15th September 2025. Now here uh they have mentioned couple of model. So let me uh show you these model. See these are the model guys. So they discuss the thing behalf on this model. And guys uh the center the core of this research paper is the uh AI agents. Okay. Because AI agents is going to be a future as we know for entire automation guys we are using the AI agents. uh and in every company people are hiring for the agentic AI for the AI agents and every company are developing their own AI agents for automating their task right so if we want some autonomous system uh then we'll have to understand the AI agent and AI agent is going to be my next playlist so if you want that playlist guys you can uh comment in the comment section definitely I will create one playlist on top of the agenti with all my experience where I will record at least 25 video regarding ing the different concept uh yeah so let's uh discuss the summary guys so here SLM are the future of the agent AKI so what they mean by SLM and LLM so let's see the definition of the SLM according to this paper so they are saying a model that can run on a consumer device okay over the single GPU over the laptop over the edge devices right with a lower latency for one user agent uh that is called the SLM now anything beyond to this right uh anything beyond to large beyond to this that is called the LLM. Practical rule according to this paper they have mentioned below 10 billion parameter so 8 billion parameter 9 billion parameter and even 10 billion parameter is equal to the SLM. So they have given the roughly estimation regarding the parameters over here. Uh now uh these are the model guys which they have mentioned over here Microsoft 5. This is the good model guys. uh it and it is beating like so many benchmark with a very few parameters. So if you want to use any LLM for your task right sorry any SLM for your general purpose task then this model could be a very good model uh similar to this deepseek model right so deepseek R1 distill 1. 5 uh guys I haven't checked the benchmark of this model but guys this is also performing well I have seen in many leaderboard uh so definitely you can try it out now apart from this one Neotron again it is a model from the Nvidia itself small LM Hima sales 4 XLM. So couple of more model they have mentioned over there. So definitely you can explore but I will highly recommend you to check out with this Microsoft 5 and the deep sea. Okay. Now what is the core idea? idea behind this research paper? So they are saying in agentic AI system. So in agentic AI system most of the work is done through the small repetitive well- definfined subtask. Okay. for this kind of work, small language model are the more than powerful enough, more cheaper, right? And the operationally better than using one big LLM. Now guys, if you don't know about the AI agent, so uh let me show you the AI agent. See, this is the AI agent. Uh I have like kept one image for all of you guys. So whatever task you want to be complete through the AI agent. So AI agent is having three main thing. One is the tool, second is the memory and third is the planning. So what does it mean guys? So the planning is nothing. Planning means it think then it take action. Okay. And then it observe right it observe or it evaluate. OB S E R V. Okay. It observe and then it evaluate. So let me write over here it evaluate. So these are the main pillar of the planning. So AJ if we are saying like action. So action is nothing it's a tool calling and uh we can have any sort of a tool guys. So tool means uh any service we can expose as a tool and there this MCP comes right. So definitely I'll discuss about the MCP also in my upcoming video we'll discuss onto that. So uh here you can see guys databases uh it could be the tool local file census data API like from wherever we can access the data the information right that could be my tool I can create any tool any custom tool okay so that's a core agenda behind the agent behind the AI agent and soon I will start one playlist on top of the agenti guys even though I recorded one but again I will discuss in very detail uh with all my experience uh now here guys they are saying the core idea of this research paper most of the work basically is the small work in the AI agent the subtask actually which can be done through the SLM now SLM actually why SLM fit for the AI agentics AI agents so agent task usually non chatty means we are not doing a repetitive chat over there okay uh format restricted means where we are going to be generate the structure output and agent are already the control model which is tightly using prompt tool logic so most So the LLM which is having a general intelligence is a based one right. So we can use the task specific LLM. So this is a core idea behind this uh behind this research paper guys and after this research paper I have seen so many tutorial on top of this SLM and even like people have started using this SLM. Uh now guys economically also it is good. So 10 to 30x cheaper right than this LLM. then much lower latency and the energy use uh easy and the fast fine-tuning. So yeah, that's the same thing which I'm going to be discussing inside this video how you can fine-tune any SLM then it can run locally on the devices uh better privacy and the control and the recommended strategy is SLM first then call LLM only when it is required. So yeah this is the like uh thing which uh they have discussed inside this research paper. This is the entire summary but for the more detail again you can go through with this research paper guys. Uh now we have discussed I think like all the thing but again guys one more example. So here you know about this llama. So llama actually llama 3 is a llm okay large language model which is having billions of parameters. So it is having more than 500 billions parameter. Uh it's having a different variants actually. So yeah you can explore this research paper and you can understand the different variants of the llama. So llama 70B then 8B 70B 405B. Okay. Uh so these are the model which they have introduced over here and it is also having a general purpose knowledge. Okay it's intelligence. Now on the other hand we have one more model. The model is the tiny llama. So guys, if we want to understand uh the differences, the real differences between the LLM and the SLM, okay, and how mathematically they are different, what all other technique, what the different technique they have used in while they are training the SLM, right? So definitely we should go through with this research paper. Uh there only you will find out the authentic information. So I prepared one quick differences between this LLM and the SLM. So let me give you the quick walk through mathematically we'll discuss later on but if you want to understand that definitely you can go through with this research paper LLM and the SLM and you can understand that. So here guys this is the uh these are the differences which I capped over here. So model size wise 1. 1 parameter 1. 1 billion parameter and the llama actually you will find out 7 B to 70 B plus parameter. Okay. Category it fall under this SLM it fall under LM training data wise 2 to three trillion tokens 20 to 30 trillion token. Uh then primary strength efficiency good performance at the small scale. Uh so guys as I told you this tiny llama also is trained for the general purpose task like five model PHI. Okay. So it's not a task specific model which is trained by uh the closed source organization for any specific organization for their own task. No, it's a open-source model. It is also having a general knowledge. But guys, its general knowledge is a limited one. Okay, its general knowledge are limited compared to the other llama model. So that's why it's a tiny llama. Now here the primary strength is a strong uh and it is having a general intelligence reasoning depth basic to moderate reasoning. Uh it is having deep multi-step reasoning and it is also having a chain of thought capability. Then common sense again is strong for its size. It beats opt and the pytha uh much stronger more cons consistent. Then uh code coding ability decent it is having a strong capability instruction uh good after fine-tuning excellent out of box right uh context handling short and the medium context it can handle and it can handle long context fine-tuning cost cheap expensive inference cost low and the higher one latency very fast slower deployment wise we can deploy it on a single GPU here we can we required a bigger GPU or the cluster of the GPU best Real use case agent automation drag right there we can use and we can use this also at the same place right but again it is a bigger model uh production fist yes it is a con sensitive and uh we can use it in the production system production grid system in our own server now it is a high quality model which is required a bigger infrastructure now best suited for so again chat style assistant light logic reasoning light coding and the Chinese task so yes couple of Chinese task also we can perform using this model now general purpose foundation right so the task which is being performed by this bigger llama model so general purpose foundation task common sense reasoning QA reading comprehensive math code generation multi-dommain knowledge or different thing so guys this is a quick uh differences if someone is going to be ask you okay what you know about the SLM and NLM then you can highlight these differences mathematically what all mathematical changes mathemat mathematical changes they have done while they are performing the supervised finetuning or the training of the model right so that we'll discuss in the upcoming video definitely I'll again highlight that part so yeah guys we have discussed all the points and now let's uh jump to the practical guys okay guys so this entire practical will perform in the Google collab because we have a access of the GPU uh so in my local also I can do it but uh see I have a GPU in my local first of all uh let me show you my local uh GPU guys. Uh yeah. So this is my GPU. My GPU name is Nvidia RTX5070 TI. Right? So I don't know you are able to see or not but yeah it's RTX5070 TI. This is the complete detail of my GPU. Uh I can do it in my local as well. Yesterday I also tried uh but unsllo actually it is required the pytorch okay unsloth is required GPU as well as it is required pytor in back end not pytor CPU it is required pytor GPU so I was getting some version incompatibility with this with my GPU this RTX 5070 TI and this unsloth and the PyTorch basically so I did multiple research on top of that and I figured it out that uh library actually is not still compatible with my GPU. There are some like gap in between uh I was getting some data type related issues over there. So that's why I'm not doing it in my local but yeah if you have any other GPU if you have configured any other GPU on any server you can try out over there. I will do it over the collab. Collab is providing us free GPU. We can take the enterprise variant of the collab if we have a bigger data set and the if you have to do it for any P or for any MVP we can do that also or else we can hire any uh cloud GPU as well. Okay. So there are several option and uh definitely I'll create one dedicated video in the near future regarding all the GPU related option and uh over the multi-GPU training also because I did it guys. Uh now uh here uh you can see so uh the model title sorry the video title is the fine-tuning any SLM any large language model. So guys uh are we going to fine-tune any large language model using this code? Yes, we are going to fine-tune any large language model. You just need to give the name uh of the model and you just need to provide the data. Okay. Uh this code will take care everything. I written this modular code in such a way that it will take care everything and yeah it will fine-tune your model. So I written couple of name just to like assist you over here. You can see these are the couple of name. I hope you are able to see this. So uh as I told you we are not going to use the native hugging phase or we are going to use unslossoth is a very good package very good framework to fine-tune the uh fine-tune the model. Okay fine-tune any LLM or SLM model. So yeah, I'm going to be use the uh model from the unsloth library itself. If you don't know about the unsloth, I already recorded one video in my playlist. You can go and check there. And now data set guys uh we can have any sort of a data set, any data set from the hugging face. See this is the inbuilt data set of the hugging face. This one. Now this is the data set from my repository. So even I uploaded my data set over the hugging face. See this is the data set. If I will search it over the uh Google, I will get my data set. Okay. So just a second again I can search it. See? So I'll get it over the hugging face. Let me check with my profile. Okay. I will have to login over here. Actually it is not login that's why it's not coming. Uh let me log check with a different browser. So okay it's not directly coming but uh I can show you if I set that I can show you uh see collection spaces is there then models are there then data set see this is my data set which I already uploaded over the hugging phase okay so I can uh use any custom data set from the hugging phase not from only we can use it from anywhere here. Now if you will check guys, so see uh this is the data set. So I can keep it on my uh collab server. over here and I can utilize it. So we can even uh read the data set from the different places. Uh so first of all what you have to do you have to install this uh library guys. Uh torch vision torch audio. You can skip this torch vision and torch audio. This is not required. You can uh install this ax former and then you can uh mention this index url. Okay, this is required guys for the compatible cuda version. Uh now you require the unsloth and keep the library in the same order. Then you require the transformer in the data set. Okay, then you require the TRL. Uh again TRL is one of the opensource library which is available over the hugging phase also. So if you will write TRL GitHub, you will get the GitHub of the TRL. All right. So here is the GitHub the TRL uh this library actually it is developed by the hugging face only it is an open source and you can download it by a pip install okay UV pip install so this is a complete code of it right transformer reinforcement turning and under that only you can perform the instruction fine-tuning and all everything uh already I discussed these thing uh now uh these many packages and the library will be required so guys please install it in a correct order and please make sure that you have connected with the GPU if not going to be connect guys in that case you will not be able to find you the model so here let me run it and see this line will confirm whether I have the GPU or not okay so this will check this will perform the sanity check okay so I'm going to be install the required packages uh let it install until I can give you the uh walkthrough of the module which I'm going to be importing the data sorry uh here is a data class guys so for defining the configuration I'm using this data class then uh this is again u like from the typing optional in the list. Okay. So just for the validation the check uh data set uh from the data set library again I'm going to be import the load data set then from the unsllo fast language model this is important guys this package then from the pft model and from the trl sft tenant and the sft configuration. So this package is being installed until I can show you the other thing. So here guys you can see I've created one data class. So this the name is the finetuning configuration. So we have a model load in 4 bit. Okay. This the these are all parameter actually which I can define it into the different places. Okay. Uh model name load and for bit it could be true and false max sequence length and the data type. This is one set of parameter. Then for the data set another set of parameter for the training guys another set of parameter. Okay. Output directory lora per device grad gradient accumulation step epo lr warm up warmup ratio then logging step packing and all. Then for the lura another set of parameter then for saving the model these are the parameter. So whatever configuration you have regarding your parameter and all definitely you can keep those parameters over here. Okay. Uh now let me check whether it is installed or not. Yeah still it is installing like the package or the huge one. Uh now apart from this one guys. So I created one more class. The class name is the unsloth fine tuna. So inside this class only I have defined my all the methods. Now this is my main class. the core class actually. So this is the init method. I will give you the quick walk through of all this thing. Don't worry even I will provide you the code. Uh you can go and check uh then we are going to be load the data set. Okay. Uh after the loading so see we are going to be sorry we are going to be load the model. See here is the model. We are loading a model. Uh then we are going to load the data set. Okay. Then we are adding end of the uh end of uh sentence token. Okay. This is a special token. Uh we required it. Uh so we have to form we have to keep it. we have to add it inside the data. Then uh this is the format different format of the data. See uh I written the So according to the format actually whichever data set we are going to be provided so according to the format it can be uh done. Okay it can be like format according to the given format. So it will check the name first and then it will format the data set. Now uh here guys you can see so I written for the custom also okay uh for the custom uh data set and for my own personal data set. So you can change the logic again I will come to this part you will get a good understanding. Now uh this is my main method train method. So it is handling everything. So here you can see this train method using this train method actually uh what we can do we can initialize this SF trainer. So I define the SF trainer over here and then I will call the train and then I'm going to be save the model over here. Okay. And then this is the run method which is a master method. Master method means it is uh taking care of each and every function means it is uh like see it is asking the restart session. I will not do it because the other package is going to be installed. It will be interrupted. So let me check whether it is done or not. So yeah it is still being done. Now uh here you can see guys one class is a finetuner finetune configuration. Another class is the anselot finetuner. It is having a different method. uh definitely I'll give you the code you can explain explore it even I will give you one more kind of time of revision okay after run after explain you fully uh till the end uh then here is the format data set I already explained as this is the train method this is the save and this is the like orchestrator okay full pipeline now uh here uh I already executed it and see I was able to perform the training and even save the model then guys uh this is my object here I'm going to be create a object of my class okay uh then I will uh I will see here I've created a object right now after that unsloth finetuner again I've created a object of it and I'm passing my configuration over here and then I'm calling this run method so this is the code guys which you can directly use anywhere on any server in any project uh it is a simple code okay it is a modular one you just need to create a specific file and you need to paste this classes right so uh I hope you understood how basically we can fine-tune any model now or let me check whether my import whether my installation is done or not. So yeah, installation is done. So guys, I'm commenting this thing. I just written it uh to explain you. Uh I'm not using it anywhere inside the code this particular thing. Uh now over here you can see I have importing the statement. So yes uh data class then optional list load data set and the other one. So it will also take time. So this is the configuration again I will import I will uh create a sorry I will like initialize this cell also and then I will create a object of it. So I can show you that part. Now this is my main class the core class anselot finetuner trainer. So yeah I will come to this first let all the cell load. Okay till here this is important guys. So till here guys uh all the cell uh loaded. Now what I'm doing I'm going to be execute this one unsloth finetuner and then I will explain you. So here let me load this sol also and this is my object. Okay. So what I'm doing guys I'm going to be create a object of this fine tune config class. So I'm passing a different parameters over here. I'm passing model name. I'm passing data set name. Okay. So you can pass any model name. data set name over here. Uh you can pass one more parameter that is a split. Okay. where you want to be saved that model. So Laura save path and then output directory. So over here you can save your model. Now for how many epochs you want to be run it uh on per device basis. Okay. Then gradient accumulation uh this is the learning rate mass sequence length and save merge. Right. So after training this uh lora right after fine-tune using the lora if you want to merge that layer with your own model you can do that also. Okay. I given you the option regarding that. Now let's look into the main method. Now guys uh I'm going to be create a object of this class unsloth finetuner. Okay, here I'm passing this object this this particular object. Okay, it's a data class actually. So using this object only this object we can access the different parameter. I can show you that. So if you want to access the model name, so simply you can take this cfg then uh you can uh call this model name. Okay. So, cfg is not defined. Let me do it. Yeah, this is done. Now, if I will run it, see, I'm getting the model name. Now, if I want to be like uh take the data set name, if I want to be get the data set name, I can take this objects efg and then I can uh call this parameter data set name. Now, see here, this is the data set name. So, I can access any parameter over here. Now guys, unslot tuner. So, I initialize this class onslot tuner with the cfg. Okay. Uh with this configuration and this is my object trainer. Now once I will call this run trainer. r run my training will be started. So now see guys uh my training is started. First the model is getting loaded. Uh now after that what will happen. So after that the data set will be loaded everything will be done. So let me give you the quick walk through of it. So let's uh look into the run. Okay those step is running. Let it run. Let me give you the quick walk through. So first guys what will happen? So once uh it will come to this run. So it will call to this load model. Right. So this is a load here is a load model. Load model is a method, right? Which we have defined. Then it will come to the load data set. We'll get the raw data set. Okay. Then we'll format the train the model and then we'll save it. So this is the complete orchestration. So I think load model and load data set was clear to you. But again let me give you the quick walk through of it. So here guys uh this is the load data set right. So sorry load model. So here what we are doing we are passing the model name. We are getting the model name. Uh then we are passing the max sequence length data type. Okay. And load in four bit. So this is one side for loading the model. We will get both model and the tokenizer. Then we are calling fast language get pept model. So we are passing model and the other configuration. Okay. Regarding the pep parameter efficient finetuning regarding the lora actually. So this is all the parameter. So once I will explain the mathematic part of the lora definitely I'll come to this particular parameter. Then here we are like uh here we are going to be print the trainable parameter. Okay. So this is the information which we are going to be print just to validate the thing. Then here we are going to be load the data set. So whatever data set will come we are going to be load it. Okay. So uh here you can see uh the data set will come over here and we'll load it a split wise which part of the data set we want to be load. So if you will check with the data set let's say this alpaka data set. So here you can see it is having three part. Okay. one is a train, second is a test and third is a validation. So for training the model, I just want the train part, training part, right? So over here guys, you can see so uh we are going to be load the data set and then uh we are going to be formatted. Now how we are going to be formatted? So these are the master function for it. I written my data set. So it will check the data set name. Okay, it will check belong to which one. So yes, you can uh like make a more generalized logic over here. So here I written the logic. Okay. Uh so according to the data set name here you can write the more generalized logic that is not a issue. So here I'm mentioning if the data set will be this one, this one, this one. So it will format accordingly. If the data set is this one means my data set means from my repository is coming it will format accordingly. Okay. And these are some fallback statement right? So uh now here guys see it will format the data set. After formatting the data set it will initialize the SF trainer with all this parameter. Okay. Okay, this is the parameter. Now it will take the parameter model tokenizer data set. Okay, uh it will take the SFT configuration. This is the configuration regarding the mathematical uh thing and then it will call the train and then we are going to be save the model. That's it guys. So this is all the functionality of this entire code and see after training the model we'll get it over here. Once I will refresh it, see inside the free out uh inside this output I'll be getting my checkpoint. See the model checkpoint is over here. So you can give any model okay you can provide any model whatever model you want to be provide over here. So while you are going to be define a configuration just provide the model name just provide a data set. See I provided my data set. So it is taking that data set and it's training the model. Okay my data set was a quite uh like uh small one. We just had the five rows over there. Okay. Inside this uh inside my data let me show you again. So inside my data inside this particular data I just have five rows. So that's why the training happened very quickly. But if you're going to be and the model also were quite small and model also was small and the and we are using ansloth. So that's why guys we are able to do the training very quickly. But if you are using a big data set in that case it might take the time. Now I hope guys it is clear. So please test it with a different model with a different data set you can create your own custom data and you can uh train your model you can finetune. Okay. So that's why guys I put the title of this video find any SLM just put the name over here just put the data set and this code will work. If you're getting any issue anything please let me know and uh please make uh the code accordingly if you want to uh changes if you want to make any changes according to your requirement then make changes accordingly. Yeah, fine guys. So, yeah, we have learned so many thing over here. I will provide you this entire code and all everything. Please check it from your end and check out with my fine tuning playlist for the more information. I'll be coming up with this kind of video in the near future. So, yeah, if you have any doubt, any suggestion, if you want any more topic, please let me know in the comment section. Uh until uh thank you. Uh take care. Bye-bye guys. I will see you in the next video. Hey, hello everyone. Welcome back to my channel. My name is Sunonny and I am back with another exciting and important video. So guys, in this video we're going to discuss about the multimodelity and multimodel fine-tuning. In the previous video, I discuss about the SLM which is called small language model. Uh now in this video we'll explore multimodelity and multimodel fine-tuning from basic to advanc. So guys these many points we are going to discuss. The first thing we'll understand the key terms and the terminology inside the language model ecosystem. I I'll just give you the walk through of the key terms or what are key terms is there related to the language modeling. Uh then we'll come to the multi-model large language model and we'll understand what is a multimodelity. I'll give you the clearcut definition regarding this concept. Uh then guys I'll come to the model example. I will give you the different model example. We'll discuss the open-source closed source model and even I will show you the different leaderboards. Uh then guys we'll understand why do LLM needs multiodalities means why we should train our like LLM on the multimodel data. Uh then we'll understand what is a multimodel LLM fine tuning and when and why should use the multimodel fine tuning. Then we'll take a architectural overview. So I will show you how this multimodel works. At least I will take one modality and I'll show you this concept. Uh then guys we'll understand what exactly get fine-tuned when we talk about the multimodel training. Then we'll discuss the different data format for the multimodel fine-tuning. Uh then we'll see how we can create a custom data set means let's say if I have to fine-tune on my own multimodel data then how we can do it. Uh then we'll understand the differences between the normal fine-tuning and the multimodel fine-tuning. And then finally I will show you the practical using the unsloth. Now guys uh we are going to all this point inside this particular video. So that's why I told you it's going to be a kind of crash course. Uh not only the course crash course guys. So in even in the course as well you will not find out these many points in any of the course basically. So yeah I'm going to be cover all these points uh throughout this video. Uh so first of all guys uh let's understand the key terms and the terminology and before coming to that uh let me show you the practical as well that uh what is my practical see here is the practical I prepared completely I kept so many thing over here uh the different multimodel the different type of data and uh we are going to do it using the classes and object itself I'm not going to be write a normal code over here we are going to be write a computer modular code which you can directly copy
Embedding Fine-Tuning Masterclass
and paste on any server uh then guys we will understand how we can prepare our own custom data. See this is the uh the like code for that. Then uh see the different leaderboard and not only the ALM leaderboard guys I will come to the trending research paper also. Uh then guys these many data set we are going to discuss throughout this video. I will give you the uh like complete guide how this data have been prepared and what are column basically we have inside. Now let's see the key terms inside the language modeling and uh then guys we'll come to the definition of the multimodality. Now first term is the LLM guys or the large language model. Uh the second is called the multimodel large language model and the third is called the SLM small language model. So this three uh important terms is associated with this language model ecosystem. So let's see the definition of it. So first is transformer based model train on the massive data set to understand and the generate a language. uh the model basically comes from the GPD from the cloud A from the Gemini llamas or from anywhere right uh so that model basically can understand the language and it can generate the language so those are called the large language model now on the other hand what is a multimodel a large language model so in LLM extended with an additional capability with the vision audio and video so we are providing a additional capability to the large language model where it can understand the images it's videos or audio right so those llams itself is called the multimodel large language model uh so we know right GPT4 giminy 2. 5 coin 3 vlava so these all are the multimodel large language model it can process the text along with the text guys it can process the other different modality of the data and now the third term is called the small language model. So what is a small language model guys? or the multimodel typically which is less than 10 billion parameter optimized for the efficiency, speed and the specialization. So again a small language model could be the normal language model which can only process the text language or it could be the multimodel means uh it can process the text along with the images and the other type of data. So that is called the small language model. A small language model is having less than 10 billion of parameter. So if you want to understand this is small language model in a detail uh then check out with my previous video. I given you the complete in the detailed guide about this small language model. Now what is the example of this small language model? So the example is 53 mini uh GMA 2B, GMA vision, right? Then tiny llama, coin 2, VL2B, lava small. So here I kept the uh normal model which can only process the text like 53 mini and GMA and even I kept the multimodel like GMA bizen and lava small coin 2v 2b right which can uh even understand the images. Uh I hope guys uh this thing is clear. Now let's look into some other term uh so the another term is the vision language model. So again uh if someone is saying the visual language model so that is nothing that is a multimodel large language model only uh if someone is saying audio language model or speech model like uh text to speech or speech to text again uh those model comes under the multimodel large language model only. So I hope guys all these terms and uh terminology is clear to all of you. Now coming to the next part. So guys uh there is few more term which we need to understand. uh the first term is called the closed source model and the another term is called the opensource model. So what is a open uh sorry what is a closed source model? So guys uh the model actually which we can only access through the API uh and we cannot access the weight of the model means uh we cannot download that model uh and we just have a limited finetuning access. So uh those model actually it is called the uh those model is uh those model are called the closed source model. Uh now on the other hand we have the open-source model. Uh so we can uh access the weight of the model means uh we can download the model. We can perform the finetuning of the model and even the local deployment is available. So we can download the model directly. We can deploy it anywhere. Even we can fine-tune that model. So in whatever way you want to be fine-tuned whether it's a full fine-tuning or it just like partial finetuning whatever kind of finetuning you want to do you can do using these opensource model right so guys uh this is a very important uh you need to understand the differences between the closed source and the open source uh now we need to understand the other different terminology regarding the data now let's understand that part so for that guys I kept one image I think uh you are able to understand uh the different uh like terms related to the data. So whenever we talk about the data guys uh so we have a different modality of the data as you can see. So we have text modality, we have image modality uh we have audio and the video okay video. So guys this is all this is called the modality of the data. nature of the data. The data will be present in this particular format. Okay where the data could be the text, image, audio and the video. Uh now uh on the other hand we have one more terminology which is called the file format where we can store the data. Uh the first thing is called the PDF. The second is the docx, CSV, JSON, YAML, MP3, MP4. So inside this of uh storage right inside this file format basically we can store the data. Uh then guys we have one more mod. Uh it is not a modality actually I would say it is a semiodity. Uh so the semiodity is called the tables right. So what is a table guys? Table is nothing. It is a way of structuring a data. Right? So we can structure data in the form of tables. Again uh it does not comes under the modality because in the table we can keep anything. We can keep the text, images, we can keep the audio file, right? Whatever we want to keep inside this uh table we can keep that. So table is nothing. It is just a way of structuring the data. On the other hand, we have one more specific term that is called the document. So what is a document guys? So the report invoice research paper presentation. So these are nothing these are the reports right now this report actually it can be the PDF doc Excel means in any file format we can create this document. I hope you are getting uh the differences between each terms and the terminology. Okay. So these are the fundamental guys before starting with the multi multimodality we need to understand all this fundamental. Uh now I hope guys uh this slide is clear. Uh the key terms in the language model ecosystem. Uh the differences between the closed source and the open source and the term the different term related to the data which is modality or the different file format. Uh the structure data which is also called the table and the another term is a document. Now understand what is an multimodel large language model and let's understand uh this particular diagram. So guys first let's start what is a multimodel large language model. So guys uh we're talking about the multimodel large language model. So this is nothing is just a AI model uh that can understand and process and generate
Multimodal AI: Image, Video, & Audio Modalities
uh multiple type of data. Okay multiple type of modality. So uh what is the example of those modality? So modality is the text uh it's a image uh audio and the video guys right? If we're talking about the video, so videos are nothing. It is a collection of the images, uh, audio and the time stamp, right? So video is a collection of these three thing. I will discuss that. I'll come to that. I created one separate table regarding the different modality and the example of it. I'll come to that part. But before that guys, let's understand this very important architecture and uh let's understand what it is saying. So we all know about the LLM guys. Uh so we have a llm over here. So to this llm what we are passing text we are passing image we are passing audio and video. So we are able to pass more than one modality means one more than one type of data. So that is called the multimodel lm. Uh now over here guys let's say we are passing text and we are generating a text right. This is possible right? This is possible and this is what we are doing. Uh on the other hand, let's say we are passing text and we are able to generate an image. Yes, this thing is also possible, right? So this is called the multimodelity means we are passing one type of data and we are generating another type of data. Uh let's say we are passing text and we are generating uh audio. Yes. Uh text to speech is possible. Uh model is capable to do that thing. Uh now we are passing text and we are able to generate the video. Yes. Uh that thing is also possible. So we have several model like openai sora right a runway uh and uh even a couple of model in the gymn API you will find out the text to video. So yeah this modality this functionality is also possible. So this is only called the that's why guys we are we are saying this normal LM the multimodel LM because it can process the multiple uh because the LLM if LLM can process the multiple modality and it can generate the different kind of output right heterogeneous output. So what is a heterogeneous output? If we are passing text and we are able to generate a image or audio or video so that output is called the heterogeneous output. Right? Uh now guys uh images wise. So yes we are passing images. So we will be able to generate the text. This is possible nowadays we are passing images to the GPD model to the cloud model to the Gemini model and it is able to generate a caption description out of that image. Uh then guys from image to image yes that thing is also possible or we have certain tools using that we can modify the image we can basically customize the image okay we can edit the image so yeah this thing is possible using the AI then image to audio I think I haven't seen that system so far maybe it is available but yeah uh we can do that also so model basically we are talking about to generate a video or audio right so Model directly cannot do that. Model can only process the mathematical information. Uh let's say text we are going to be converting into the embedding. Model can process that. Images we are going to be converting the embedding. We can process that audio we can convert into the embedding. Uh and model using that model is doing processing that audio we can convert into the images then into the time stamp. Then uh basically audio and model is processing that. But guys if we want to uh like direct see if we are directly passing a video and LM is processing that means behind that there is some process uh which is breaking down the thing okay into the smaller part which LLM can understand and LM can process. Now generation wise again uh video audio. So, LLM directly can cannot generate those MP4 file or any audio file right but guys uh it can give us the mathematical component and using those mathematical component we can reconstruct the output right so we are talking about audio to uh sorry image to audio or audio to video or uh basically video to video so that is a complete system like uh GPD is a model and chat GPD is a complete system which can process anything. Uh similar to that guys, uh if we are going to be generate video to video or audio to video, right? Uh so that would be the complete system. I hope you understood it. Now uh let me show you the different example uh regarding the different model and uh after that guys we'll come to the finetuning part. Guys uh this is a table where I given the example of the uh different modality. So uh let's understand uh about the modality uh then uh transformation type then description of it then what all close source and the open source model are available regarding to that modality. Uh so the first is a text modality as you can see. So what it is doing it is going to be generate text out of text. So whenever we are passing any text guys. uh so it's going to be generated text. uh this is called the classical LLM case and uh what are closed source and the open source model are there so open AI based GPT anthropic cloud a jimny or any other opensource model uh sorry any other closed source model which we cannot access directly for those we'll have to pay uh then the other one is called the opensource lama mistril or all the model basically which we can access from the hugging face hub or maybe via free API those are called the opensource model means for those model we no need to pay anything. The other one is the image modality. So from here to here guys you will find out the example of the image modality where we are passing the image and we are generating a text. Uh we are passing a text we are generating an image or we are passing image and we are generating a image. So let's see image to text. So we are providing an image and we are extracting the content out of it. Okay. So uh this thing is very common nowadays means uh every company wants to be the LLM with a multimodel capability where at least it can process the image right. Uh then guys uh here is all the model. So this is all the model guys. You can read out the name. I will provide you all this notes. You can go through with this table and you can understand it by yourself. Okay. You can do self uh you can do some self study. Okay. Using this entire table. Uh now guys here you can see some opensource model. So yeah image to text we can do using the opensource model. So the model from the sales force from the motor sorry from the meta from the Alibaba from the Google right and even from the hugging phase. So uh some model are available which can do this task. Then text to image. So whenever we are passing any sort of a text so out of the text we can generate the image. So, OpenAI Delhi Midjourney Gini 2. 5 flash image Jimny 3 image preview uh which comes under the nano banana right the image generation model. So these model are the closed source model. Now on the other hand we have stable diffusion model from the stability AI from the black forest labs there is flux okay the model name is flux flux 1 2 x is representing the version 1 2 3. So we can pass a text and we can generate the image. Okay. So uh the other one is the image to image. So why we use this uh modality? So image to image. Uh so we modify we can modify the image, we can enhance transform the image. Okay, means we can uh remove the background. We can do some u style transfer. resolution related thing. We can uh perform some face swapping. So yeah, this kind of thing is also possible using some system. So here I written a name. So the first one is what uh is Adobe firefly. So this is very good uh image editing tool. Uh even using open air delhi also you can do that. Uh using the nano banana So these are some closed source one and on the other hand we have open source from the stability API that's called the stable diffuser image to image okay or painting in painting. So these model using these uh basically system you can perform image to image uh generation. Uh then the other hand guys see on the other hand we have other different modality like audio modality and the video modality. So regarding that also I kept some examples. So you can understand this entire image this particular image which I was talking about. So uh let's understand about the audio modality. So we have text to audio, audio to text and uh yeah there is two modality. So convert text into synthesize speech which is called text to speech. Okay. And audio sorry text to uh go got it guys. So text to audio. Text to audio means text to speech. Uh audio to text uh convert spoken audio into text. Okay. Which is called the speech recognization. Audio to audio. Uh transform or modify input audio. Sorry I missed this one. this one uh now over here guys see this is the model uh some closed source model some open source model so I listed each and every model so this openai uh whisper API and the Google speech to text are the very well-known model right uh on the other hand this open TTS and text to Google text to speech again for uh it's a very well-known model for text to audio uh these are some open source model as you can see open a whisper again uh it give you like the opensource access also till some extent. Uh on the other hand we have this modular DP speech okay which is completely free you can utilize that. Then from the coqi there is one model coqi tts and from espnet there is one more model which is a tts okay which I can use for converting text to audio. Now audio to audio guys. So again uh audio to audio directly we cannot pass a audio file. we required some kind of system which can uh convert the information into the mathematical patches and which can provide to the model. So this levels voice AI Adobe enhance speech meta voice box. So these are some platform using that we can do the audio to audio generation. Now coming to the next part video modality. So video is nothing guys video is a combination of the images time and the audio. So video modality is going to be combine all these three thing uh as I written over here. Now text to video, video to text and video to video is possible. So we're talking about text to video guys. So again runway uh pika labs and openi sora then of video to text again open 40 gimny vision model can perform this task. Now on the other hand in the open source if we talking about so stability video diffusion from model scope text to video and uh even Alibaba group right uh Alibaba group is providing some model like coin o coin 3 omni uh okay so using these particular model what we can do we can generate video to text I think this coin is very famous model from the Alibaba right we have a different variant of the coin definitely we'll uh talk about it now again guys video to video. So yeah uh the model is working the multimodel is there in the system but again for doing this thing we required the end toend system. So modify or transforming the existing video what we are going to be modified. So we are going to be modify the style uh the some video enhancement face swiping and all some editing in the video. So we can do using these particular tools. So I listed the tool over here. I written a tool name. So guys this table is very important to understand the complete multimodality. That's why I created this kind of table uh with the uh like different example. Okay, with a very vast example and uh definitely I'll provide you this note so that you can go through with it. Uh now let's understand the next point. Uh let's look into the different leaderboard and let's look into some trending research paper guys. Guys, uh the first leader board is from the open LLM from the hugging face itself. This is a open LLM leaderboard. So here you will find out all the open-source model. So they have listed around 4,000 model over here. You can simply go and check. Okay. Uh now apart from this one you can apply so many filters over here. Uh so filter wise you can see leaderboard is there, citation is there. Then uh even you can compare the model. Now apart from this one you can uh check out with this advanced filtering. See uh they have given you some quick filter where you can uh select the model for the edge devices. You can check out the consumer model, mid-range model for the GPU range, right? And only from the official provider. Apart from this one, you can apply some advanced filtering. You can uh click on this one and uh here you can select the model type. So if you're going to be select a multimodel, so they will give you the recent multimodel. Uh okay. So let me show you. Uh they are showing some nine multimodel over here. See these are the uh name coin to VL right. uh then uh from the demon uh demon talks and then from the rhythms so from the different provider you will find out the multimodel and even see guys uh you will find out some benchmark also over here. So on whatever benchmark this model have been tested you will get those benchmark also inside this one. Now apart from this leaderboard we have one more leaderboard which is a quite famous again that is a uh like arena leaderboard LM arena leaderboard. So just go and check out over here. So here also you will find out the different models actually. So uh see this is the text related model. Uh then uh here is a code related model. Then vision related model. Then text to image model. Uh then image editing model. Search model. Okay. Image to video model. Text to video model. Uh so different modality you will get over here. So if you want to compare the model, check like which model is doing well, which model is performing well, then you can go through with this leaderboard. Uh apart from this one, if you wanted to like know about more model, okay, the different more model regarding the different modality. So simply you can go and check with the hugging face. So let me show you that. So once you will click on the hugging face, see just face. Just go with the home, just go and check with the homepage of it. Then here you will get the model option. Click on the model option. Now left hand side you can filter out. So left hand side they are giving you the various filter various option. You can check out directly with the text to image, text to basically uh text to text, image to text, video to text different filter you can implement over here and you can check your required model with your required model. Just check out over here. see uh audio category, natural language, comp computer vision category, then multimodel category uh the different and the various category they have provided you over here. So uh likewise guys you can explore the different model. Uh now I would say guys I would suggest you this leaderboard is a quite like important and the required also even I am going through with this leaderboard whenever I have to decide any model. So I can uh check out with the various model over here. I can directly check. Let's say if I want the vision model, I can click on the vision and I can look over here. Once you will click on the view all you will get the uh all the model, all the listed model. Okay. Uh now uh here is one more leaderboard guys. Now this leaderboard is not about the models. Uh this leaderboard actually it is about the research paper. So uh hugging face over the hugging face itself you will find out one over the hub itself right page uh regarding the trending uh paper by the uh research community. So these all are the like training paper with you can go through with these papers. So whenever I have to check with any recent uh research right the updated research then I go through with this uh research I sorry I go through with this leaderboard uh leaderboard of the trending research paper and I try to figure out some uh the latest research. Okay. So many people were asking to me s how you are keeping your up to date regarding the LLM research the research paper. Okay. the different new concept which is coming day-to-day in AI. So I generally follow these approaches. platform. I hope this entire thing is clear. Now you can go through with this like you can go through with this platform. Uh the one is the arena okay uh arena leaderboard. The another one is the open uh LLM leaderboard and uh trending paper leaderboard. Okay. So you will get some additional information. Now again coming back to the uh like the topic. So uh here guys we were talking about the uh let me show you the last one. So yeah we were talking about like the different modality. So uh now let's discuss why do LLM need multiple modality. Okay what is the requirement of that? Why basically we cannot train our model only the text. So whenever we talk about the real world guys so real world is a multimodel. Uh now tell me what is the capability of the human? So human can see something right? Human is having a vision capability and human can speak means human can uh understand the language and behalf of that behalf on that language it can speak something. So human is having two capability. One is the vision and second is the language capability and even human can listen something right. uh so uh human can speak, human can see something and human can listen something. So human is having all the capability like language related, audio related, vision related and if I want the same capability inside the AI then definitely I will have to train my model over the different type of data. Okay. So what is the main aim of the AI guys? So is to provide same kind of intelligence whatever intelligence the human is having right to provide a same kind of intelligence which the human brain can explore. Right? So this is the main aim of the AI and to achieve this thing guys we cannot only rely over the text right because human can speak human can watch something human can listen something. So similar to that if I want to give this capability to the AI so we required a different type of data means we require the text data which is a language right which is a language. The second we have to provide the vision data and even uh we can give the audio data as well and video is nothing guys video again it is a combination of the vision as well as the audio along with the timestamp. getting my point? So that's a main aim right? So that's why guys LLM needs multimodality. So the same thing I have written over here you can read out. So model needs multiple modality because the real world is not a text only. Intelligence required seeing hearing and understanding the context. Okay. I hope you understood this point. If someone is going to ask you in an interview then explain in a same way. Right? So that you can leave your impression. Now another example. So here I kept the another example. Let's like think. So uh let's say there is a doctor and doctor is looking into the doctor want to understand like what kind of problem this patient is having. Right? So uh the patient brought this X-ray brought his or her X-ray. Now uh doctor is looking into the into uh the X-ray. Right? Along with the X-ray he is reading the reports and the he is understanding the lab value. So just after combining only just by combining okay just only uh just com after combining all this thing uh doctor can uh bring or doctor can make a better conclusion right. So here the image right patient report which is having the text the lab value again it is having a text and whatever patient is saying right regarding their disease and all. So yeah doctor is listening to that. So after combining all this context only uh doctor make a better conclusion. Uh I hope you understood why LLM required a multiple modality. Now guys uh after see we all cover up the fundamental of the multimodelity. Uh now let's come to the next uh topic which is a finetuning one. Now what is a multimodel fine-tuning when and why it is required and then we'll see all the concept related to the finetuning only. So guys, adopting a multimodel large language model to perform a specific task or a domain specific task using multimodel data. Uh that is called multimodel LLM fine-tuning means we are going to be retrain our multimodel LLM over the multimodel data like images, audio or videos. So when you should perform this multimodel fine-tuning uh so the first thing is uh if you want to give the capability right multimodel capability to the large language model uh in that case we should perform this multimodel fine-tuning uh the second is the OCR right if you want to give the OCR capability to our model means let's say there is a model let's say there is a GPD 40 uh what this GPD 40 can do uh I can write over here. What this uh GPT 40 can do? This GPT4O can take any type of data. It can take images. It can take uh text. Right? Now guys, uh let's say if I want to train this GPT4, if I want to retrain this GPT4 on my own data, uh let's say I wanted to perform the OCR on my own domain specific uh problem statement. uh let's say the problem statement is a medical analysis. So I want to provide some medical document to the GBD 40 and I want to get some information out of it. So for that what I will do I will perform the multi-model fine-tuning means I will collect some images uh related to my domain specific task and I will retrain this GPT4 model. uh if I want to uh do the uh visual conversation means uh let's say if I'm going to be provide a images and uh like behalf on that images right I want to generate some output and again uh the output I want to the I want into the images or let's say uh like I'm passing image along with the text and I want to generate some output okay on my domain specific task so for that also I will perform this multimodel lm fine-tuning now again the last one is a document AI Right. So this could be some sort of a region. Uh because of that basically uh I'm going to be perform this multi-model LLM fine-tuning. So uh the fun is clear, the idea is clear, the definition is clear. If I want to retrain my multimodel LLM on any domain specific task. Okay. So for that only I will perform this multimodel LLM fine-tuning. I hope this definition is clear. uh now uh what I'm doing guys see here is one more definition I'll come to this definition first of all uh let me explain you how you can learn this multimodelity and this multimodel fine-tuning because uh see if we're talking about the multimodelity let me write over here so we're talking about the multi-modelity guys so multimodel is going to be like contain a different type of data let's say we have a image over here right or audio Right? Uh let's say we have a video. So every type of data uh guys uh to process and to train a model on every different type of data is required a different architecture. So how you can understand this multimodelity? So if you want to understand this multimodelity then you should start from the images guys. Right? So uh you know guys uh audio and video maybe we are not using that widely uh but yeah we are using the images very widely. So whenever we have to process uh like see whenever uh basically we are using chat GPT. So along with the text most of the time we are providing the images. Okay. So guys if you are starting your multimodel journey then you should start from the images itself. So inside this video also I'm going to be teach you the vision language model like how is working. Again I told you nothing it is a multimodel only. Okay. So in this uh video we'll discuss about around the visual language model. I'll not focus on the audio and the video data. Again we can look into the model the different model that which can process the audio and video. So that I'll let you know in the separate video. Okay. So in this video I will focus on the image data and we are going to fine-tune our model on top of this image data only. So here is one more definition just uh and along with the definition guys I kept the different uh research paper also and in this particular sequence only you need to like go through with this research paper if you want to understand the multimodelity using the image data. So over here guys just read out this definition. Multimodel LLM fine-tuning is a process of adapting a multimodel large language model that process both visual and the textual input. So here I'm like here I'm saying in the context of the here I have written images. Okay. So textual input by updating it a projection layer the uh language model. Okay. language model weights uh using the image and text instruction data set to improve the domain specific crossmodel reasoning. So if you want to fine-tune the multimodel or if you I which is uh like specifically related to the images so I will have to focus on this two part the first is called the projection layer guys. So we'll understand what is this projection layer and uh after that after this projection layer only this language model will come and inside this language model only we'll be having the attention as well as the uh MLP multi-layer perceptron. Okay. Uh so these all are the research paper. If you are starting your multimodel journey then guys you can start with this research paper. It will give you the in-depth understanding of the multimodelity using the images. So you can go through with this vit clip uh then this quen model uh then this blip model lava model then openai Delhi and this Google sorry Google image chain okay so the nano banana the model basically you know the nano banana it have been created using uh this particular research only uh now uh let's uh see how we can understand this multimodality right or the vision language model so If you want to understand the vision language model guys, you will have to follow this path. So the first thing is the image uh modality you will have to understand. See uh you will have to understand about image to text and text to image both are the different thing. uh text to text we know but we are passing text if we are going to be generate a image or if you're going to be image and if we are going to be generate a text both are the different thing in both like modality right in both image modality the data is being processed in a different manner. So for understanding this thing you will have to understand the uh image first. So what is a image right? So you will have to understand about the images mathematically. So this is going to be your first thing first topic. Then you will have to understand about the CNN basics. Okay. the backbone of the image modality that is called the vision language or trans sorry vision transformer. Uh this paper was published by the Google and inside this paper only they have showcased uh like how you can uh process the images and how you can provide that embedding output to the LLMs. Okay. To process the images uh this paper is very good. Now another fundamental paper is the clip which is playing a very important role while we are going to be generate a image using any LLM. So whatever model you are seeing whether it's a Delhi or midjourney or any other model guys. So in back end those model is using this clip technology. So if you want to understand the image modality whether it's a image to text or text to image then this two model is very useful. First sorry two paper is a vision language sorry vision transformer and the second is the clip. Okay. Uh now apart from this one if you want to understand the models so model wise guys I would highly recommend you this two model uh lava and this quen model. Okay. Uh this is image to text and if you want to understand the uh like text to image then this model guys Delhi and the image chain. So likewise you can cover the entire uh this image modality and you can understand the multimodel concept. uh now let me give you the overview architectural overview of the uh image uh mathematically then CNN and then I will come to this uh vit model okay and then we'll understand some architecture so here you can see the image of im here you can see one image okay the mathematical representation of the image uh then we have this convolution neural network guys uh we'll I'll give you the quick walk through of it uh then we have this vision transformer so over here you can see how the vision transformer is working uh then we have this Delhi architecture which is representing how this uh text to image is working. Okay. So uh let's do one thing. Let's take a overview of this. So guys uh if we talking about the images uh this images are nothing. It is a collection of the pixels. Okay. Uh here you can see the pixel. So pixel what is a pixel? If you don't know about the pixel guys pixel is just a numbers. Pixel what is a pixel? Pixel is just the number. So the range of the pixel between 0 to 255. Okay. Uh and if we're talking about the images, right? So we have two type of images. One is called the black and white image. And the second type of image is called the color image. In blacken and black and white image, so we just have 2D array. And in color image actually we have 3D array. 3D array actually it is a combination of the R, G and B value. Understood guys? So if we're talking about the images it is nothing it is just a collection of pixel the range of the pixel between 0 to 255. If we're talking about the black and white images so it's a collection of 2D array okay in 2D only all the pixels value you will get. And if we're talking about the color image so in that actually you will find out the three channels. Okay, three channels like this. Three channels like this and each channel having their own pixels value. Uh I hope this thing is going to be clarified. Now guys, how the CNN is working? We need to understand that part. So uh we talking about the CNN, the full form of the CNN is the convolution neural network. So it's going to be extract the feature or the important feature, the important value from the images and uh that uh thing we are going to be provide to the uh artificial neural network. Okay. So we can divide uh this uh we can divide this architecture into the two into two part. So uh the first part is called the feature extraction and the second classification. So we're talking about the vit paper guys. So in the vit paper in this vision transformer paper we just required this feature extraction part. So we are going to be collect the patches okay the important feature of the images and that feature we are providing to the large language model. So instead of this neural network guys so you will not get the neural network inside the vit paper instead of that instead of this uh neural network you will get this large language model understood I hope this thing is clear so let's uh look into this feature extraction process that how we are going to be find out a feature out of images so what we do so let's say we have a image is nothing it is a collection of the pixel so we are going to be multiplied with the filters okay uh but the multiple filters. So uh that process is called the convolution. So we are going to be multiply this uh image with the various filter whatever information we want to be get from this image. Okay. According to that basically we are going to be create a filter. Uh now this filter basically it's a learnable values. So like uh while we are going to be train the model. So this all the filter is going to be learn. Okay. uh so you know the learning the forward propagation and the backward propagation in the backward propagation we always update the values okay values of the weights so in CNN actually we update the value of this uh all like neural network as well as we update the value of this learnable uh filters okay this is also called the kernel so we multiply this kernel or this filter with the images and we are going to be collect we are going to be find out this uh convolution image okay After that we are going to be perform the pooling on top of it. Okay. We are going to be select some important features some important pixel value out of image. Okay. And uh then we get the filtered one filtered data. So here is my filter data. Here is my all the features out of images and we are going to be flatten it and then finally we are passing to our network. So in the classical CNN network we had the fully connected layer which is called the which is which was my neural network. Now inside the vit inside the vision transformer actually you will only get the uh llms. Okay. And this flatten layer actually it's going to be replaced by the projection layer. So uh now let me discuss the vit one. architecture. So this is a vit architecture. So here what we are
Vision Transformer (ViT) Architecture Deep Dive
doing guys? So we are passing a image. So we are having a image. Okay. Uh here you can see now this uh image actually we are going to be convert into the multiple feature using the convolution process. So this is the multiple feature. Okay. feature which I extracted from the image. Uh then guys what we are doing that replace that flatten layer actually we are going to be replaced with this projection layer. So linear projection of the flatten. It is a similar kind of operation where we are going to be convert all the image into the embedding. Okay. Means this is the images only. This is the value of the pixel. So we are going to be flatten all the value. We are going to be convert into the 1D array. Okay. So this is called the linear projection of the flatten patches. Right. Uh then what we are doing guys we are going to be apply this positional embedding and after that we are passing it to the transformer only and then uh this transformer is doing the prediction that what we are having inside the images. So this is a straightforward architecture a very simple architecture of the VIT. They have replaced what they have replaced the neural network with this transformer encoder. If you don't know about the transformer encoder guys this is the transformer encoder. You can check out with my previous session there. I already discussed about this transformer encoder. Okay transformer encoder and the decoder. So this is the overall process guys. Uh here you can see this entire process. So we are having images. we are passing it to the vision encoder. Okay. Uh then we are going to be extract the images feature. We are passing it to the projection layer. We are converting to the embedding and then we are passing it to the array. And now over here guys this vision encoder is nothing. See uh here I wrongly written this thing. Let me remove this. This vision encoder is nothing. It is a CNN process. Right? CNN based process. Convolution neural network based process. Okay. Now if see guys and uh here we have one thing which is a linear projection of the flat. So don't be confused with this thing. I can explain you this thing uh with one more example. So whenever we are talking about the text guys so let's say we have a text the text is my uh I'm just writing over here and I will just take one more minute. My name is Sunny. So if I'm going to be write it down and if I want to pass this particular text to the LLM, how I will do that? So first I will convert this text into the tokens. So let's say I have a token. Token is my then second is name. Okay. Then the next token is and then sunny. Then what I will do? So I will convert the I will create a embedding out of this word. Right? So let's say this is the embedding of this word. Then here embedding of this is and sunny then what I will do I will connect this embedding with a positional embedding right position embedding and then only we'll pass this data to the attention layer okay where to the attention layer so this is the process which we are following now over here what we are doing inside the images guys just replace this particular text with the image so what we have a small patches of the images. feature of the images which I got after the CNN. Okay. After the after performing the convolution operation I got this different patches of the images. Then what we have done see we have this is nothing this is the array only right it is having some value. So what we are doing we are going to be flatten it. Flatten means what we are going to be convert into it. We are going to be converted into the 1D array this entire patches. Okay. So let's say we got the 1D array. Okay, this 1D array, this 1D array. Now we are going to be uh attach this position encoding with this 1D array. Okay, so the process is same. The process is same here also we are doing a same thing. So this is the token we are going to be convert embedding and all together simultaneously means uh we are going to be combine all this embedding. We are going to be uh merge this position embedding then only we are passing it to the attention. Getting my point? So the same thing we are doing with the images but here we have a feature of the image and token which we are going to be generate from the text itself. I hope you understood the meaning of this linear projection of the or linear projection or the flattening operation. So just read this line the paper proves you can do image recognization with the pure transformation. Uh don't require the CNN by splitting an image into the fixed size patches. Okay. uh the size of this patches the feature basically we are going to be extract from the image the size of it would the size of this feature would be 16 + 16 uh then flattening each patches into the vector then linearly embedding them like a tokens add the positional embedding and then feed the sequence to the transformer the same thing which I was explaining the same thing I have written over here okay so this is the entire process behind what behind image to text so whenever we are going to be pass any image uh any image to the model. Let's say we have a GP4 model. So in back end it is going to be perform this procedure only. So it's going to be performed this entire procedure. Now guys let's understand the architecture of the Delhi like how the Delhi is working. So uh we're talking about the Delhi guys. So see just look over here. So we are passing a prompt to the Delhi. Okay, we have a text encoder over here. We're going to be generate a text embedding. Then we have one prior layer. We are passing it to the image. We are going to be generate a image embedding. Then we are going to be passing to the decoder and the decoder is generating a image. So this is the entire process behind the Delhi. Now let's try to decode it. What is happening actually? What basically is happening in pack really. So if we're talking about the user prompt so this could be anything. This could be uh let's say here I again I'm writing uh image of cat okay generate image of cat now what will happen so it will come to this clip model now this clip model actually it is a it is trained on the image and the caption okay it has train on the multiple image and the caption so what we'll do so according to this given input okay it will generate the image of Right. Okay. Image of it. Right. So image and along with the image we have what we have this user prompt. Then what will happen guys? So here we are going to be create a text embedding out of this text. Right? Then prior model so text uh is going to be convert into the see here we have a text embedding and the image embedding both I'll be getting. Okay. in a same space using this clip model actually uh we'll be getting the text embedding and the image embedding okay then we are passing to the diffuser right so it's going to be generator image initially the image will be the noisy one but by the time it's going to be enhanced okay and then we'll be having a final generated image so we are talking about the Delhi architecture so the main component of the Delhi architecture is what it is a clip model so understand how the clip model works Okay. Then after that guys uh the diffusion model understand how the diffusion model is works. Okay. So this two is a main architecture of the two is the main uh like component of the Delhi right and apart from this understand about the embedding side like how the embedding works whether it's a text embedding or the image embedding. So this is the main component actually. So likewise if we are going to be pass any text so the uh image is going to be generated accordingly. So here guys we understood both uh here we took the overview of the both architecture of the image modality. One is the uh basically text to image and another is the uh image to text. Now guys uh let one thing let's understand which uh thing is going to be fine- tuned what exactly it's whenever we are performing this uh vision finetuning or this multimodel finetuning with the image capability. Right? So here we have a option one. Now guys just read uh this each and everything one by one. It's a very much important. So in the option one what opt what we are going to be fine tune. So uh train everything right. So train vision encoder projection and the llm. So here if you will see so we are going to be fine tune all this thing this one is this one. Second is this one and third is this one this llm. Okay. Now guys this process is going to be expensive. Now here guys we are going to be talk about this uh image to text. Okay we're talking about this image to text. Now this process is going to be very expensive. So we generally prefer don't uh we generally don't prefer this process. The second is the uh train only the projection layer. Okay. So here what we are going to be do we are going to be freeze the vision encoder and the llm. We are just going to be retrain the uh projection layer. Right. So how the uh embedding is going to be generate uh sorry how the flattening is happening the projection is going to be happen right this one. So we can train this also we have three component inside this architecture. First component is and is this a patch. Okay the patch is being generated from the CNN. Okay. The second is the projection one. This one and third is this transformer architecture the encoder one. Right. So either we can train this entire one all these three thing which is going to be very expensive here I written over here. The second thing uh just train the uh projection layer or else train the a projection plus ln. Okay, this is a common one actually we generally don't go with this one actually. Uh let me uh mark in a red color this one. Uh so we always go ahead with this one this part train projection plus LLM which is a very common one I gen we generally fine-tune this layer only and the another one basically fine-tune everything means finetune the vision layer as well as the LLM layer attention and the MLP using the Lora okay so whatever component we have on top of it we can apply the Lora okay and we can try that or sorry we can retrain that so we have these approaches Okay. Uh the what needs to be fine- tuned, what will be fine- tuned. So over here I clearly mentioned again I give uh again let me give you the quick revision of it so that easily you can understand. Don't worry about the time guys the time definitely will be going there. So now uh here if we're talking about this image we have three part of it. Uh if we're talking about image to text one is this patches uh which we are going to be generate from the CNN model. This is also called the vision encoder. The second is the projection one and the third is the LLM one over here. Got it? Then what we are going to be fine tune. So option one train everything which is expensive. We generally don't go with this one. Uh second basically this projection layer as well as what projection layer with LLM one. So this is the common one but again it will take up more resources. Okay. The next one basically fine-tune everything with the Lora. Okay. So what we are going to do over here just read each and every line and maybe the understanding will be clear. So what we what I'm what I have written over here Laura base multimodel fine-tuning. So viz layer lora apply lura on top of it. Then llm layer attention and mlp uh apply the lura over here. Okay means you are not going to be fully retrain the entire one. You're just training the lora adapter. Okay. Uh this will work even on the smaller GPU and it is a memory efficient. So you can retrain every component using the LoRa capability right and yes uh this is possible and uh this guys I'm talking with respect to image to text I hope this is clear now if you're going to do without Laura it will be little expensive now coming to the next part we're talking about the data set format now how the data set looks like so we're talking about the data set format guys so data set is having a different format okay uh so these all are the format basically uh in which you will get the data set while you are doing this uh multimodel fine-tuning. The first is a simple image and the instruction. Now again guys we are talking about the image to text over here. Okay, So if I wanted to retrain my model, LLA model on top of the images, okay, so in this three way only I will be preparing my data set. So the first is a simple format. What I'll do? I'll keep a image. Okay? Either I'll be keeping the path of the image or object of the image. Right? Object means uh I'll keep the image itself in the pil format. Got it? Or I'll keep a path of the image so that like I can read the image from the specific folder. Right? Uh this folder could be available on any platform and or any cloud or it could be available in my local itself. So uh images and then the caption regarding the images. So example. png and this is the caption. Uh the column name could be the text or it could be the caption anything. Uh the second is a BK BQK format. Okay. Visual question answering format. There you will be keeping the images then question and then answer related to that. Okay. So this is a normal captioning right? Image captioning. On top of the image captioning only you are going to be retrain your model. uh this particular format basically it's a visual question answering format where you have the images along with that you have question and answer regarding that particular image. Uh the third format is called the lava format. Right? So inside the llama format what you will have you will be having the uh images and the conversation right conversation basically uh you can see the role is a user content is this one means the user is asking this question and we are going to be generate this answer. Again it is similar to the question answering only the conversational uh regarding the conversation only. Okay. So either we can keep in this format or just simple image question answer or either we can keep it like this. Okay. Both will work. So yeah here also I mentioned the same thing. So if you will go through with this uh data set the different data set which I open over here. See uh one very famous data set is a chart QA. Just check over here what I have written over here. See uh sorry what they have given over here. Uh they have given the images. It is a like the uh image itself. Okay. It's a pil format of the image which we kept inside this table. Okay. So uh you can see this is the image. There's a query regarding it and there's a label means the answer. So this is a conversational format. Now uh just look into the another data set. So uh the data set name is lava instruction. So what we have? We have a image path. We don't have a image guys. So we just have a image path. So separately we'll have to uh download the image data. It is a coco data set. So we'll have to im download that data set folder and accordingly we'll have to load the images from there. Okay. And see this is a conversational about the images right. So again this is a conversational data the question answering data which we can keep in this format. So we have two ways. One we can keep the image like this. Okay. Or path of the images. So that we can read the images from the source. Okay. From the given source over here. Then uh guys over here you can see we have one more type of data set. So images is there. Then we have a text. Okay. Uh means either we can keep the text, we can keep the caption, whatever we can keep. So this is just one more column. So image is there and then text is there. Okay. This is the image captioning. Uh then here you can see one more format. So image is there then caption is there. Okay. So image and regarding the image we have a caption or the text or either you can say the description anything you can say. So the different data set guys you can see over here as I shown you. So either we can keep the image in the column or we can keep the path. So just keep all this thing in my mind. I created my own custom data set. So that if you have own custom data uh like how you can train your model on top of that data. So uh see this is my own data guys. I uh I had some images of the iPhone. Uh let me show you in the local itself. So this is the iPhone images guys. Uh sorry this is the images I kept outside of the folder. Let me keep it over here. So this is the iPhone images. Uh let me open the image. See this is the image. So uh using this image only I created some data. I I'll show you how to create it. I have a script the complete script of it. So this is the first image then second image, third image. In total I just have five images. I kept the five images. Okay you can keep as many as images. So I had this data and I thought okay let's create a data set my custom data set using this images only. So this is the one uh like data see along with the images and then see this uh this is another data with the path only. Okay. Now over here if you will see with this data so I have image and the caption regarding that and even I can keep this message column. So I can utilize my data in this way. I can use the image and the text out of this uh data set or else what I can do I can use this image and this messages or I can use the all these three column all together just to train my model. I hope you are getting my point. Now just see over here inside this register. See I created this particular data set. So over here you can see we have my image path. We don't have an image. I didn't keep the image inside the column. I just kept the path of it. And over here you can see the text regarding this particular images. And this is the message the complete conversation. Now guys uh if we are going to be use this particular data set uh mean this particular format then I will have to keep one iPhone image folder in my local. from there only we'll have to read this particular images. Getting my point? So whenever someone is giving you this kind of data set then uh it will provide you the data folder also or location also. Okay, data folder also or the data folder location also inside the data folder you would be having the images those specific images. I hope guys the data format is clear. What kind of data format should be there if you are going to be train your model on top of the images. uh here I kept each and every example. Now guys after that uh let's come to the final thing final topic. So what is the differences between the normal finetuning means the text fine-tuning and the multimodel LLM fine-tuning. So guys here I kept all the differences. Let's uh read all the differences one by one. So uh one input type will be the text only here input type could be anything along with the text architecture LLM only mean the decoder part of the LLM. here encoder projection lm and whatever another thing this is just a general uh this is the term basically I kept behalf on the image to text only but uh if you're going to work with image to sorry uh like text to image audio to uh text to audio so this term could be the different one okay so according to that you will have to keep the term over here then computation guys medium to high GPU needed moderate GPU maybe high GPU but here guys if we are going to be process this image audio video. So yeah, we required the higher VRM and the higher high-end GPU. Complexity will be the medium one. Here would be the higher one. Uh processing tokenization here media processing means uh images, audio, video, right? Whatever other type of data we have, we have to process that. Uh now it is more stable and it is little sensitive because we have a different modality. So uh we are going to be fine- tune our model just over the text guys. So it is like little easier compared to the multimodel. over the multimodel guys. Uh on the other hand in the multimodel guys we have a little more complexity. So I hope guys I you understood everything every sort of a term whatever I have mentioned over here. Uh now finally let's uh look into the practical. After that I'll end this video. So guys this entire practical will perform over the collab. Uh you can do it anywhere wherever you have access of the GPU. Uh now see guys uh first of all you need to select the GPU. Just click on this runtime and then change the runtime type and then select the free available GPU. Uh just save it guys. After that uh connect with your GPU. Now these all are the model. Here you can see I kept the name of all the multimodel. Just uh read out the name. So uh these all are the multimodel actually from the coin. Okay. Then from the llama, from the GMA, from the mistrill and from the lava. This lava actually it is from the Microsoft. So uh guys this is all the multimodel we are going to finetune means we can pick up any multimodel from here and we can fine-tune it. So I written a name over here. So what I did guys I created one model registry using this model means I can pick up any sort of a model from this model registry and I can perform the finetuning. Okay. Uh and then guys data set wise also see this is my registry. So I can keep I can like read any sort of a data set from here and I can perform the finetuning. See I kept my own custom data set. Okay. So that's why guys I kept the name of this video fine tune any multimodel. Uh the title is going to be justify over here. So uh let me again give you the quick recap. So this is all the model guys which we can finetune. You can create a model. You can keep it inside the model registry and whichever model you want to fine-tune you can do that. Now uh here guys uh first of all you will have to install some packages. So first is a transformer. Second is the uh TRL. Then third is the onslaught. Then fourth is the sentent piece protobuff and the other required packages. If you want to know about these packages you can go and check out with my hugging face crash course or there I discuss the complete hugging face ecosystem along with this uh packages also. Uh now guys why we are installing this hugging face packages because see this unsloth actually it is created on top of the hugging face only uh and uh it is a certain level of optimization over the hugging face. So if you want to understand this uh unsloth right uh then please go and check with my video it is already available inside the playlist. So just go and check with the video number 19 okay so here I discuss the complete onslaught. Now uh what I'm doing I'm going to be install all these packages. It will take some time maybe 2 to 3 minutes. So let it install. Now guys uh you can see my all the package are installed. Uh now after that what I'll do I'll import this packages. See I kept the data link also. So whatever data I have shown you over here. All this data set I kept the link inside my collab. So you can go through with this link. uh now what I'm doing I'm going to be uh import the packages so first is unsloth second is osch then data class then ticked uh then the other packages like load data set text streamer fast vision model this is the class inside the unsloth for loading the vision based model that's unslo vision data collector okay then s the config so apart from this here is my model registry it is nothing it is just a simple dictionary where I'm keeping the model name along with the key. So whatever model I wanted to use, I will just pass the key name and I can access that specific model. Uh similar to this uh similar to that, similar to this, I created data registry. So whatever model I wanted to whatever data set I wanted to use, I'm just passing a name and which part of the data I wanted to use. So I wanted to use the train part train data set and I am passing the image key. Okay, so it is a column actually where the image is going to be keep. So image I'm passing and the text related to the that image the text I'm passing okay either it could be text caption or that conversation I shown you each and every format I think now you are familiar so likewise what you can do you can prepare your data set registry okay uh now what I'm doing see first I'm going to be import this thing so let it import if it is asking you to restart your kernel then restart your kernel and then import it and guys please uh keep this unsloth at the first place otherwise you might get error guys you can see we are able to import all the statements successfully uh now what I'll do guys I'll create one class so I created one class the class name is the uh vision finetuning config uh it is a data class where I define my all the required variable so whatever variable I wanted to use uh I will I have defined over here inside this config class. So let me give you the quick walk through of it. So first is a model key uh then data set key. So by default I kept one model key here and the data set key. Whatever I wanted to use I can pass it. Okay, I can pass to this vision config class. I I'll pass I'll show you how to do that. Then guys subset how many uh rows I want from the data because data is very huge. Okay, I cannot use the complete data set over here to train my model. if I'm going to be use any hugging phase data because there we have like maybe uh 10,000 to one lakh rows okay so I'm just using the subset just to demonstrate you then evaluation ratio so this is the evaluation ratio means 10% data 0. 1 means 10% data I will use for the evaluation then seed means again it is for the reproducibility so if I'm running again and again then random sample should not come okay the data set should be the same then guys this is the lura configuration so R means rank of the Lora okay Lora alpha and Laura dropout this is again two more variable to regularize the Lora okay low rank adaption and don't worry I'll explain this Lora concept in very detail in my upcoming video I already planned that uh then guys we have a training so for the training guys see per device trained batch size so just read it from back only so size batch okay batch size training batch size device okay per device on per GPU how many uh like in how many batches the data should go. Okay. Now gradient accumulation step. Gradient accumulation means uh in how many step we are going to be uh change the value of the gradient. Okay. The weight actually graded accumulation. So let's say we have run for the first step, second step, third step, fourth step. We are not changing up to four step. In four step commumulatively we will change the value of the weight. Okay. So this is just to reduce some overfitting and all this one then number of epochs for how many epox you are running learning rate okay again very important part logging step at every 10 step we are going to be log it log the value weight decay okay max length of the generated output so all this value guys it is related to the training so the sft configuration uh I'll explain you all this thing I will explain you in the near future also guys uh because I know it is a pain point that we don't know like most of the parameter which we are using while we are fine-tuning the model. So I have this thing in my mind and definitely in my future classes I'll discuss onto it. Okay. Now coming to the uh next part. So here is output directory in the save directory. So I'll keep my every checkpoint over here and my final output will be over here. Uh so what I'll do guys I'll create a class. I'll uh run it and I have uh loaded this class. Okay then guys uh if you want to check the data like how the data looks like. uh so I can show you using one data only. So here I'm loading this chat QA data and mainly I wanted to show you the chat this image column. Okay. So after loading the data see the data is getting loaded. I can print this data set. So let me print this data and then what I can show you. I can show you the first. Okay. So here I can split it. Did I split over here? No. I think I can split it like this. Just a second. This is a data set guys. We have a train data set, validation data set and the test data set. So again let me load it with the train split means I will just get the train data set. Okay. So yeah I got Now let me show you the first row of the train data set. See this is the first row we have a image and it is a pil image. Okay. This is the configuration of the image. So we can so you will be having the image in this particular format in the column. Got it? I hope this is clear. Now this is the main class the trainer class. uh just focus onto this class. This is going to be very important. So the class name is the vision finetuner. So first what we are doing we are loading the model. Then we are preparing the data set. After that we are building a trainer. Okay. And then we are going to be train the model. And then finally we are going to be save the model. And if you want to do the quick inferencing. So yeah for that also we have a method over here. So this is the complete uh class. class guys. You can directly take this class. you can keep as it is inside any sort of a code. Now let me execute it. Yes, it is going to be execute. Now what I'll do guys, first I'll uh run. Okay, first I'll create a configuration. See what I'm doing? I'm going to be call this vision ft configuration class. I'm passing my model key. So I define one by default model key or else uh see those are the default one. I if I wanted to override that I can pass the value from here. So I what I'm doing guys uh this is my vision configuration class. Let me show you where it is. So here is a class this one. This I define this one vision configuration. So I can pass any sort of a value whatever I want to define from my end. take from the user. Okay. So what I'm doing I'm just passing my model name over here and the data set you can pass anything guys model key and the data set key. You know we have defined one model registry. So let me show you that model registry. I'm writing over here model registry. Let me take the variable from here itself from the sale only. So this is my model registry. It is in a capital. So if I'm going to be printed over here uh let me print over here and you will see that what models we have. See these are these all are the model. So whatever model you want to find tune you can simply fine- tune you over here. Okay just pass the just pass the model key and uh the respected model the respective model will be loaded. So now what I'm doing guys I'm going to be configure the vision find values okay through this class through this data class. Now what I will do guys I'm going to be create a object of this uh viz fin fine-tuner class. Okay I'm passing this configuration then uh guys what I'll do I'll call the load prepare data set and build trainer right. So my object will be ready over here. So my trainer object is ready. I will uh come to this part. I'll explain you each and everything what uh is happening. Then what I'll do guys I will train the model. See my model will be trained over here. Then I will save the model. My model will be saved. Okay, using this train dots save and then uh I will perform the inferencing. So I can pass the question any question uh related to the train data. Okay, and then I can test my model. So uh let it complete until I can give you the quick walk through of this vision finetuner class one more time and then we'll come to the final result guys. So if you will look into this vision finetuner class. So what we have over here first we have this configuration. So we are passing a configuration. Okay, the type of the configuration is going to be the data class, right? So, I'll get a complete configuration. From here, we can access any sort of a value. Uh then guys, we are going to be load the model. data. We have this three thing. Uh now what I am doing? So here guys, we are going to be load a model. So using this fast vision model from pre-train, we are passing a model name. We are passing load in four bit true and then use gradient checkpoint unslaw. So we are loading model and checkpoint. Okay. Then we are getting a pft model over here. See we are passing all this parameter to get a pft model parameter efficient model. Uh then I I'll be getting a model inside this particular variable self domodel. Okay. Uh now I got the model. I got the cell dot model. Now what we are doing we are going to prepare the data set. So we are loading a data set. Uh okay. And here I have a data set like how many uh rows we want from the data means the subset of the data. Then here is my instruction which I define inside the data registry. Then image key the image we are getting from the data and then text key. Now guys uh if you have a path of the image uh see here I shown you uh the image path right this one. If you have a image path then you will have to keep the respective folder onto your if over here over your server okay over your whatever directory you wanted to keep you will keep a respective folder and from there only you are going to read the images okay then here I'm going to format the data set so see uh here is my user uh the instruction will come the image will come over here right this one then assistant okay this is the assistant right so user is giving this instruction along with this images and then the assistant means the uh chat the model should reply this one. So this is my complete format of the data. Now I'm going to be mapped with my data. Okay. And here I will be getting my split means how much for the evaluation and training. Okay. And then we are going to be return now this is my trainer. So what we are doing guys we are going to be define the SFT config. This is my SFT trainer. Okay. And what I'll do guys I'll train. Okay. I'll call this trainer. t train right so self dot trainer train once I'll call this train method on top of this uh trainer sf trainer my model training will be started and then guys we are going to be save it and here we are going to perform the inferencing so how we can perform the inferencing guys so for that we are having a image okay we are passing this particular message along with the images okay we are passing images along with the instruction and my model will be generated the output so this is a complete code for what for the inferencing you can go through with it Here we are going to be passed here going we are going to be create a message which will be passed to that tokenizer. This tokens the models and finally we are going to be generate a output and then we are going to be decode that output. That's it guys. Uh now what we have seen my uh data have been there. See uh load model is loaded data had been prepared and my builder is ready. Now what I'll do guys I'll call this trainer trainer. train and my model training will be started over here. uh once the model will be trained guys I'll save that model I'll save wherever I can save it over the hugging face I can save over here okay or else basically I can save it uh on any cloud wherever I want so yeah the training is started it will take some time to epoch maybe it will take 5 to 10 minutes so let it train okay guys so my training is completed it took around uh 7 minute and uh see over Here uh I have run my two epochs. Okay, all the two epochs. Now this is what this is a step at every 10 step we are going to be log the information. So yeah I log this three steps over here uh in my data set basically according to my data set the information is shown over here. Okay now what I'm doing I'm going to be save the model once I'll call it uh so my model will be available over here. See this is the VM Lora output. So we got our model and save tensor file is over available over here. It's a binary file. Now if I wanted to do the quick inference so I can uh run this one. So automatically the code will be executed and whatever image and the caption I'm giving according to that the answer will be generated. Okay. Over the finetune model. So I'm loading the fine-tuned model over here. Again let me give you the quick walk through and then I'll show you the output. So what is happening guys? So over here see uh for inference the model will be loaded. This is the finetuned model. then the data set will be loaded. Okay. So load data set info name and split. Right? So I got the raw data set. Now over here what I'll do? So I will pass the sample index the data set information and from there I will take a image. Now I'm passing the image along with the instruction. So this is my complete message. I'm tokenizing that I'm converting the input text. Then I'm passing this complete input to my uh model. Okay. And the model will generate the response. So let's see what response is being generated over here. So see guys whatever image I'm passing according to that I'm getting a response. Now I can format this particular information actually uh on which data set I train my model let me show you it is a latex OCR data set. So this is a data set guys. Uh this one uh here we have a formulas. So this is a text. Okay. Uh this is the images and this is a corresponding text. So we have trained our model on top of this particular images. Right. So we are passing this image. So it will extract the formula out of this images and it will provide to us and we can format that later on in the same manner. I hope guys you understood this entire thing entire tutorial. Now one more thing uh let me highlight over here. If I you want to prepare your own custom data then you can do using this particular script. So you can keep the images inside the folder you can give the respective caption. Okay. And after that guys you can execute this uh cell where the conversational format uh the description of the data set will be created. Uh if you want to keep the images okay then you can run this particular line right this particular line feature you can create a feature object where you can pass the image text and the message and see you just need to run this one if you don't want to keep the images you just want to keep the simple path then unccomment this line and run it so you will get a data in this particular format let me show you in this way okay you will be getting a path. If you want to keep the images, then you will have to run it in a another way. Okay, this one then guys run it and push it. Uh for that guys, you will have to generate the right API key from the hugging face and you can push your data to the hugging face itself directly. So a simple code I will give you this code so that you can uh execute it from your end and you can create your own custom data and you can keep it anywhere guys. Yeah. So this is it for this particular video guys. I hope you liked it. Uh this kind of content takes very much effort guys. I was preparing it from last one week itself. So if you like it then please hit the like button. Please subscribe the channel and please support this channel so that other person also can learn the AI and then can they can trust on my content. Uh thank you guys. Thank you uh very much. I'll see you in the next video. The topic name is embedding and the emitting finetuning. So uh this video uh I divide into the three six chapter. Uh now guys what I'm thinking actually this sixth chapter see if I'm going to take all this chapter right inside a single video uh it will be around two hour of video. So first three chapter I will cover in this video and rest three chapter I'll be cover in the next video. Okay subsequently I will upload one more video uh right after this one. Uh there I'll discuss uh chapter 4, five and six. So let me give you the quick highlight uh that what all thing we have over here. Uh in the first chapter we're going to discuss about the embedding. What is the embedding? Then uh we'll uh understand the very important uh concept about the embedding that is called the semantic search. We'll understand the differences between the keyword search and the semantic search. Uh then we'll see the differences between the encoding and the embedding and then we'll see the application on the embedding. So here we are going to cover all the fundamental about the embedding. Okay. Now after that guys we'll come to the chapter two. So here we'll do some model level analysis. So what is the model level analysis? So we'll see guys what models are there. Model models are there for the embedding. Uh we'll see the type of the embedding model. We'll see how to select a best emitting model and we'll see embedding models leaderboard. Okay. So you will understand the model models we have and which model needs to be used. Uh then guys in the chapter three we'll come uh onto the model architecture. Okay. And we'll see we'll we'll see on which data set this emitted model have been trained. So here guys we'll discuss on a architecture level. So we'll see this uh embedding model it is similar to the GPD5 GPT or the Jimny or the llama or the mistl the architecture is similar to this model or it is a different one. Okay then we'll see on which data set or this embedding model have been trained. Now uh after completing all these three chapter all our fundamentals regarding the embedding is going to be clarified. Now after that guys uh in the chapter four we'll discuss what is the embedding finetuning why and when we should do the embedding fine tuning. So all these thing we are going to discuss inside the chapter four. Then inside the chapter five we'll see data set format for the embedding fine tuning and we'll fine-tune uh one embedding model on our own custom data. So uh the scenario is going to be like this means you have to create one rag system. inside the rag system you use the embedding model. Now let's suppose this embedding model this uh embedding model actually it is not performing well on your own data set on your own custom data set. Okay. So what I'll do guys so we'll fine-tune this embedding model on over the custom data set over your own data set and then we'll try to utilize it inside the rack pipeline. Okay. uh so this is going to be a complete uh scenario guys and uh definitely we'll try to implement that now we'll see embedding fine-tuning versus LLM fine-tuning so I will close this uh video I will close uh this chapter okay with these differences so that you will get to know each and everything about the embedding and the LLM fine tuning now let me show you the practical also so this is the complete practical guys where we're going to discuss about the embedding see I'll show you the embedding We'll discuss about the semantic search. After that keyword search versus vector search. Uh then we we'll search we'll see how basically we can evaluate the embedding model. Uh after that guys uh after seeing the embedding model the evaluation all everything not only the one guys I have kept the different models guys. Uh I'll show you the MTEBB okay MTB leaderboard and even I will show you the sentence transformer repository. Uh then guys after that I'll come to the training part. So we'll train our own model. Okay we'll run we'll train a model over our own custom data and yes uh that particular model we are going to be utilized in our rack pipeline or anywhere else where we can use this embedding model. So I hope guys you like this uh entire thing. Now one by one uh step by step let's start. So guys uh let's understand what is an embedding. So uh here I kept a multiple definition to understand about the embedding. Uh let's uh read it one by one and let's understand about the embedding. So uh the first definition is embedding is a mathematical representation of the data. Okay. Uh or we can say embedding is a way to convert text, images, audio, video into the meaningful number. This is very much important guys. If I'm saying meaningful guys, so meaningful is also called the contextual number. Okay, contextual number. So either you can say meaningful or you can say contextual. Right? If I'm saying data guys, so this data could be anything. Data uh it could be text, it could be images, it could be audio or the video data, right? So any kind of data actually we can convert into the embedding. Now guys uh this definition actually it is more technical. So let's understand about it. So embedding is a dense highdimensional uh numerical vector that represent semantic meaning of the data. Okay. Uh dense means what? What's the meaning of dense? Dense is called dense is also called nonsparse. Nonsparse means non zero.
Keyword Search vs. Semantic Similarity
Got it? So whatever vectors is being created using the embedding model. So there you will not be able to find out much zero. Okay. So there will not be having much zeros inside the generated vector. So those are called the non-sparse. Uh second is called the height dimension. So 384 768 1024 1536 2 4 uh 2048 and uh nowadays even we have bigger dimension. So what is the meaning of the dimension guys? So let's understand with this example. So uh let's suppose we have the sentence the capital of the France is a Paris. So uh how many numbers we have? We have 1 2 3 4 5 6 7. So what's the size of this vector? The size of the vector is 1 + 7. So one is representing a row. This is a row. Okay. And the seven actually is representing to a column. Right? Now this uh seven actually it is a dimension. So this columns actually this columns C O L U M N S right this columns is nothing it is a dimension and this is also called feature. Feature of the data. Yes this is true. So whatever number you are seeing over here it is representing to a individual feature of the data. So in this vector how many features we have? we have seven features. We have seven columns. Okay. So column or we can say we have seven dimension. So in reality guys you will not be able to see this uh this much of small vector. So in the vector at least we would be having 384 dimension and it can goes up to 2 to 3,000 as well. Uh now I hope you understood the definition of the embedding what it is. Uh now let's understand what is a semantic search. So guys uh semantic search actually it is a very important application of the embedding right. So let's uh discuss about this topic. Uh let's say we have a sentence and my sentence is my name is Sunny. So this is my sentence and now I converted this particular sentence into the embedding. Okay. Now one more line guys. I think I missed that line. Let's try to read that line. So here I written vectors. So what is a vector? So vector is nothing. It is a mathematical object in a linear algebra. In programming, we represent this vector or we store this vector as an array. Okay. So if I'm saying embedding, if I'm saying vector, if I'm saying array, right? So everything is same guys. So it is just representing a numbers. What it is representing? numbers in linear algebra as a mathematics guys. in mathematics actually uh this vector is having some like uh extended terms and the terminology like direction magnitude and all so as of now I'm not going to discuss that part I will discuss in some other video okay but guys if I'm saying vector if I'm saying embedding if I'm saying arrays right so all are representing to a numbers okay in those numbers we are representing to our data got it so uh here you can see let's Say we have a sentence. The sentence is my name is Sunny. And here I'm going to be represent this sentence with this embedding. Now uh guys what I will do with this embedding? Now what could be the application of it? So the application of this embedding what I'll do guys? I'll perform the semantic. Okay. I will perform the semantic search. Now this semantic search is also called what it is called guys? It is also called similarity search. Okay. So either you can say semantic search or you can say similarity search. Both is same. Now what is the meaning of it? I'll come to the definition. I written everything. But let's understand the meaning of it. So semantic search means uh whatever embedding actually we are going to be uh create right. So it is having some contextual meaning. Right? semantic meaning either you can say contextual meaning or you can say semantic meaning right now guys behalf of behalf on this embedding actually we can search a similar embedding right so that's a application of the embedding and that's a meaning of the semantic search what is a semantic search guys semantic search means this embedding actually this embedding is it is having some contextual meaning it is having some semantic meaning. Now behalf on this embedding actually I can search the similar embedding right. So that is only called the semantic search or else it is called the similarity search. I hope this thing is clear. Now guys uh if I can say behalf on this embedding right so not only the text we can even uh search the image okay uh image to image or we can search text to image right we can search any sort of a document there are lots of thing which we can do using this semantic search and it is a very powerful concept in the natural language processing guys okay so I written each and every definition each and everything over here even along with example let's understand so what is an semantic search guys semantic search meaning based intelligence search using embedding so the same thing I was trying to explain you and I written the same thing over here now guys uh here you can see uh semantic search means searching based on the meaning not based on the exact word so whenever we talk about the sentence okay now this sentence is also called the document so in NLP guys the Right? Now, uh we have sentence one and let's say we have sentence two. Right? Now, if we are checking the meaning, right? We are finding out a similarity between these two sentence. So, we are not just following a words. No. Okay. We are checking the exact meaning. And how we are able to capture this particular meaning? meaning using the embedding model because the dimension which we have inside the embedding model. model those are nothing those are some features. Okay. It is representing to the features. I hope you understood everything now. Now how we are doing that semantic search on similarity search. So we are doing it using the cosine similarity using the dot product uclean distance. So these are some important matrixes guys right. So if you are into the NLP or into the ji right so uh you have to start your encoding and embedded journey and there you need to understand about all these matrices. This is very much important. Now let's see some example. I kept some example for all of you. So just uh look into this first example guys. Okay. So this is important this first example. Let me highlight this one. Okay. Then guys I kept one more example over here. This is one more example. And here I have some points related to these example. Okay. So you have to focus on these points as well. Now this point uh the next point actually it is related to the next example the different example. So read it out. Uh let's read it out this point one by one. So what I'm saying? I'm saying eating fiber reduce heart risk. Okay, this is the first thing uh or I'm saying eating fruits and vegetable lower cardiovascular disease. Okay. Now here I have written both sentence have a same meaning. Uh this is true. Uh even though the words are different uh but embedding will place them in a closer vector space. That's why semantic search return a relevant result even though we don't have a same wording. even though the words are different inside the sentence. Okay. So I hope you understood what I'm trying to say. I'm trying to say see uh this sentence actually is something else means the words are something else and this sentence are some this sentence is something else means the words is not matching completely. But still guys if we are going to be find out a similarity between these two sentences it would be very high because the contextual meaning of this sentence is same. Okay I will show you in some time. So uh this is the first example. Now just look into the second example. The second example is eating fiber reduce the hard risk. Okay this is the first sentence and the second sentence is buying a new car improve driving comfort. Now guys just think the sentence one. Okay, this is my sentence one and here is what guys, this is my sentence two. Now these are the complete different topic health versus uh auto automo and here embedding will be apart to each other and we will be having very low cosine similarity. So what I want you to say over here I want to say this two sentence actually it is not having any semantic meaning. Okay, we don't have any similarity between these two sentences. So our similarity score our cosine uh score a dot product score is going to be very low. I hope you understood right. So this is the meaning of the semantic search. I hope you understood with this example and don't worry guys, I'll give you this notes. You can go through with this notes and even you can uh do some self study using this notes. Now uh coming to the next part. So here guys I written keyword versus semantic search right. So let's understand uh what is the differences between. So uh just read out this particular definition. Uh this is uh like very much important. So keyword search means it matches the words. So whatever sentences we have. So uh inside those sentences whatever words we have it is just going to be match those words. On the other hand, this semantic search is going to be match the meaning actually using the score sign, uklant or the dot product. We have some other matrixes also like zakad similarity and the different other matrixes. Okay, we can use those as well. But uh these three cosine, ucle ukuh distance and the dot product are very important and the useful. Uh now guys uh here I given you one example. Okay. Uh what is a keyword search? This example actually is uh going to be very important guys just focus over here onto this part right now. So what I written uh how keyword search works. If you search okay if you search how to reduce heart risk the system will mainly look for the sentence which is containing these word reduce heart and risk. The sentence is going to be contained ways of lower cardio cardiovascular disease chances. Right? So even though this sentence okay this these two sentence this first one and the second one is having a same meaning but again with the traditional keyword search it's not going to be matched because uh reduce is not equal to lower and heart risk is not uh equal to cardiovascular disease. Okay. Even though it is having a same meaning but again uh this sentence will fall apart to each other. I hope you understood what I'm trying to say. So if you want to understand this example just uh read it out this sentence first. See this is the first sentence. Okay. Uh how to reduce a heart risk and then this is the second sentence. The second sentence is way to lower a cardiovascular chances. Right? So in both sentences I'm trying to ask a same thing. the same thing. But again guys uh the keyword search is saying reduce is not equal to lower and heart risk is not similar to this cardiovascular disease. So this keyword is not going to be match. So this uh both sentences uh will not show any sort of a similarity and that's a disadvantage of the keyword search where we are not going to be uh basically uh focus on the context okay the meaningful context the semantic meaning of the sentence we are just looking into the words now here I kept one more example guys just uh see over here how to lose weight fast and sentence two is saying quick fat loss strategy. Now using the keyword search it is a weak match but using the semantic search the embedding uh after genetic embedding similarity search we are going to be performed right so there it will show the strong match I hope uh this thing is also clear now guys uh let's come to the third uh topic so encoding versus embedding now again I'm not going into the deep but yeah I will give you the quick recap of this topic uh the encoding topic uh because uh Once you will start with the embedding journey right so at the first place you will always learn about the encoding and uh definitely once I'll start my NLP playlist in the near future so I'll come to this encoding part encoding chapter so what is this encoding guys so encoding it convert data into the numerical format okay so that machine can process uh now this uh encoding actually it is a count base and it is a matrix factorization based now these are some method uh one hot encoder B V B V which is called back of words TF VM25 and globe. So uh BM25 is nothing it's a extended version of the TF. Okay. And globe actually it is nothing it is a matrix factorization based technique this one. Now uh this one hot encoding B O W and TF IF actually it is a countbased technique. Okay. Now here I cap the one hot encoding. Now let's take a recap uh how let's look uh let's take the overview how does it work I'm not going into the depth topic but yeah I can give you some understanding so this is called one hot and coding uh now if I want to see this is my uh category red blue green okay now if I want to convert into the one hot encoded vector so how I will do that first I'll create a column okay so this is my three category Now what I'll do guys uh in whatever row this category is present I will write one and to rest of the like column I will give zero. So in the first row if you will see the first row guys so we have a red right. So red is going to be one and rest color is going to be zero. In the second row blue will be one and rest of the thing is going to be zero. In the green one uh this two is going to be zero. One would be for the green and blue uh this is going to be a zero and blue will be one. So this is called one hot encoded vector and this is a sparse vector. Okay, sparse vector means so this vector actually this uh array this vector is going to be contained a lots of zero. We have lots of zeros over here right. So uh this is uh called the one not encoding guys. Now let's understand about the bag of words. Now guys uh how this uh bag of words works. So what we do guys see let's uh understand we have a document see this is my first document okay now uh this is my document guys this one right now what we do guys using this document first we create uh if I'm saying document is nothing it is a sentence in NLP actually this document is also called the sentence okay sorry sentence is also called the document now uh let's say we have two document now what I'll do guys so I will create a vocabulary Okay, using this document. Now this vocabulary is nothing. It is a unique words. Okay, unique words. So these are the vocabulary. This one child dog happy makes the Okay. Now how many times these are coming? So uh here you can see child dog happy makes D. So in first sentence in document one how many times these are coming right? So child is coming one time, dog happy is coming one time, make is coming one time, the is coming two time. Right? So this is my vector. That's it guys. Right? Now just look into this document too. So child is coming one time. Dog Happy is coming one time. Make is coming one time. D is coming two time. Just read out this sentence. Automatically you will get it. Okay? Now here guys this bag of words is nothing. It is just a countbased technique. Okay. Now how it is working? So sorry how we are going to be form this vector. So first uh we'll look into the document. Okay. Document mean sentence the entire data from this we'll form the vocabulary. Vocabulary is nothing it is a unique words. So these are my vocabulary which I'm representing as a features over here. This one this I'm representing as a column which is a feature. Right? And then uh I'm just checking a count inside the particular sentence regarding these words. Okay. And then the final vector we are showing as a encoded vector. Right. Uh so I hope guys you understood about the one encoding and the bag of words. Now this is the formula of the TF. Again I'm showing again I'm telling you guys uh this thing I will cover in some another session where I'll discuss the fundamental of the NLP. As of now, I'm just showing you the formula. See, this is the formula of the uh TF where TF is called the term frequency. What is the term frequency? Number of time the term appears in the document. The term is called the words. Okay, that is specific word, the vocab. Okay, the unique word. The total number of terms. Okay, the number of all the unique words. Then inverse document frequency means total number of document in the given corpus sentence. uh and 1 + number of document containing the terms. Okay. Uh how many like uh number of document containing that specific term regarding that we are going to be calculate the uh frequency. Okay. Now here we are adding one. Why? Because if the term is zero so not it will not go to the infinite and here we are taking a log of it. Okay. So this is a TF IDF and once we are going to be multiply this term okay TF and IDF. So whatever number I will get regarding that vocab okay for the given sentence that number okay those number the series of number I will be representing as a encoded vector right so I will show you in my NLP playlist I will give you the complete intuition of this TF but as of now just remember this formula now this is all the encoding technique now let's look into the embedding guys so I think we all know about the embedding so let's uh take a one more time and after that guys I'll come to some more important concept. So and embedding means convert data into the vector representation. Now here uh embedding of the king okay embedding of the so just think guys uh if we have a embedding of this king and right so let's say uh I can represent in a 2D uh like uh 2D graph so let's say we have x and y axis now this is the embedding of the king and queen right so this will be having some similarity king and queen is having some similarity not based on the gender guys I'm saying uh based on their title they have some similarity okay uh so the cosine similarity between will be very high and the angle the cosine angle will be very less we are going to be showcased over the x and y axis this vectors right uh and uh we are talking about this king and banana so the angle will be very different let's say this is my king okay King. Now this is the queen. Okay. Now here would be my banana. Let's suppose this one. This is what this is my banana. So the differences between this the angle between this king and banana will be very huge because there is no such similarity between the king and banana. Banana is a fruit. King is a living person. Okay. Uh I hope you understood what I'm trying to say. So what is the classical method to find out this embedding? So word to back actually it was a method fast text is a method right. Uh so this method actually it was working over the neural network based strategy. Got it guys? So word to back and fast text was working on top of that strategy. Now this method were having some limitations. What were the limitations guys? Limitation wise uh they create embedding at the word level only. Okay they create the embedding on the word level. Means we giving a sentence. Let's say if I'm saying over here Sunny is a AI engineer, right? AI engineer. So if I want to convert this uh sentence into the embedding, I will not be able to create it using this word to back and the fast text. It was not possible. Okay? Because it was only working on a word level. They produce a static embedding. Now what is a static embedding? I'll come to that. I'll explain you that they do not understand the context. Okay. So they produce the static embedding and they do not understand the con uh context. This is very much important guys and because of that only this embedding was going to be failed. Okay. We cannot use it further uh instead of the sentence embedding the sentence transform base embedding. These are quite powerful a contextual one. But this word embedding word to back we cannot use everywhere because of these limitations. Right? So how this embedding looks like. So here I given one image uh you can simply look into this image and you can understand the embedding of the man, the woman, king and the queen. Right? So these are some embedding. Now this uh is a is also having some dimension. Now this dimensions are nothing it is a uh like features actually. Okay. So in the real embedding we would be having like 300 to 400 feature at minimum. This is just a demonstration. Okay. The dummy one which I kept over here. Uh now over here guys let's understand with the example uh let's understand why what is the meaning of the static embedding and why this uh what to model was not having the context. So uh let's understand about the sort transformer first then I'll come to the comparison. So sort means what? Stateart. So state-of-the-art transformer based embedding model. So it is based on the transformer architecture guys. The earlier word to back model okay or the fast text uh model actually it was only based on the neural network but guys this sort transform based model right the embedding model actually it is based on the transformer architecture. I'll come to that architecture. I'll discuss few points regarding that. Okay. how uh the embedding is being generated everything we'll try to understand now contextual embedding context aware embedding so it is going to be generated a contextual embedding and any text means a word phrase sentence full paragraph anything is coming let's say I'm saying sunny okay I'm saying sunny is a AI engineer right now this word this sentence whatever paragraph we have. Okay. Whatever paragraph we have or whatever kind of text we have, everything we can convert into the embedding, right? Uh this is a uh like uh very important uh concept of the sort transformer. Now example sort sentence transformer model mini LM, BGE, open AI embedding, Jimny embedding, cloud embedding. These are the example right. So these are the model example and even I will show you the model in very detail uh in some time. Now here guys you can see I kept one example with that your understanding will be very clear about the static embedding. Okay this one. So let's say I have one sentence. In the first sentence I'm saying I sat on a river bank right bank. Now in the second sentence what I'm saying? I'm saying I deposit my money in the bank. Now over here guys just think this bank actually it's a river bank. Okay bank but this bank actually it's a money bank. Okay. So here guys this bank is having a different meanings. meaning in both the sentences. So if you are going to be capture the meaning of the bank using the word to back model right. So it's going to be a same let's say I use a word to bank model I generated a embedding of this bank. So guys this always this bank is going to be generate this embedding right whether it is coming inside this sentence or doesn't matter. Bank will be always represented using this embedding and that's a very concerning thing. Now instead of that if on the other hand we are using the soda transform based model. So bank will be represented according to the context. So here bank is representing to the river bank and money bank. Right? So sort model will generate a different embedding. So that was a huge difference between this word back model and the current sort model. I hope uh this thing is clear. Now uh let's come to the next point guys. Let's uh see uh this embedding model actually it cannot only uh transfer it cannot only convert text into the embedding. It can convert everything into the embedding. So here I kept couple of example let's say if you want to convert image into the embedding. So yes you can do that. So image is what? Sorry guys uh I'm suffering like with little cuff and cold like okay. So yeah. So yeah now I think uh you got so what is a image? So image is nothing it is a collection of the pixel. Okay. So See this is the image of it. Now this we can further convert into the embedding. Okay means we can use this vit kind of model and we can get the vector representation. representation of the image right so here I written some name so clip model vision transform model are enough capable to convert any data into the images and uh any image data into the embedding and even I will show you in the future okay even I uploaded one video uh in my rag playlist where I'm going to be convert this image into the embedding and then I'm performing a retrieval on top of it. If you want to check, you can go over there. Now, uh the other one basically audio. Can we convert audio and the video also into the embedding? Yes, we can do it. Now, let's try to focus over here. So, we're talking about the audio guys. So, we have two approaches over here. The first approach is this one. Okay. And the second So, uh let's look into the first approach. The first approach what we are doing, we're going to be convert audio into the text. And the text we are going to be convert into the embedding, right? It is the same one like we have uh we have any text uh embedding model and we are going to be convert uh the text into the embedding. Okay. First we have generated text from the audio using the ASR model uh automatic speech recogniz speech to text model. Okay. Now the second one see these are all the model even I listed the model over here. You can read it over here. We have open air whisper we have Google speech to text meta mms. These are some uh speechto text model. Now on the other hand guys what we can do. We can directly convert the audio into the uh embedding. Okay. So uh here you can see what we have. We have a audio. We'll use the audio decode encoder model. Then we'll convert audio into the embedding and then we'll store inside the vector database. Uh now this is the image guy. This is the image of the audio. So yeah uh we can do it. We can directly take the audio file and we have such models where we can directly convert audio into the embedding. See these are the model name. Just read the model name. One is the Google YAML, Google Yamnet. Then from the open Cap uh then from the meta word to back. Okay. Wave to back actually. Uh now uh where we use this audio embedding. So we use it uh inside the voice search in the music similarity. So this could be some example. application actually of the audio embedding. So at uh this place we can use it. Okay. And now coming to the video part. So again uh if we're talking about the video so there also we have two method let's focus on first one. So first uh we are going to be convert video into the images audio and the time dimension. So audio we are going to be converting to the uh text embedding. Okay. Frames means images we are going to be converting the image embedding. Uh and then uh we have some metadata. Okay. So this is called the multi vector right. We we are going to be uh we are going to be capture the multiple vectors. Okay. and will store inside the vector database and on top of it uh whenever we'll perform the retrieval operation. So that is called the multi vector retrieval. Okay. So uh now the second approach is uh we can directly take a video and we can convert into the embedding. So this thing is also possible. We have such model. So here you can see video ME transformer sorry times former I3D. So these are some model using that we can directly convert our embedding. Okay. video into the embedded. Now these are the use case guys. So video search, content moderation, recommendation on YouTube, Netflix. So we use such things. I hope uh this is clear the use case and all everything is clear. So uh I believe guys uh this entire thing is clear. So we started from what is a embedding and uh let me highlight what thing we have covered so far. What is the embedding then semantic search then keyword versus semantic search then encoded versus embedding. Now let's discuss application of the embedding guys. This is going to be very much important. So application of the embedding. I written uh so many points over there and the last one is going to be very important. So please don't miss out that. So we're talking about the application of the embedding. So uh initially only I told you the semantic search is a most fundamental application. Okay. Now what is a semantic search? It is a meaningbased search. Now instead of matching keyword we are going to be perform the vector similarity. So it's being used everywhere in the Google engine inside the Google image search in the pin Pinterest right. So user search a red car system retrieve image of red car. So yeah we we are doing that in a Pinterest we are doing in a Google image search and uh even we are writing those thing over the Google uh directly and we are getting those information and how this is possible because of this semantic search guys right so because of the semantic search this thing is possible so this is the primary application of the embedding now in the recommendation system also we use this semantic search we use the similarity embedings right so in a Netflix similar movie in a Amazon similar product in a Spotify similar song all are using the vector similarity so yeah this is again a very huge application okay application of the embedding now guys uh coming to the next part so here topic modeling means a clustering of the data okay based on the similarity group similar document together right so we I have document one. Uh document one. We have document two. Okay. We are going to be read a content of these document and based on the similarity we are going to keep it together. If there is there is some uh like uh there is some similarity between these document then we are keeping it together. Okay. So that thing is also per uh possible using the uh documentation together. Now the last and the like the last one is a very important guys. This is the retrieval argument generation and everyone's wants to be know about this retrieable argument generation. Uh everyone's uh everyone knows about the embedding from this retable argument generation only. So let's understand what is this retable document generation at the first place. Uh then I will come to the embedding part. So uh if we're talking about the data guys so here so the data we can convert into the multiple chunks right then we can convert into the embeddings. So here uh we are going to be convert using the specific embedding model. Now here only this embedding model comes. Now why we are doing it I will tell you that then we are going to be store inside the vector database. Okay vector DB. Now guys whenever user is asking any sort of a query right so this particular query we are going to be convert into the embedding using the embedding model and then we are going to perform the semantic search and then we are fetching the retrieval relevant data. Now this relevant data this rank data it is also called the context. So this context along with the query we are providing to the llm okay we are argumenting our query this query we are not directly passing this query to the llm no we are passing it through the vector database vector first vector database is fetching some context and then uh behalf on this context right so just a second guys so behalf on this con context only LM is figuring out some uh result uh of the query and then it is giving back to the user. The final response is given So this is what this is the rag guys. Okay, this is what this is a rag. I hope this is clear. Just read out this architecture by your end uh everything will be clarified. If you don't know please check out with my previous video. So the biggest application of the embedding is this rag architecture. Okay. uh I hope uh you understood where the embedding is being used over here. So we are going to be convert our data into the embedding and here at this place actually uh to the vector database we are performing the semantic search the similarity search and we are fetching a relevant context over here. So yeah this thing is clear and I hope you understood the application of the embedding. Now what are models we have regarding the embedding and how to select the best possible model then we'll see the embedding leaderboard. So here I kept the embedding leaderboard and then from here guys uh the core and the architectural concept we'll discuss in the next video. Okay. So here I'll tell you how the model look like if we are going to be train any embedding model from scratch then which uh model you have to select which part of the transformer you need to be select and how to train that. But yeah, as of now we just uh we'll just focus on the embedding model. So first what I'm doing guys uh I'm going to be just a second see here I kept a different model uh for the embedding and uh let's look into this model one by one and uh then basically we'll come to the practical side. So guys uh in the embedding model or model for embedding uh you will see every big companies are providing their own embedding models. So just look into the provider section. Now over here see OpenAI is providing their own embedding model. Google models. Okay. Enthropic Coher even AWS providing their own embedding model that is called Titan embedding and it is available over the bedrock. Guys, uh these all are model closed source means uh you will have to pay money if you want to use this model. Okay. Uh now here I kept some opensource model. So this model actually you will get over the hugging face itself. You can directly download this model from the hugging face hub. Okay. Now see uh this model is also being provided from the different company from the various company but it is available over the hugging face uh and uh some of the model we are continuously using whenever we are learning any rag related architecture right or whenever we are learning about the encoding embedding right so we all are using these model only so uh here the famous model is all mpnet base v2 uh these are the model based on the bird Okay. Then uh here you can see the BAI from the Beijing artificial intelligence research organization, right? And then uh here again from E uh here is a E5, right? I think it is from the Google if I'm not wrong. Uh I kept somewhere this the from uh who is providing this E5 model? I I'll show you that. Then the mini LM actually Microsoft is providing this mini LM. Then open clip I think open a is providing that blip. Okay. Then dino then web to back hubert yamnet clap right. So guys not only the text actually you will get a embedding model regarding the different other modality also. So I mention the provider I mention uh the model whether the model is a closed one or open one. Then I provide about the modality and the specific model name. So these are some famous model. So I kept in my list. But guys I would like to show you one leaderboard and uh with that leaderboard actually your most of the understanding will be clear. So the leaderboard actually it belong to I will come to this part how to select the best embedding model. But yeah before that let me come to the leaderboard. So this uh leaderboard actually belong to the MTEB. So what is this uh MTEB? MTB is called massive text embedding benchmark. Okay. So uh let's uh look into this MTEB. So see what is MTB massive text embedding benchmark. So it's providing leaderboard. See this is a leaderboard guys. And here only you will see all the embedding models. See this is all the embedding model. This one right. And even you can classify. So if you want to check the image embedding model you can check over here. Even you want to check the different other models you can check over here. You can categorize based on the performance. Okay. performance, the model size, performance based on the task type, language, every sort of a filter uh they have provided you over here, right? So guys, this uh leaderboard is quite uh important if you are like using the open source embedding model. Now let me highlight couple of models over here. So uh if I'll scroll up, see you will get the first one K A LM. Okay, it's from the Google. Then again from the meta, it's from the coin, right? from the Alibaba from the Google. Okay. So every sort of a model you will get over here the embedded model and these model are the open source. Okay. And here you can see the memory uses the number of uh basically users. What is this number of uh okay just check out guys what is this? Okay number of p something like that then embedding max token mean. Okay just explore this one. If you are willing to use the best embedding model just check over here. Right now apart from this one guys, see this is again one more uh like a uh one more resource for the emitted model the sentence transformer documentation. Okay, just check out with their hugging face page. Now over here guys over there they have mentioned about the documentation. Then uh find all the sentence transformer model. So this all the model actually it is based on what it is based on the uh this all the model actually it is based on what? Uh it is based on the transformer only. So just scroll down you will get all the sentence transformer based model and it is having thousand of model right. So see this uh like this you can categorize this is the sentence transformer and now over here once you will see once you will scroll down now here only you will get the model 127 model right. So just check out with this 127 model and apart from this one once you will click on this one now find all the sentence model sentence transformer model on the hub. So you will get uh the other model which is working under this sentence transformer. Okay from the buy again uh this is the based on the same concept based on the transformer concept only. So in the at the same place basically you will get these model also. So yeah these resources are quite useful if you are willing to use the embedding model. Now uh coming to the main part guys see so uh here I kept some practical. Let's uh discuss this practical and before that let me show you that how many chapters we have completed. So uh let's look at the chapters. Chapter one is completed. The chapter two all model for the embedding fine tune it is completed. Type of the embedding model. Yes, this is also completed. How to select a best model? This is remaining. And then embedding model. Uh then embedding model leaderboard. So I uh shown you this leaderboard. So guys let's do one thing. Let's look into some practical. After that I'll show you how to select a best emitting model and uh then after that guys I will uh stop this video and rest of the thing I will show you in the next one. Okay in the next video. So uh what I'm doing here. So let's uh connect with the GPU first. Okay. So here I'm going to be connect with the GPU. Now what I'll do I'll install the sentence transformer. I'll install this. So here I'm going to install this one and then it might take some time if you are doing it first time. So let it install. All right guys, so my sentence transformer and the torch is installed. Now after that I imported this sentence transformer from this uh module. This is the class actually. Now what I'll do I will create a object of this sentence transformer class and I will write my model name. So I'm using this all mini LM. Okay. uh all mini LM L6 V2. So this is my model name. Now what I'll do guys uh let me load this model and this is my sentence. Embedding fine-tuning improves retrieval quality in the rack. So once I'll run it guys, see here I'm able to encode it. So yeah, I'm able to get the embedding of this particular sentence. Now what I'll do guys see here uh I'm just checking the shape and uh then what I'm doing I'm just checking few numbers okay some initial numbers of my embedding model let me write over here import np yeah so it is saying oh fine numpy got it got it guys numpy as np so Yeah, this is what this is my size of the embedding 384 and here you can see the first 10 value of the embedding. Now what I'll do guys, I'll take some document. I'll perform some cosine similarity. So let me run it. So I will pass some document to this method. Okay, this is the formula for the cosine similarity. Here I written the formula. Okay, so I made this formula using this numpy methods np dot and lineage norm. Okay, so I'm checking I'm getting a norm, right? uh nor means what the magnitude of the vector right so this is the formula now what I'll do this is my document so embedding finetuning improves retrieval and drag lora reduce GPU memory uses my car needs fuel then vector databases store embedding now I'm this is my query how to improve retrieval and drag so let's see this query is like near to which document now so if I run it guys so here what I'm doing I'm just going to be encode the document this one and after that guys what I'm doing so here is what Here is my query. Okay. Now what I'll do, I will find out the co sign similarity. So yeah, I'm iterating on top of each and every document I'm adding and I'm checking the cosign similarity between the query and the uh documents. Okay. So I will I'm getting my score. Now let's see. Let me check uh it is near to which one? My query So this was my query. Okay. Now how to improve ratable and drag? So it is very near to this document. the sentence. It is uh less Vector database is stores embedding. Okay. So score is 0. 05. My car needs fuel. It is very low. Again the similarity very low. Lora reduce GPU memory. It is again very low. The context of these word these sentence and this sentence are different. So that's why the similarity is very less. But the context of this sentence and this sentence are same. So see the similarity is very high. Okay. Now here I kept some pair also. Let's see the similarity between these pair. If I'm going to run it guys, so see similarity between these pairs are very high. Uh rather the similarity is very low over here. Okay, between these sentences. So let's see between the difference between the keyword search and the vector search. So here is my uh document. Now what I'm doing guys? So here I'm running it and see uh I have my query. Okay. Now what I'll do guys? uh I will convert it to the token first. So yeah, token. See this is the custom code which I written for the keyword search. I will show you with a VM25 also. So I'm tokenized my query. So here you can see the query token guys right this one. Now what I'll do guys see here uh I am going to be print the query token as well as uh keyword search score. So I I'll print the keyword search score over here. Let me do it. So I will iterate on top of the document. Okay. I will tokenize that. I will check uh like which all I will check the count matching between the words uh between the document uh between the like document on which I'm iterating the sentence as well as the query. Okay. Then uh here is my score. This is my score. If uh it is matching means the count is matching the word count is matching then I will keep it inside the score. Okay. And then I'll print it over here. Now let me check. uh so in the first sentence we have three match so this would be very high in the next one we don't have any match so this is going to be zero now here also you can see uh if I have this query let me show you the query so this is the query guys how to improve retrieval and drag so embedding finetune improve retrieval and the rag so this actually uh this particular query right it is very near to this sentence and we have proved it using a keyword search right where we were just matching the keywords right rather than the semantic meaning now this was my custom code regarding the keyword search now let me show you using the BM25 okay so what I'm doing guys I'm going to be install this BM25 now here what I'm doing I'm going to be import this BM25 okay then here is my document let me keep the document over here this my document guys same one now this is my query okay now what I'll do guys I'll tokenize a query. This thing is going to be same. So now after that what I'll do? So I will uh convert both into the tokens. Okay. So token of the query, token of the uh corpus. So this is the token of the corpus and here is the tokens of the query. Okay. I hope you got it. Now what we are doing we are just going to be initialize a BM25 model using this BM25 okay API I will get that now I'm going to be check a score okay so how so BM25 there's a model uh which I uh like uh which I initialize using this corpus now I'm getting a score using this query okay let's see what would be the score so if I'm going to print the score see I already done it actually I was just practicing the thing so then only I executed it now here you can see the score. Understood guys? So yeah, this model is also showing the same one. Now uh one more thing guys, if you want to evaluate any embedding model, so this is also very easy. So using this MTB, you can do that. So let it install, then I will show you guys. Uh this MTEB it got installed. Now what I will do? So first I'll explain you this MTEB that is uh massive text emitting benchmark. Uh now we have another term inside this MTEBB that is called STSB benchmark. STS benchmark that is called semantics textual similarity benchmark. Okay. Now it is giving us some matrixes like spareman matrix Pearson then cosine spearman then man and then equian spareman. Okay. Now it gives you some score also. I'll show you that score. So this is the meaning of that score. Okay. Now apart from that I written the score uh range also. So what would be the idle score range and when your embedding would be like too powerful. So this is very useful to evaluate your embedding model. So if someone is asking you like how to evaluate the embedding model. So you can say I evaluated using this uh package. These all are the matrices I was getting. This these what the uh score and uh you just need to understand the meaning of this matrixes and then even you can explain them mathematically. Got it? Now uh I installed this MTV. Let me give you the walk through of the code. So here I created one function. It will take a model name whichever module I want to be evaluate. Then I it will take best size means in one shot that model how many sentence can encode. Okay. Uh you will have to mention that. Then normalize embedding. uh embedding actually it is a ve vector so we can normalize that vector. Okay, normalization means what? So normalization means the magnitude of the vector would be the one. Okay, if we are going to be normalized that and we use the co uh in SDS benchmark we use the cosine similarity and most of the places for the similarity search. So for the cosine similarity if the vector is a normalized one then it performs well. Okay. So uh normalized embedding I kept it true. Then language in which language uh what is the language of your embedding model in which language it is performing a encoding sorry whatever what kind of data you are giving to model which in which language actually you are giving a data to a model and then it is generating a embedding. So yeah that also we can mention. Now here if the language is none we'll keep it English only. Here we are going to be load a model from the MTEB. Then uh we are going to be uh like uh get a task. The task is STS benchmark. I already told you the task uh full form is semantics textual similarity benchmark. Okay. On top of this task only we are going to be evaluate our model. Now we'll run the evaluation. We'll uh call this evaluate model method. We'll pass the model. We'll pass the task. will pass the encode kwgs like best size and the normalizing. Now whatever result we'll be getting so we are going to be iterate on top of that particular result and from there we are going to be get all this thing model name model division main squareman score Pearson score cosign spearman cosine Pearson equilman man language HF subset and the row okay and then I will print over here so this is the complete method guys you can read it out by your end now here I have written the meaning of this E5 that is embedding for everything and every everything to anything this is developed by the Microsoft okay and it is very popular like it is the popular model is inflat e5 base v2 bge means bi journal embedding so it is from the bijing academy of the artificial intelligence and again uh their model their embedding model is also quite famous right uh now what I'm doing guys so I'm running it on different uh models so one is all mini then second is a bge then another one is a e5 base once I'll run it guys so Here I can check the score of each and everyone. So here uh it will take some time. See it is running. Let it run because it is loading a model and all. So it takes time. So guys my model is executed. Uh it is it has evaluated a model over this STS benchmark and then see the result. So BGE base E1 it is having a highest score. then E5 then here you can see the all mini LM so likewise you can evaluate your models and you can check out the best possible embedding model now just uh do some self study of this benchmark guys I will sorry of this matrixes okay so I given the typical range you can check out your range okay in which range it is falling this matrixes are falling based on that you can uh based on that basically you can check whether the model is good or not. Right? Now let's uh see uh basically how we can select a best possible uh model. Okay, on which basis actually we have to get a we have to select a best embedding model. So I kept one point uh let me highlight those points uh first of all just a second where it is see how to select a best embedding model. So the first is the embedding quality. So check the benchmark performance the MTB leaderboard and the BI benchmark. So I will discuss this BI benchmark in my next video. Okay, I'll discuss what it is once I'll come to the uh different architecture of the embedding that the dimensionality guys. So we have several dimensionality lightweighted to the high quality dimension. So higher dimension will give you the better representation of the data but it is having a more storage cost, memory uses and the speed impact. So if you're going to be choose a higher dimension, no doubt it will give you the good quality. Okay, result actually good result rather this lightweight. So if you don't have a constraint of the storage memory right if you have a good server good system then use the high dimension embedding then guys uh we have the cost again so close source it give you the more cost rather this open cost open source so close source basically it is easy to maintain high quality embeddings you will get but the API cost would be there open source wise you will have to host the model somewhere uh you will have to keep it on your own infrastructure uh if the stealing would be there then scaling cost would be required but again on a small scale right on a smaller application it won't give you that much of cost so yeah open source is a better choice full learning always opensource there's a domain suitability right so these are some general model you can utilize it so it will fit in every domains but if you want some specific model tune model then you will have to take one more step ahead and you will have to finetune your own model so these are some simplest step based on that you can select how to guess the best emitting model. I would say this benchmarking is the best one. First you have to check that then you need to come to the dimensionality and then for which language and for which domain you are going to perform the embedding. If like uh if you are able to work with the general model that is well and good but if you are not then fine-tune your model on a specific data that we are going to learn in the next video. So yes guys I will continue this part in the next video. Until thank you. Bye. Take care. I hope you have learned so many thing over here. I will see you in the next video. Until take care yourself. Uh these all are the chapter uh which I uh this particular topic I divided into the sixth chapter. So guys uh I already discussed this two chapter in the previous video. Now from uh chapter 3 onwards I will uh discuss inside this video. So in the chapter three I will focus on the training side uh basically how this embedding model have been trained and uh in the chapter four I will discuss onto the finetuning how to perform the custom finetuning uh on your own data set okay we'll take any sort of a model and we'll try to perform a finetuning uh then in the chapter five we'll discuss how uh you can uh prepare the data set how basically you can train the model the complete practical guide and how you can fit that model inside the rack pipeline. Then uh in the inside the chapter six I will discuss the differences between the embedding fine-tuning and the LLM fine-tuning. So with this differences guys I'm going to close this topic. Okay. I hope this entire topic is clear. Uh now let's uh jump to the chapter 3 directly. So guys uh I prepared a very beautiful slide. Uh so here you can see I kept the entire detail about the embedding fine-tuning. Uh first I will discuss about the embedding model training and then only we'll come to the embedding finetuning. So in the second slide I kept the complete detail about the finetuning. Okay. Here you can see. So first let's discuss about the embedding model like how these model have been trained. uh first let's uh take the entire fundamental knowledge so that uh your understanding very your understanding will be very concrete when you are going to apply this concept from your end and guys uh if my explanation is little slow then you can speed up this video so on a personal note I will suggest you please watch out this video at 1. 5x okay so first let's uh discuss uh the differences between the LLM and the embedding model so guys if we talking about the LLM as you know so this LLM training basically we can divide into the uh three major section the first is called the pre-training the second is called the supervised fine tuning okay now here I already discuss about the instruction tuning and even I discuss about the non-instruction tuning Everything I discuss if you will go and check with my previous video you will get that. Now the third stage is called the preference alignment. Even I discuss about the preference alignment in the same playlist. Please go and check if you haven't checked so far. Okay. So these are the three stages whenever we are going to train any model. So guys uh whenever we talking about the hugging phase so over the hugging phase you will get so many model so many pre-trained model basically right uh this is also called the raw model you will get even the SFT model okay over the hugging phase and many model with the preference training and if we're talking about the open AI right we're talking about the GPTs model or cloud a model or a gymni model right which we are directly accessing via API. So there those model actually it is already trained on the preference data right. So all these three stages have been performed. Now after this uh stages one more stage comes right. So that stage is called the custom finetuning. Custom fine tuning. Okay. So guys uh this is the target. This is our target. So this entire playlist actually we were talking about this custom finetuning. So either we can take this pre-trained model right and we can perform this custom finetuning or else we can take any supervised fine-tuned model right and we can perform the custom fine-tuning. Okay, custom fine-tuning means mean means we can perform our own SFT. Uh we can uh perform our own preference alignment and even we can take the model with the preference alignment. Okay, which is already trained on top of this data and after that also we can perform the custom fine tuning. Right? So in the entire playlist guys, we have discussed uh about this custom fine tuning only. Now if we're talking about the pre-training, so pre-training basically we perform over the entire internet data. So here inside the pre-training what we teach to our model. So inside the entire pre-training guys we teach a journal intelligence to our model. If you have seen my previous video I already discussed all this concept. Uh if you don't know please check out the previous video. You will get a more concrete understanding. So this is all about the LLM model. Now if we talking about the embedding model. So uh I can write over here embedding model. Okay. So in embedding model also we have three stages uh sorry two stages. Okay. Two main stages. The first is called the pre-trained model. Right. So here also we'll get a pre-trained model. So let me write over here pre-rain model. In the second stage basically after the pre-training what you'll get after the pre-training basically we'll get a tuned model. Okay, tuned model. Now guys, here actually we are not going to perform the supervised finetuning. Instead of that, we perform the contrastive learning. Okay, contrastive learning. Now, what is the meaning of this contrastive learning? We'll discuss about it. Okay, I'll explain what is this contrastive learning. So, uh we perform the uh we take a pre-trained model, right? And uh what we do guys we perform the we uh perform the tuning on top of this pre-trained model. So after this only this particular step come right and here also what we can do we can perform our own custom tuning custom fine tuning. So we are going to discuss this particular stage the custom finetuning either we can take the pre-trained model the raw model. This is our raw model guys again it is trained on our internet data. Okay. And uh or we can take any tuned model and we can perform our custom finetuning. If you are confused between this pre-trained model and the fine-tuned model, okay, which is already done by someone else, right? So let me give you the example with that maybe your understanding will be very concrete. So I kept some model name over here. So see the first model is a metal lama and the second 3. 21B instruct. Uh now let me show you this model. So if I will go ahead with this uh hugging face. Okay. So see the model name is meta llama 3. 21b. So this is a raw model means uh this model is just pre-trained. Okay. This is just having some general intelligence uh means the capability of generating a text of generating a next token. Okay. This is not tuned on any other data. Right? But uh on the other hand if we'll talk about this model llama 3. 21b instruct. So this model is trained on a instruction data set right? This model is already tuned on a instruction data set. So guys uh I hope now your understanding is clear. So either we can take a raw model okay or else we can take only the fine-tuned model and we can perform our own custom tuning. Now the same thing goes with the embedding model also. So here you can see I kept two name. The first name is a MP netbase. Okay. And the second is the all MPNET base version two. Now guys if you will check with this repository Microsoft repository under this you will find out this model ampinate base. Okay. So uh let me show you this amp base. See this is the model and this is a raw model means uh this particular model basically is trained on a very huge amount of data. Okay. And further we can fine-tune this model. Further this model right further this model is fine-tuned for the embedding task. Now here you can see all ampinate ways V2. So this sentence transfer on model it maps sentence and paragraph to 768 dimension DE vector and can be used for task like a clustering and semantic search. Okay. So this is a very popular embedding model and I think we have seen uh this embedding model many times. We were we are using it inside our rack pipeline right to perform the embedding. Now uh if the thing if this thing is not clear let me show you one more paragraph they have written at the end of this repository. So just uh read uh this particular uh just read this particular paragraph. So what they are saying over here they are saying the project aims to train sentence embedding model on very large sentence level data set using self-supervised contrastive learning objective. We use the pre-trained model. This is the pre-trained model guys. Microsoft MPNet base. Okay. Uh that and fine-tune it on a 1 billion sentence pair. Right? So this model was the pre-trained model and this model further was fine-tuned for what for the embedding task right now how the data set looks like for the embedding how to prepare the pairs and all what is the meaning of the contrastive uh learning each and everything we'll discuss inside this video itself I already prepare a material so definitely I will show you so please make sure guys you are going to watch this video till the end if you want to master the embedding finetuning okay I'm uh going very slow and I'm teaching you each and everything right now. Uh here you can see so uh this was the uh this is what guys this is the this is nothing this is a base model and uh this particular model is a pre fine-tune model right so either we can take this base model or we can take this fine-tune model and what we can do our own custom finetuning now why we are doing this own custom finetuning so that we can train our model over our own domain specific task right so we can train our model on our own domain specific data set right and guys whether we are talking about this LLM model or we are talking about this embedding model right all this model actually it's nothing it's a transformerbased model okay so this uh behind this model there is no like other technology except the transformer so if you don't know about the transformer this is the architecture of the transformer okay so inside the architecture you can see we have two part one is the encoder. The left hand side part is called the encoder and the right hand side part of the part of this architecture is called the decoder. So in behind this uh LLM model behind this embedding model you will only get the transformer model right. So uh let me summarize the thing now. So what I was saying guys we are talking about the embedding model. So this is the transformerbased model. So it is already like a pre-trained model right which is trained on a very huge amount of data. Now this model is further tuned. Okay, on the contrastive learning. So this is a special kind of learning where we prepare a data in some specific format and we have some different loss function right and what we get our finetune or we get our embedding model the embedding model which we are seeing uh on a different places right now what we can do we can take this model okay the final model and we can perform our custom finetuning or else what we can do we can take a pre-trained model on top of that also we can do our custom finetuning okay but generally guys we take already trained train model we take already like fine-tuned model because uh it is like this model is already like trained on some task on some like the pair data set right so it is having some knowledge and on top of that if we are going to fine-tune our own if we are going to be fine-tuned on our own data set so it will get a very like good understanding because it is already having some knowledge okay about this contrastive learning and all and then further we are going to be fine- tuned on our task okay so this is a like good approach otherwise uh if you want to do everything from a scratch then you can take this pre-trained model also so now guys let's understand uh so here I have highlighted something if we're talking about the pre-trained model so this model actually it is trained on a very massive data set means what uh it is trained on the Wikipedia data common crawl data set book corpus data set web text data set open data set public web pages right so these are the uh internet data internet scale data And why we are uh like uh using this data so that my model can understand uh the general knowledge. Okay. So whatever general uh thing I'm going to be asked to my model right regarding anything so it can understand that and it can generate the next word the next sentence behalf on that particular uh sentence. Okay whatever we are going to be asked. So just to provide a general intelligence to my model I am training my model on top of this data. Now contrastive in the contrastive finetuning what we have. So guys we are going to perform the contrastive learning. So there what we have the pair of similar and the dissimilar text right. So what is the like similar and the dissimilar text? Let's uh like look into that. So uh guys here I kept some data set format and I think uh just by seeing this data set format you will get a better understanding. So just uh look into the first format. See this is the first one uh this is the second one. Okay and here is what here is a third one right. So in this all in all these three format guys what we can do we can prepare our data set. So in the first format you can see what we have. So in the first format we have the sentence. Okay. Uh what we have guys we have a sentence first we have sentence two and we have a label. Now this label actually it is telling the similarity between these two sentences. Okay zero means not similar one means similar. Okay we will be having uh the value between 0 to one. Now in the second guys we have this is the this is called the triplet format. So where we have a so where actually we have a query right then we have a positive message and negative message. So uh likewise also we can prepare a data for the embedding fine-tuning. Okay. Now case C uh so we have Nwayave format. So in that actually we will be having a query then positive data positive uh column and then the negative column. Now in the positive guys you will get the document one document two means the multiple positive document and in the negative again you will get a multiple negative document. So in this format first of all in this format we'll have to prepare our data set. If we are talking about the normal instruction finetuning, so there the data set format was a different one, right? But if we're talking about the contrastive learning, contrastive finetuning or fine-tuning on the embedded model, then we'll have to prepare our data set into this particular format. So on whatever pre-trained model, so I was talking about this pre-trained model, right? This MPET base. So uh this MPET base further fine-tuned, right? Uh this model was further fine-tuned and it is open source, right? So this model also have been trained uh either of this format. So uh the community has prepared a data or whoever has finetuned that model this based model right. So they have prepared a data like that like this only and then they have performed the uh like then they only perform the training the further training. Okay. Now guys uh let me show you some sort of a data set which is already present over the hugging phase. Okay. So uh here if I will uh go through the hugging phase. See guys. So these all are the data set. Now uh just look in the first data. So inside the first data see uh the data set name is the all NLI. Okay. So uh in the col in the column actually we have this anchor positive and the negative. Now on the second data set guys see this the data set name is what? SB. Okay. So uh again inside this particular data set you will see sentences. Okay. Sentences and the score right. So it this score actually it is telling the similarity between these sentences. Then uh we have the third data set. See this is the third data set AI job embedding finetuning. So inside this data set uh again you will see so we have a query. Okay this is the job description which is a positive one and then we have a job description which is a negative one. Right? So in this way we'll have to prepare our data set. We we'll be having a query. We'll be having positive side and the negative side. Okay. So on top of this data once we'll train our model. So my model will understand what is correct and what is not correct. Right? Means I'll be passing a query and sentence. So my model will easily understand right what is correct thing what is a like what is like the near one okay and what is like not a near one right so I can explain you this thing with one example I think with that your understanding will be very clear so let's say we have a model right so I have one embedding model now to this embedding model uh I'm training this embedding model onto one data Okay. So I I'm saying over here Sunny is AI master. Okay. So this is my sentence. Sunny is a AI master. So here I'm writing Sunny teach AI and the second sentence is Sunny teach Java. Okay this one. Now I'm marking this sentence as a negative sentence and positive sentence. Okay? And this is what this is my actual query. Right? Now see this is a positive sentence means this sentence actually it is near to this particular query. Okay. And this particular sentence a negative means this is a far from this is far from this query. Now in future in future guys whatever see in future if this kind of query is coming to my model if I'm getting a query sunny is a AI guy right so this model basically automatically will understand what will be the closest sentence okay document to this particular sentence right because I already trained my model on top of this type of data right I already train where this embedding model can understand what will be the closest let's say I have a cor I have a like very huge list of the sentences right inside this list I have a I have let's say 100 sentence okay it is all about the different uh tech jargon so sunny knows this sunny don't know this okay AI is this that whatever So if I'm passing this sentence to my embedding model, so embedding model will automatically find out whichever is a nearest sentence to this sentence because I already shown that kind of data. data to my model, right? So this is a simple uh phenomena, right? concept behind the embedding model. Okay? Now guys uh here I uh kept the goal and all everything and I kept like uh how this model have been trained. So what's the goal guys? So the goal is close vector right? So close vector similar close vector different distance vector. So if the sentence is different so they will maintain a distance between that if the vector are close so they will be closer to each other. They will be the similar sentence and I think I already given you the example. Now if we talking about uh this training guys the embedded model training right so uh this is being performed using this three concept. So the first concept is called the cosine similarity second is called the triplet loss e either I can use the triplet loss or I can use this contrastive loss. Okay this is also called the info NC. So this is the similarity formula guys. This is the cosine similarity. There is a triplet loss guys and here is the infoc contrastive loss. Right? So using this uh like loss function only we are going to be train our model. If you don't know the training pipeline so let me give you the highlight. So the training basically it always runs in a epoch. So here I can write. So uh if we're talking about the training guys the training actually it always run in a epoch. Okay. If you don't know the epoch let me tell you the epox. So in the epox what we do we perform the forward propagation and we perform the backward propagation. Okay. So in the forward propagation what happened? we always calculate the value right. means uh we perform the calculation. In the forward propagation we talking about the transformer architecture. So in the transformer architecture we perform this calculation using the attention. Okay attention and with the feed forward neural network. Okay. Then guys what we do? We calculate a loss over here. So we always calculate a loss value right and after that in a backward propagation. So we're talking about the backward propagation what we do over here in the backward propagation. So in the backward propagation we use the optimizer right we use the optimizer. Why we use the optimizer to adjust the to adjust the weights guys right. So in the backward propagation we use the optimizer to adjust the weight. So uh here what we do guys see uh in the first we perform the forward propagation we pass our data we calculate uh the values okay we have some weights over here the random weights and we pass our data we calculate the final value then we calculate the loss okay and then in the backward propagation we have a optimizer and there we adjust the weight so this is a complete training okay this is a this is called the one epoch uh this is only called the one single epoch okay epoch. Now here this loss function. Now this loss function actually plays a very important role because in the optimizer also we take the differentiation. We take the uh we take the derivation. Okay. We take the differentiation uh differentiation of what? We take the derivation of the differentiation of this loss function only. I hope you are getting my point. If you don't know guys, so this all the thing actually it comes under the deep learning fundamentals. So I can record a video on top of that. Uh in future definitely I'm thinking there I can teach you this entire mathematics and all right. So this loss function actually plays a very important role. So we're talking about this embedding training. So in the embedding training guys either we use this triplet loss or else we use this info NCE loss. Okay this one this particular loss. Now here inside this loss guys you can see this similarity. Now how we are going to be calculate this similarity. So similarity using this cosine similarity. Okay. So this is what we this is the cosine similarity. Okay. This is what this is the cosine similarity. Now using this cosine similarity only we are going to be calculate a similarity. Now let me explain you the formula that what we are going to be do over here. So we have a similarity between the query whatever query is being asked and the negative document. We have a similarity between the query as well as the positive document. Okay. And this is one my hyperparameter the m value. Now we are going to be check the max of it. Okay. And this would be the loss. Right. So this value this loss actually we want to be minimize. How we will do that? So we'll use the optimizer. It will run the multiple evok. Okay. And at the end guys we'll meet to the minimum loss right. So we'll run our training until we are not going to be reached to the minimum loss. So this is one of the loss function which we can use. And the other one basically is this one. Right? So we can utilize this loss also again like uh here also we are going to be use the similarity but uh like the mathematical uh the uh so calculating a loss in a mathematical way that is little different over here. Okay. So this is the highle overview of this entire embedding model. So if you want to deep dive into the mathematics and all with all the examples so I can discuss that in a near future session guys. Okay. Because to explain the entire mathematics uh it would be the different uh kind of effort right okay and first of all this fundamental should be clear coming for understanding this mathematics and all uh now uh after that guys what we'll do we'll perform our own custom finetuning so in the third stage let me revise this entire pipeline and after that I will come to the architectural side so uh here guys you can see So first what we have a pre-trained model. Uh let's take example let's say we have this mpinate base model. Okay. Now this model uh further have been trained on some pair or similar and dissimilar text. Okay. Again this is a generic data set which is collect from the different sources. Okay. The data set have been prepared in this particular manner. Either we can prepare in this manner, this manner or this manner. Right. So let's suppose guys after this entire finetuning we got this model the sentence transformer all ampinate base v2. Now till here everything is clear we got the fine-tuned model. Now what we can do uh we can perform our own custom finetuning. So uh either we can download this uh fine-tuned model this contrastive finetune model or either I can take this pre-trained model and we can perform our own custom finetuning. So this own custom finetuning would be the third stage. Okay. Now guys, which model we need to be consider as I already told you. So what whichever model is already trained on some data set means they have already performed some contrastive learning and all just take that model and perform the uh perform your own custom tuning. If you're going to take a base model right so uh if you're going to be take a very base model so in that case you will be required a very huge data set right. So just take uh that kind of model which is already seen some uh similar and the dissimilar text then like you can fine-tune that on your own custom data and I will show you on the same model. Okay, I will take this all ampinate base B2 right and after that we'll fine-tune on our own custom data. Now if we talking about the architecture guys see this is the data set the different data set basically. So uh here I shown you this format right. So according to the format I given you the link. So this is all the link guys. You can go through with this link and you can check the different data set. Now uh we talking about the core architecture. So guys uh this uh embedding model actually we can divide into the multiple category. Okay. So let's uh discuss onto the architectural side. So as I told you guys this embedding models are nothing uh this embedding model it is a transformerbased model. Okay. Now uh on the transformer side as well we generally use the encoder. Okay
Step-by-Step: The Modern Text Embedding Process
we use the encoder side of the transformer. So as I shown you we have two side of the transformer. The first is called the encoder. The second is called the decoder. Right? So what we do we use the encoder side of the transformer generally nowadays we have a decoder based model also and in some time I will give you that example also. So this is a encoder side of the transformer and we generally use this uh encoder side of the transformer only for the embedding. Now let's see how this thing works. Okay we are passing any text then how this data is being converted into the embedding. So this is a step-by-step process guys which I mentioned over here and I think you can clearly see this entire box. So let's say first we are getting a text. Okay. Now this text could be anything. Uh I'm writing a very uh simple text over here just to explain you. Uh let's say I'm writing AI. Okay. AI is a future. Now this particular text I wanted to convert into the embedding. So my final goal is what? see here I'm going to be draw the embedding guys. I think it is clearly visible. So uh my final goal is to get a embedding out of this particular text. Okay. So first what will happen? So first guys this uh text will be converted into the token. So let's say we have AI over here. Okay. Then we have is over here. This is the next token. Then A. Okay. Then A. And then what we have? We have a future. Okay. Now what I'll do guys? So this particular text I will be passing through this transformer encoder. Now inside the transformer encoder you can see we have two main thing. The first thing is called the multiattension. Here right hand side you can see the first thing is called the multiattension and the second thing is called the feed forward network. Okay it is a neural network. So this uh data will be passed either from the encoder or the decoder. So most of the model actually that embedding model it is a encoder based model but nowadays couple of model are whatever model we are having right so those are the decoder also I kept one table and in some time I will show you that what is the encoder and the decoder base model okay so uh guys uh this particular tokens actually I will pass from where the encoder decoder now what I'll do first I will convert all these tokens into the embeddings okay so the this token will be converted it into the embedding. This is the word embedding, right? Word embedding. Now, uh this is called the word embedding guys. So, we'll take any word embedding model and we'll convert that. Now, after that, guys, what I'll do? I will add one more layer. So, this layer basically it would be the positional encoding. Okay. So, this uh this particular uh layer would be the positional encoding. So, let me add over here positional encoding. Okay, positional encoding. Now after that guys what I'll do see this all the sentences this all the vector actually it will go to the positional encoding. Now over here you can see we have input we are going to be convert into the embedding then add the positional embedding. Now after that we'll pass this particular data okay whatever data we have. So to the attention layer right. So this attention layer is nothing this is for the contextual understanding right. So after passing my data from the attention layer, we get the contextual embedding. So we'll pass it from the attention layer, neural network, feed forward neural network. Okay. So this is my encoder side. This is what of the transformer. After that what we do guys, we perform the pooling. So pooling means what? To pooling means to uh take the relevant feature from the vector. Okay? So uh either we can do the max pooling or minimum average pooling there different ways of the pooling right so generally we perform the average pooling okay so uh what we do guys we have a multiple vectors okay we are passing from the attention in the neural network so let's suppose we are getting multiple vectors over there then we are going to perform the pooling so either we can perform the max pooling minimum pooling and the average pooling okay and after that what we'll get whatever vector we'll be getting whatever single vector we are ing. Okay, if you want to extract more feature from there, so this is the optional layer, the dense layer. Okay, it is nothing again it is a neural network only. So after passing my data from here, we'll get a final vector this vector. Okay, this contextual vector. So this is the entire process to convert any sort of a sentences into the vector. Right? So just go through with this entire points. Just try to write it down like this. Okay? and step by step try to understand uh basically how we can uh convert any sort of a sentence into the embedding. So first we have a sentence we are going to be converting to the tokens the embedding then we are adding the pushal embedding we are passing it to the attention neural network then whatever sentence whatever vectors we are getting we are performing the max pooling minimum pooling and average pooling now why we are doing it to like get the most important feature from there. So whatever single vector we'll be getting again we can pass it from one projection layer one from the dense layer. Okay. Again it is a neural network layer only and then we can per we can we then out of that only we will be getting our final flatten vector and that flatten vector is called the embedding. Okay. And this is what this is my contextual embedding guys. I hope this entire thing is clear and I hope you are able to understand this entire explanation. Now we are talking about this embedding model. So this embedding model actually we can uh divide into the multiple category on a architectural level. So uh guys uh here you can see so uh encoder only model uh cross encoder multi-dual encoder and the decoder base embedding. So we're talking about the encoder model only. So we have this sbot E5 BGE these all are the encoder base embedding. Now we're talking about the cross encoder. So this MS Marco cross uh and the all the model basically we'll get under the co here right. So those model actually it's a cross encoder. Some of the model is a multimodel dual encoder right and some model are the decoder based model. So these are the name of it open embedding Gemini embedding right. So this model actually it's a decoder based model right now over here guys you can see I clearly written a differences between the cross encoder and the dual encoder. What's the difference between it? Because uh I think you already seen the encoder. What is a encoder? So you know the normal encoder but uh maybe this dual encoder and the cross encoder is different for you right and at many places uh in whenever you are going to be create a rack pipeline you're your embedding pipeline at uh those places guys you are going to be use this cross on encoder and the dual encoder kind of thing right so uh let's understand this uh dual encoder and the cross encoder uh here I written a clearcut uh differences so uh how this two model how This two like encoder are different right. So these are different in terms of their data processing capability. So uh how they are going to be processed the input data it is just uh having a difference uh in terms of the data input only nothing else guys nothing rocket science no rocket science nothing over here right so how they are processing a data they just have that different capability now let's uh look into the dual encoder so query and document encoded separately okay and then similarly computed between that so on one side we are passing the query on the other ing a document right and those thing is being calculated separately inside the cross encoder what we are doing we are passing query and document together in one single pass okay and then we are going to be check the direct relevance score getting my point so in cross encoder we are combining both query and the document and we are passing it through the encoder and inside a dual encoder we are passing uh the query first means we are passing query and the documentation document means the query and the data separately. So that is a difference guys. Okay, nothing else. Now dual encoder is fast, scalable and like we can pass millions of document and cross encoder little slow because we are going to be combined a data over here. This cross encoder you have heard guys this cross encoder actually we are going to be use it inside our uh inside the reranking also right. So how we are doing that because we are combining the query and the other sentences our document okay and then we are passing it through the model. So model is able to understand right the relevance very clearly. So this thing basically I even shown in my rack uh chapter and on top of this cross encoder and DL encoder basically I can take one separate session and I can decode the entire thing like this only okay if you want. So yeah, this is the entire uh thing guys and I think uh you understood how this embedding model works. Now I'm coming to the next part. So guys uh now the question is uh what is a embedding fine-tuning. So let's understand this and after that uh we'll come to the practical. So guys uh till now I think uh you got to know what is embedding fine-tuning. Uh but still uh we need to check out the definition. So here is the exact definition of the uh embedding finetuning. So embedding fine-tune means uh training an embedding model further on your specific data set so that it vector representation become more accurate and relevant for your domain specific task. Okay. Uh embedding fine-tune means training an embedding model so that it better representation become more task specific rather than a generic. Right now uh whoever don't know about this thing means the embedding and where this vector representation is being used you will get to know in some time. Okay. Uh now here guys you can see so normal embedding model it is a pre-train on a large generic data set as we know and it is good for the general search right or semantic search but if we're talking about the fine-tuned model so further train or on your own specific data set and model learns better semantic structure about your own domain so we have a normal embedding model which is just pre-trained model or which is just like fine tun on some general data set and all like I shown you this MPET model. Okay. So, it is good for the general task. But if you are doing your own domain specific task, in that case you required the fine-tuned model. Okay. You required uh basically your domain specific model. So in that case you can do it. See here I uh here I kept some images also with that uh your understanding would be clear. Let's say uh we have a base model. So this is the MPNET base model. Okay. MPE base model then guys uh we have fine- tuned that model so MP net base okay B1 means all they have finetuned on some sort of a data set then guys uh we have a base model we have finetuned model now guys this is the additional finetuning so here this is your this is this could be your custom finetuning this particular stage I hope You're getting my point what I'm trying to say. So I'm saying over here let let's see let's look into this model. So guys uh this is the model right? This particular model uh this particular model MPET is a base model right now guys they further uh tuned this model and the model name is all MPNET base 2 they have trained on their specific data for the for generating the embedding and all right now guys on top of this model again you can perform the finetuning so that it will look like this the additional one this one okay so this one single image is clarifying all the thing in a single shot and I hope this is clear. Now coming to the step like what all step is required to perform a fine tuning. See guys, so step one uh we'll have to gather the positive and the negative ps. Then we'll have to pick a pre-trained model. Okay, pre-trained model or any uh like uh model which is available like generic finetuned model. Okay, then pick a loss function, fine-tune the model and after that evaluate the model. So this is the step which we need to follow to perform a finetuning. Now what kind of data? So we'll have to prepare this kind of data guys. This one I already highlighted over here this one. So we'll be having a query. positive match and the negative match. Right? So model will understand what positive and what is negative for that specific query and according to that only it's going to pick a data from the vector database or it's going to be pick the relevant document. Okay. uh now guys uh here you can see so why this finetuning is required why we should do that so I written an example I written a multiple uh basically uh points over here just by reading this your understanding will be uh even more concrete okay so here's the real reason for the practical use cases for the domain specific understanding so uh let's say uh if you are a pharma company and you have lots and lots of data, right? data. Now, on top of this data, right, you on top of this particular data, you want to build a rag. But inside the rag pipeline, what you are feeling, you are feeling that your embedding model is not working or very good. Okay, aligned with your data. Then what you will do guys? So you will take this lots and lots of data and you will train your embedding model and then only you will utilize inside your rack pipeline right in your rack pipeline and that thing can increase right that thing might increase your 60 to 70% of accuracy. Okay. Uh now over here see domain specific understanding your model will get a domain specific understanding. uh you will be having a better search semantic retrieval right specifically I'm talking about the rack system right or task specific nearness not only inside the rag pipeline now if you're going to be perform any other task let's say you have one query and going to be and you are going to be check the intent okay regarding the other document okay uh of that specific query in that case also you can utilize it for the duplicate detection right so you have a query and you want to be check like what are document the duplicate to that document do to that specific query Right? So you can do that also. Right? So apart from the rag, there could be multiple semantic such application and here I have highlighted those one. So yeah uh now guys I think you are uh enough ready to understand the practical. So let's uh go through the practical. Let's understand uh the entire practical and uh after that guys I'll show you the differences between the LLM fine tuning and the embedding fine. Okay. So here I kept the differences guys. I just need to discuss this one table. Now guys, uh here is the entire training code. So let's execute it one by one. So first we'll have to install the sentence transformer and the storage. Uh after that we'll have to import uh these modules. So I'm writing the I'm importing this load from disk. So I'm going to be load my own custom data. Uh then sentence transformer trainer sentence transformer training argument. Uh then guys we required this uh multiple negative ranking loss. Okay. Uh then guys this batch sampler right? So this many thing is required to me. Now after that guys what I'll do? I'll load my model. So here I'm going to load my model. Now this model only I will fine-tune on my own custom data. So yeah the model is being loaded. So either I can take the data from the hugging face any inbuilt data set or I can prepare my own custom data and I can fine-tune the model. So here I'm taking a second approach means I'm taking my own fine-tuned custom data which I already prepared. Okay. And on top of that data I'm going to be fine-tuned my model. So let me tell you the scenario the entire scenario. So the scenario is very simple. Uh I am assuming that I'm working in one pharma company. Okay, I am Now for this pharma company, I have to build a rag pipeline, right? Rack pipeline. So how we create a rag pipeline? So we have a data. Then we perform the chunk out of this embedding. Okay. And then we store this embedding inside the vector database in the vector DB. Okay. Then what will happen guys? So my user will ask any query. Okay. Or I will be getting any sort of a query. So this query basically it's uh going to the vector database. Right? So this query actually is going to the vector database. Okay. And I'm fetching a relevant result. Right? So I'm fetting a relevant result. Now what will happen guys? See here this relevant result will go to the LLM for the and LLM is going to be generate their final response. Got it? So this is a complete rack pipeline. Now over here guys see what I'm assuming. See uh I'm going to be perform the embedding and this embedding model is not performing well. Okay, means on top of this data on top of this particular data this embedding model this embedding model don't know anything about this data. Okay, so whatever embedding is being generated regarding this data and regarding this query. Okay, so it's not performing a well semantic search the semantics it is search. Okay. Then uh if I'm not able to get perform the well semantic search then we will be we will not be able to get a relevant result. If result then we are not passing a good context to the LLM. Right? So that thing should not be there. So what I'll do guys? So I will train this embedding model on my own data set. Okay. I will fine-tune the training embedding model on my own data set and then only I will fit it inside the rack pipeline. So I already prepared data. So here is the data guys. See uh train pairs. I have this train pairs. If you want to see this data, I already uploaded this data. Uh data over the GitHub. You can check out and you will get this link uh you will get that link inside the description only. Okay. So uh guys uh what I am doing? So here you can see we have this data. Okay. Data in this is the information about the data. How the pairs look like? I can show you that. See this is the information about the data. All the information the meta information. This is a state. json. Okay, one more file we have regarding the data. It's again a meta file. This chunk dotal. So likewise the data will look like okay this like this uh let me keep it over here and after performing this chunking and all after creating the spare and all. So I kept it inside this dot arrow file. Okay. So see this is the data guys. Now over here you can see we have a text. Okay. uh and regarding the this text basically uh we'll be having a positive and the negative okay so we'll be having positive and negative and uh then guys using the data what I have done I have created this data uh 00000 of 00001 arrow file okay this particular this is the compressed file which is being used by this hugging face only right and we can load our chunks and all everything I will show you how the data set look like don't worry okay if you're not able to see over here. I'll show you otherwise you can download all this file from my repository itself and you can check now see what I'm doing. So I already kept the data in JIP. I did the unjip and I'm loading it over here. See I'm loading the tech train pair right now. Uh load from disk and here you can see we are going to be load the train data this particular data train pairs. Now what is the arrow file guys? So arrow file actually apache arrow columner format. So it's a hugging phase data set internally for use it internally. Okay. So for the faster memory map for the efficient column base mapping for the faster training right now over here let me show you the data set. So if I'm going to be print the data set see this is the data set train data set. Okay. And how many features we have? We have anchor positive and the negative. Right? So anchor and the positive. Now if I can show you the column name. So see this is the column name anchor and the positive. Okay. So either anchor positive negative or either anchor or positive I can keep in this format right this will also be fine. So anchor means the real text and positive means the positive word. So automatically my data will understand which is a positive. If something will be negative it will not show be similarity with that particular sentence. Okay. Now what I'm doing is I'm going to be initialize the loss function. So here is the loss function for the embedding training only. Now uh this is my sentence training sentence transformer training argument. Here is my output directory. After the uh training my model will be available over here. Number of epoch right. Uh this is the best size learning rate. Okay. Warm up rate uh FP16 best sampler. Uh then logging step and the save strategy. So once I'll execute it. So my training argument has uh created. Now what I'll do I will create object of the sentence transformer trainer. Here I will pass the model argument data set and loss function. Now once I'll do that guys. So see my training will be started once I'll call this trainer. train. So see the training is started now. Okay. So training uh is started. It might take some time. So I will save the model. Okay. So model will be saved over here. Uh basically at this particular location model pharma embedding fine-tuning. Okay. So once it will be run means my model has saved. It won't take much time because I already have a very small data set. So this training will not take very huge time. Now after saving a model guys what I can do see this is the additional code means I can chip the file model file and I can utilize it later. So I'm not executing it right now. Then what I can do the inferencing. Okay. So here is my model. I will be loading pass a sentence to it and I will be uh and I'm going to be basically uh then what I'm doing guys I'm going to be uh like uh get a encoding out of it. Okay. So this is just a inferencing of it. Now see guys the training is going on and uh after that my model will be saved and after uh saving the model guys I will perform the inferencing. Now over here guys this is my embedding model. So I can give a query around to that. This is a general query I had written. Now uh if you wanted to see the data set how the data set look like. Let me show you that I already have a data I downloaded in my local. See this is the data guys. So uh this is the data farmer demo. On top of uh this particular data I'm going to create my rag. Okay. On top of this particular data and on top of this data only I have trained my model. Okay. This PDF. Now this PDF and this data actually I have converted into this format. Okay. So where is the format? This one. Let me show you that pharma fd data. See this is the format train pair. Okay. So I converted this data into the anchor and the chunk. Okay. and I compress inside this arrow file. So I had the PDF inside the PDF I had a text. Now that particular data I have compressed inside this arrow file. Okay, I hope you got it. Now how I did it guys? So for that I had a complete script. Let me show you that script. So uh I already created that script and I kept it inside the GitHub also. You can look into that. But yeah uh I can show you that. So this is the script data creation. I'm just going to be open it and this script I already given you inside the GitHub only. Okay. So just go and check you will get uh this particular script. Now see so here guys uh this is the entire data page. Okay. Means first actually I created a PDF out of this data so that I can utilize inside the dag and using the same data only I prepared a embedding fine-tune data. Okay. So uh after that guys what I have done so see positive and the negative text. This is the entire code just go through with it. You will understand how this data have been created. Okay. So to understand about the data and all it's not very difficult. See first we had a query then we have some uh templates and all. Okay. And uh building a fine-tuning data set where we have a anchor which is a query and the positive chunk. Right? So uh guys you can go through with it. You can understand how this data have been created. And after that guys what I have done I have compressed it inside the arrow file so that later on I can utilize it. Now uh here I can give any sort of a query just to check whether uh just to check guys whether this model is working or not. So I can take a query from the same PDF. So let me take that. So what is emoxulin capsule 500 mg? Okay. So this is the query which I'm going to be asked. So over here I'm going to be write what is what is capsule right now what I'll do I'll keep it in a double quote and then I will run it now see guys you will get a embedding out of this particular sentence so once you will check with the embedding you will be getting a embeddings over here see embedding see this the now the embedding is being generated means I'm able to perform a uh inference out of that particular model now what I'm doing guys I'm going to be store this data okay the uh this uh PDF data okay inside the vector database and I will be using this embedding model to perform a similarity t search based on the given query okay and I will fetch the relevant result from that particular data so for that what I'm doing I'm going to be initialize this files okay so for initializing this files I will have to install run this thing lang chain and the langai okay then after that guys what I'll do I will uh run this langchen community and the pi pdf because I'm going to be initialize my rack pipeline over here. Uh then I'm uh running this pi pdf loader. Okay. So I'm running my pi pdf loader and here I'm going to be load the data. This is my data. Okay. From the PDF this one, this is my PDF. Okay. Farmer demo, right? So far demo it is my PDF. It is my data guys. Uh this one I can show you this one. So on top of this data only I'm going to create my rag pipeline. Right? So yeah the package is going to be installed pi PDF is going to be load then uh it's going to be load the PDF this is my all the document means my all the pages of the PDF and after that I can show you see how many pages we have three pages okay now what I will do guys I will uh I can perform the chunk of my data but the data is very small so chunking is not required so what I'll do I will initialize the files I will in I will import this hugging face embedding also it is very important to convert my model. Okay, model into the hugging face compatible model. So I'm going to import both. Now what I'll do, I will give my model path which I already saved over here. Here you can see. So my model is over here. Okay, after the finetuning I will be getting my model. Uh model over here. Okay, this is the model guys. So inside this particular uh folder I have a model. Now I'm going to be load my model uh sorry this is my model path. Now I'm going to be converted to the hugging face compatible format. Okay. Now I get my embedding model. Now what I'll do? So let me delete this is not required. Now I will install the file CPU. Okay. After that guys I will store all the data inside the file document. Okay. Then see this is my index. The file index is there. Now uh I will uh ask a question what are the warning and the precaution. So see I will be getting a result and here you can see the result guys. See my result is working means what I have done uh on top of the PDF. Okay, I create I I'm going to be create a rag. So I took that PDF I kept it inside the vector database. Okay, now whatever embedding model I'm using for the similarity search for the semantic search that embedding model is already fine- tuned on top of this data on top of this pharma data and how I have done that first I have converted this PDF into the uh compatible format this file. Okay, here you can see this one uh this and set the training pair you will get that okay this arrow file and then I finetune my model. Now how I get this data? So using this particular script I got this data. Okay, now what I'll do guys? So yeah this is done. Now here I will set up my vector retriever. Now I'll be setting up my open API key. Here is my LLM. Okay, the LLM will be initiated and then basically I will check whether my LM was is working fine or not. Now here is what here is my renable pass through str output parser I'm going to be filter the warning this is my prompt guys okay I'm initializing my prompt now this is my format document and here is my complete rack check now uh let me keep the key the uh open key let me show you the uh final output guys so guys uh I kept my open API key uh inside the secrets and I'm able to run my model now what I'll do guys I will import this runnable uh pass through so that I can take a input on a runtime and then uh str output parser for the final output. Now here is what here's my prompt. So in the prompt what I'm saying you are a helpful assistant use the following context to answer the question right simple prompt then format document. Now this is what this is my rack chain. Okay. So what I will do guys here actually I will uh see here is my prompt lmmen str output parser and this uh context I'll be getting from where? from the vector database. Okay. And I'm formatting that context. Now what I'll do guys, I will invoke this chain. What I I'm asking over here what are the consuction for the Moxley 500 mg. So if I will run it guys, I will get my final answer. See this is the final answer. And guys the answer is correct. You can check out this PDF. Okay. So that is a use of this embedding model. I hope you got it. If you're not, if you didn't get it then guys again please again check out with this video go through it one more time. If you still you have any sort of a doubt please let me know in the comment section. Uh now guys I will see you in the next video. So if you haven't subscribed the channel so far please subscribe the channel and if you're liking the video then hit the like button. So until thank you. Uh bye-bye guys. Take care.

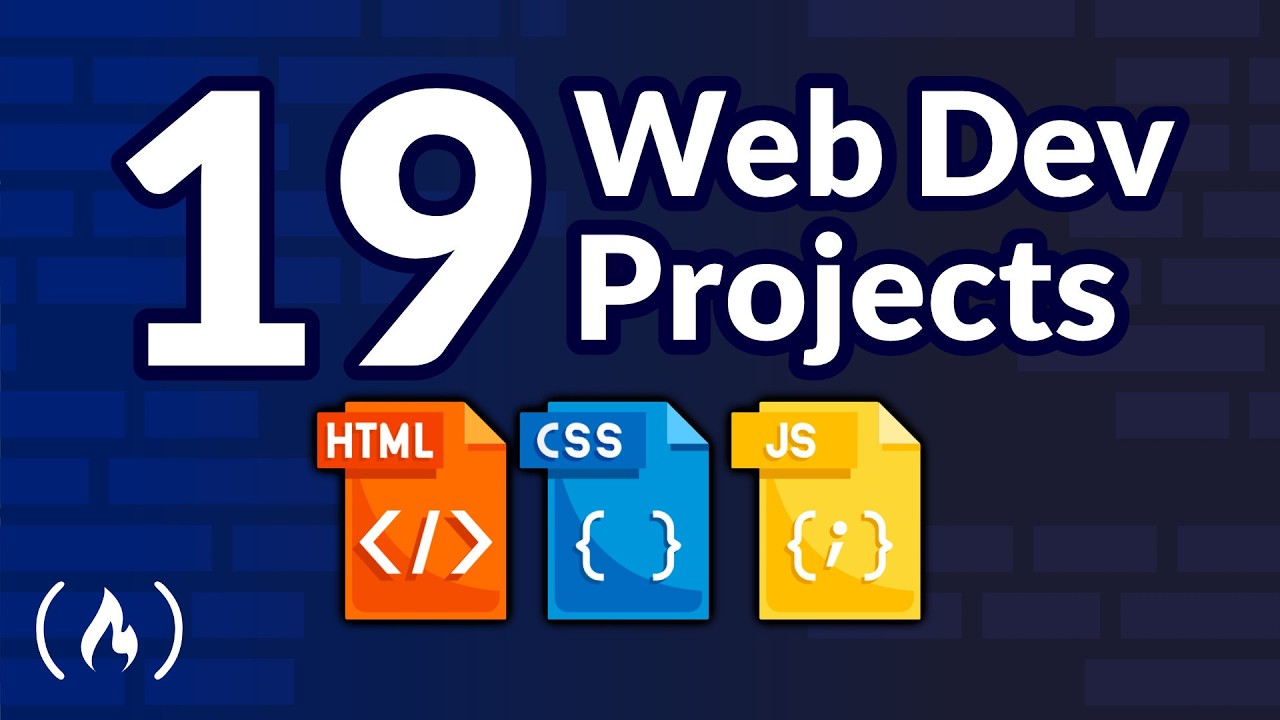
![There are 2 kinds of devs. One of them is screwed. Justin Searls interview [Podcast #210]](/thumbnail/hP931079TMw.jpg)
![How to Land Freelance Clients with Small Business Whisperer Luke Ciciliano [Podcast #211]](/thumbnail/IRcL5as-RaE.jpg)
![The world still needs people who care - CodePen founder Chris Coyier interview [Podcast #212]](/thumbnail/uJrh9GHrC38.jpg)