Click, connect, create. Learn how to quickly design and deploy enterprise-grade agents with a new suite of agentic platform tools.
Оглавление (5 сегментов)
Segment 1 (00:00 - 05:00)
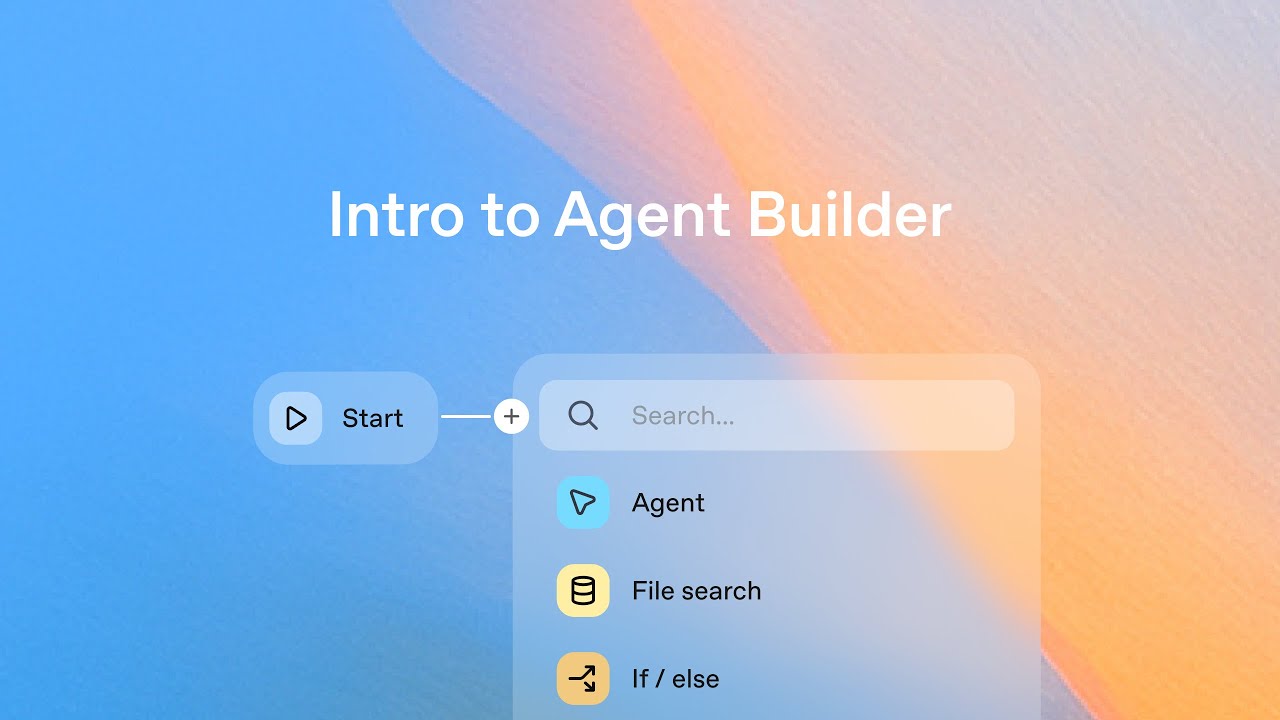
Hey everyone, I'm James and I'm a tech lead on our forward deployed engineering team. And today we're introducing agent kit which is a complete set of building blocks for you to build, deploy, and optimize your agentic workflows. So in today's session, we're going to talk through three core components of agent kit. The first is the agent builder. So in our platform, you can now drag and drop nodes onto a canvas and visually design your workflows and then run them hosted on our platform or export them as code and run them on your own stack. The second is chatkit. So chatkit is our new front end for gentic workflows. So instead of building UIs from scratch, you can pre uh you can embed these pre-built um components like a chat interface, streaming or customizable widgets directly into your applications. Finally, we're releasing an updated eval and tracing pattern. So tracing and eval are firstparty components of agent kit and it's now much easier to monitor and optimize your Gentic workflows. So, let's actually see this in action. Let's imagine that we operate a semi-truck manufacturer and that we get thousands of maintenance inquiries every single day. Let's run an agentic workflow that was built using agent kit to help our maintenance engineers solve these issues. So, I'm going to jump over to this application that we built for our maintenance engineers to use firsthand. So, what are we looking at? On the right hand side, we have the chat interface. And this was built using chatkit. So quick show of hands here. Who has ever built a dynamic UI for a complex agentic workflow? Okay, bunch of hands. And who has shipped that without a single bug? Okay, fewer hands. That makes me feel a lot better. If you're anything like me, building these UIs for these really complex dynamic workflows is really difficult. But now with ChatKit, it just works. You just embed these pre-built components. And we're publicly releasing Jacket today, but OpenAI has been using it for a while. Our entire help center is already built on top of chat. So we have the chat interface on the right hand side. Then the left hand side we have our logo for the truck brothers. Um quick side note on the logo. The flames are there because it looks cool, not cuz our truck's catching fire. Just want to call that out. Um, but this is the logo and then we're going to kick off the workflow and this will disappear and it will show you some UI components that just visualize the different steps of the workflow. So what we want is we want to enter the maintenance issue that we saw. We want the workflow to run and what it should return to us is a set of instructions for the maintenance engineer to follow and all the parts they need to make the repair. So I'm going to type in an issue we saw from a customer. The fuel economy has been super low on their minra. So we can submit the workflow and now it's hitting the workflow that we built in agent kit. So we're going to then search over all of the files of our maintenance procedures to get back the most relevant procedure. And you can see we got this one on replacing the fuel filter. That looks good. Um that looks like the issue. So now we're going to find all the parts that are associated with that procedure. So we just want for that procedure ID, let's get the mapping of all the parts uh to replace the fuel filter. Cool. So we got the parts and finally let's run a guardrail. And so this guardrail is just checking that the instructions in the parts are grounded in the real data that we have. Okay. And it looks like that cleared. So now we're seeing the results stream back. So it says to uh address the low fuel economy. You follow these instructions. Cool. List of parts. We can just double check the parts here. Uh let's see. Fuel sample jar that's mentioned here. Yep, that looks good. the instructions, they seem to match what's on the page. Okay, great. This looks awesome. So, that ran, but I don't love the output. I feel like it's a little bit hard to digest and let's add a little bit of a flare to it. So, we can just go over to the agent builder and we can tweak the workflow. So now I'm in the platform and this is the agent builder view. So on the right hand side we have the workflow that we just executed. Now on the left you have the node picker and so here is where we can just drag and drop uh nodes like an LLM uh agent tools like file search or MCP and then these logical nodes like a while loop or an if else statement to branch the uh branch the workflow. So I'm going to walk through this workflow but just for the sake of the demo I'm going to delete the last couple of nodes and we can rebuild those. So, we start with the input, and this is just going to be the text input that I put uh into the chat, which was in this
Segment 2 (05:00 - 10:00)
case like the fuel economy was low. And then that goes directly into a query expansion agent. And this is just going to expand the query, make it a little bit more semantically rich, so we get a better search. And then we feed that into this file search node. And so the file search node, we've previously uh uploaded all of the PDFs of repairs into OpenAI's hosted vector store and we just search over the Truck Brothers repair manuals. We input the rewritten query from the query expansion step and we're getting the top result. We then do a data transform and this is really just to extract out the metadata of the procedure ID from the retrieved PDF and then we pass it to this agent that uses an MCP tool. And so this is just calling uh it's executing a GraphQL query which is going to get um all of the parts that are associated with that particular procedure ID. So then we hit the MCP server and then we pass it to a synthesis agent which really is just supposed to return a clear set of instructions for how to do the repair. Okay. So let's add back in a guardrail. So I'm just going to drag that in. Connect that. And we want the input of that to be the output from the last node which is the output text. And then we're going to select hallucination. I'm going to put the same vector store which is the repair manuals. And we can select any model we want any confidence thresholds. And that looks good. Finally, I'm going to just put in a summary agent. And this is just going to give us the final response. But because it's dev day, I'm just adding, you know, this oneliner. just make a clever dev day pun at least a few words and then let's make it a little more visually interesting. So I know in the keynote they talked about the widget studio. We built a widget before. So I'm just going to select widget. Upload a widget. I've pre-built this. We can see uh a quick preview. It's going to have the instructions, the name of the repair, and then the parts needed. And all I have to do is click publish. We're going to publish this and deploy it to production. And now I just go back to the app, refresh the page, and I can enter a new prompt. So in this case, I'm going to enter, let's say we got another question about the oil warning light going off. So we're sending this through. We're kicking off the same workflow, and you can see it's just running the new hosted workflow on the uh on the back end. So we're searching over the files for something related to an oil warning light. We got back this check oil procedure like you know reviewing the oil levels. We're then going to find all the parts associated with that procedure. Kind of a similar exercise hitting the MCP server and we Yep. We've retrieved the right parts. That looks good. And now we're running the guardrails which you just added. Same thing. We're doing this hallucination guard to make sure it's grounded. Okay. Keep calm and dev day on. I don't love the pun, but it did mention dev day. And you can see it has the list of instructions and the parts needed like the engine oil dipstick, fluid top off funnel. Yep, this looks right. Um, great. I think that this is good. Let's see. I take out the oil dipstick. Yep, that looks right. Cool. So, you can see that this is a little bit visually more interesting, a little easier for the maintenance engineer to digest. Okay, great. So, let's recap what we just did here. So, we showed you a uh a Gentic workflow that was built using the agent builder and chatkit. And then we were able to go into the agent builder, tweak a couple of nodes, add a widget, change a prompt, click deploy, and then just a couple of seconds and just refreshing the page, we could run the updated production ready workflow. So, hopefully this shows how easy it is to build and deploy super quickly with Agent Kit. I'm now going to pass it over to my fellow truck brother Rohan who is going to talk through how you can deploy your Gentic workflows on your own stack and also you can optimize your workflows as you scale them out to your entire user base. Rohan, I'll pass it to you. — Thank you, James. And hello everyone. I'm Rohan. I'm a software engineer at OpenAI and I worked on agent kit. So I've got to ask agentic workflows. How many times have you heard that today? Huh? um probably a lot but I'm going to say it a few more times. So what you saw so far was James building a workflow using the agent builder and then he deployed it without writing any code or managing any infra into open ice cloud and that's great but what if you need to self-host things maybe you have compliance reasons to do that or maybe you just want to access data that's only available inside your cloud the good news is all of agent kit is set up to support that use case lets you use your own server as back end. All you have to do is implement the chat protocol, which is primarily receiving some messages and sending back outputs. And the agent builder actually
Segment 3 (10:00 - 15:00)
helps you with this by letting you export your workflows to code. Let me show you. So, if I go back here to the agent builder, I can click this code button at the top and I'm able to export this entire workflow as JavaScript or Python code. And this is built using the OpenAI agents SDK which is a open source library that we released earlier this year. And to prove to you just how easy it is to switch to self-hosted for chatkit, I will move our demo over right now. So if I go to my editor, you'll see I have this code in Python pasted in here. And it has all the same things that James set up, the hosted MCP tool, various agents, tools, so on and so forth. Then it is a substantial amount of code that I was able to just export from the uh builder. Now this MCP tool that he has is set up to run on the public internet. But let's imagine this was actually something that was accessing some data only available inside a private cloud and so it couldn't be on the public internet. I will switch this to a local tool instead. So right here you can see I've set up a SSE server that is running on local host. So, not on the internet anymore. I'm going to go in here to the agent that was using that tool and connect to the server and just print the list of tools as some proof that things are indeed running locally. And then finally, I will just switch this to use uh the MCP server that is running locally rather than the hosted one. As far as the backend code goes, that's about it. The only other thing I need to do is go tell Checkit not to point at openi. com for the API, but to use local checkit and instead hit our back end that we just wrote. And if I show you this function, there's not much in it. It's just pointing to the API endpoint, which is slappi jacket. Um, so I'll just go restart the app now and um type in one of these same queries that James typed. And if I go back to my terminal, what's happening here is the code that I wrote is now running. So it's starting with this query expansion agent, moving on to the file search agent, you can see spitting out some stuff about the MCP tools and so on. And so the power here is you can still use our agent builder to visually build workflows. You can version them. You can preview them and run them inside the OpenAI platform. And you can even collaborate with your colleagues on building these workflows. And when it's time to deploy, just export as code, paste it into editor, and you're off to the races. So that's self-hosting. And uh all the features that chat supports, things like streaming tokens, reasoning summaries, widgets, all of that is still supported inside our platform. And so you're missing out on nothing by self-hosting instead. Now I want to draw your attention back to the uh actually you can see the widget even worked. So things are working as expected. Um, I now want to draw your attention back to the title of this talk, orchestrating agents at scale. And you know what happens at scale? Well, unexpected behavior, bugs, things go wrong when you have thousands or millions of users. And you want to be able to both find those problems, but also optimize your workflows to make them go better. And so, for the rest of this session, I want to show you how you can do that using our features right here. So back in the agent builder, if I click this evaluate button, this will load traces. And what you're looking at here is kind of a highle view of the trace. Every time a workflow runs in checket or in the preview window, anywhere else, it automatically creates a trace. And this trace when you're looking at right now is an overview of what happened. So you can see the agents that ran in what order, um, and how long they took, all of that information. And you can actually click into any of these agents to see more details about what happened. Uh so in this case, the model it used, how many tokens, inputs, outputs, pretty much everything you need to know. Now, as you can imagine, I'm not an expert on whether or not this is a correct answer and how to fix fuel filter issues for semi-truckss. So I'm going to ask GPD5 to grade this for me. So I've added a grader here that says, was the final output correct and readable? And what's going on is the model is able to look at this full trace and all the context within it to judge whether things went well. And you can add a grader as complex as the one I added. That's kind of a broad one that's looking at the workflow end to end and grading whether things went well. You can also add more specific ones. Maybe if you're building a customer support agent, you could say, did the refund agent always check with the supervisor before giving a refund a user? In our case, looks like it passed and things went well. But the real power of this is one, being able to just poke around in traces and get a sense for how things are going, but two, you can hit
Segment 4 (15:00 - 20:00)
that grade all button in the top right to grade not just this one workflow, but all of your workflows. And when you have hundreds or thousands of traces coming in a day, that lets you get this bird's eye view for how things are doing in production, which is really powerful. Now, let's imagine we've looked at some traces and we found some issues. How do you optimize things? Well, I'll give you the advice that my parents always gave me growing up. They'd say, "Roan, your agentic workflow is only as strong as the weakest agent. " And so, what you want to do is you want to go to your workflow and optimize each individual agent to be as good as possible. The way you can do that is click in any of these agents and click this evaluate button and that'll pull open our visual eval builder. Now while this is loading, how many of you have built evals before for your products? A lot of hands, advanced audience. And how many of you thinking think that building evals is fun and easy? Not a single hand. Well, hopefully things are we think we've made it a little bit better and a little more fun to build evals. So, let me walk you through what you're looking at. On the left side of this on the right side of this or the left, yes, the left side of the screen, you are looking at the agent that we configured in the builder. So, you see the prompt, the tools, all of that stuff. And you'll notice that the prompt has a variable in it. And on the right side, uh the first column is some sample inputs that I prefilled that are that variable. So, inputs from the user. The second column is some ground truth data about the actual problem we're trying to solve. And we can use this on grading the outputs. The third column is the actual stuff that the model outputed given the input. And then I added a couple of graders. The first grader is a formatting grader that grades whether the output that the model produced is actually understandable and usable by the maintenance engineer. And the second one is a correctness grader. So if I click into this, you can see the prompt that I showed was does the output seem correct given the problem. And so the grader is able to look at both the ground truth data and the actual output and judge whether things are going well. Now if you look at our workflow, looks like it's actually not doing super well. 40% for formatting is not a great thing. We want to make this better. The way you optimize your workflow, standard way is you go edit the prompt. You can also addit some tools or change the model. But for now, I will uh add some instructions here to change the output of the model. And I'll click generate output, which will regenerate the model output for those inputs. Um, and that'll give me a chance to kind of sanity check whether things look good. So, this has generated some stuff. Things more or less okay. Look okay. Okay, now I want to know did I actually make things better? And what I can do is rerun the greater. So right now we have 40% of the time the formatting grader has passed. My hope is that my updates will make this better, maybe 60, 80 or even 100%. And so while this runs um the real power here of evals is over time you might start with just five examples which is really good but over time you'll have very large data set of inputs that your users have put in but also graders and each of these graders judges the actual performance of your workflow. And so over time, what you can do is when you're optimizing your workflow, adding new nodes, iterating on it, rather than relying on vibes, you can rely on cold hard data to understand whether things are getting better. In our example, we actually just jumped from 40 to 80%. Which is really awesome. Now, that's powerful. I can manually edit things. But the other really cool thing is you can click this optimize button down here. So for something like the correctness grader where I actually would find it quite hard to optimize a workflow for maintenance engineers, you can click that optimize button and it will automatically optimize your prompt to be better. And the way it does that is by seeing everything you see on screen prompts, ground truth data, the greater results, and even the thinking for why things were a pass or fail. And given all that context, it will optimize your prompt to be better. And I would really recommend trying this for your hardest queries where you're not sure how to optimize things. Um, and it's able to optimize all the things at all of your graders at the same time to make things better. Um, now I want to wrap things up by just talking about what we did here so far. In less than 20 minutes, we built a workflow using the agent builder. We then deployed it to chatkit which is running on OpenAI cloud. So we had to manage no servers or anything like that. We then switched to local checket, looked at traces to see how things are doing in production and then finally
Segment 5 (20:00 - 20:00)
built some evals and optimized them. And so what used to take weeks or even months of custom engineering, you can now do in a matter of minutes or hours inside one place, the open platform. We will be around after this on Discord for questions and we'll be around dev day. If you have questions, please come and find us. But that's agent kit. We really hope you like it and we cannot wait to see what you build with it. Thank you.