WEATHERED SURFACES: My 5-Step Method
14:26

WEATHERED SURFACES: My 5-Step Method

markcrilley 21.06.2024 5 963 просмотров 483 лайков

Machine-readable: Markdown · JSON API · Site index

Поделиться Telegram VK Бот
Транскрипт Скачать .md
Анализ с AI
Описание видео
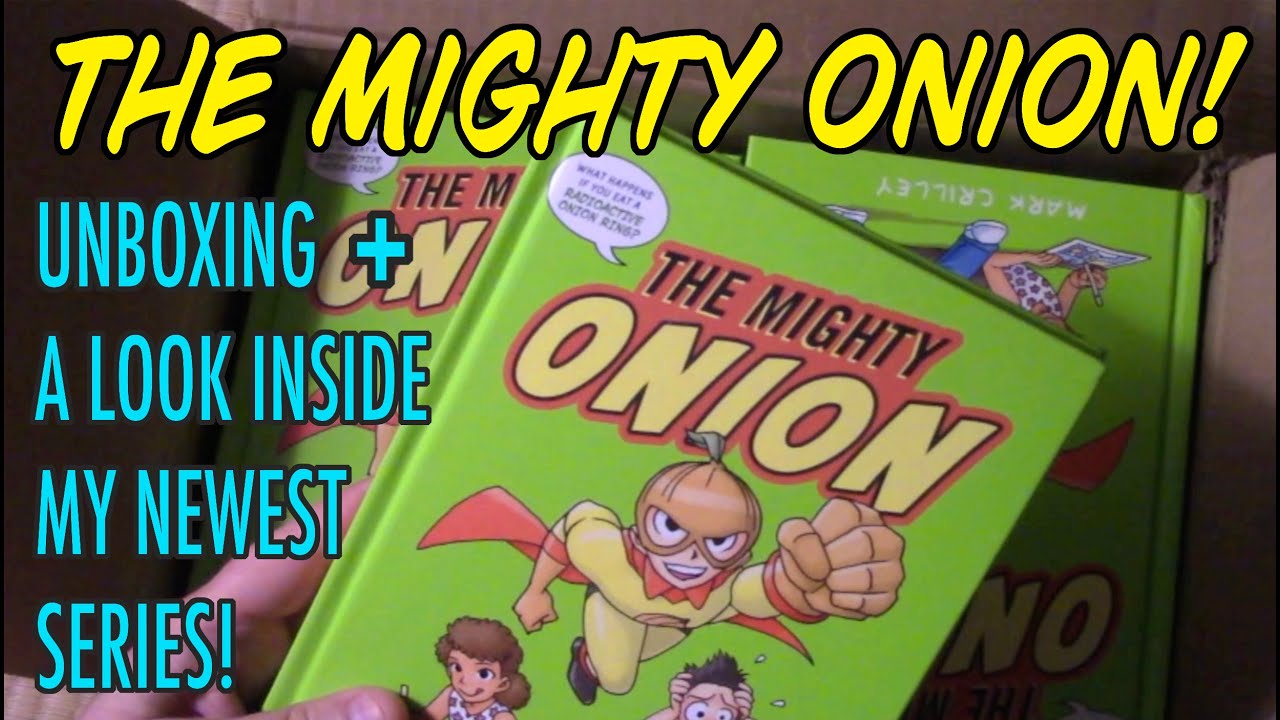
Buy THE MIGHTY ONION Here: https://www.amazon.com/Mighty-Onion/dp/0316490318 My ETSY SHOP: https://www.etsy.com/shop/MarkCrilley My PATREON: https://www.patreon.com/markcrilley Order LOST IN TAIWAN: https://www.amazon.com/Lost-Taiwan-Graphic-Novel-Crilley/dp/1368040993/ "Mastering Manga" books at Amazon: http://bit.ly/MASTERINGMANGA Order "The Two Pencil Method" here: http://a.co/cUljPMQ "The Drawing Lesson" at Amazon: http://amzn.com/0385346336 TWITTER: http://www.twitter.com/markcrilley CHIBI! Book: http://a.co/bx8kU1k "Manga Art" at Amazon: http://a.co/7OfnrRK "Mastering Manga 3" at Amazon: http://amzn.com/1440340935 "The Realism Challenge" at Amazon: http://amzn.com/0385346298 Brody's Ghost Collected Edition at Amazon: http://amzn.com/1616559012 All 4 “Miki Falls” books at Amazon: http://bit.ly/MIKIFALLSbooks All 6 "Brody's Ghost" books at Amazon: http://bit.ly/BRODYSGHOSTbooks SUBSCRIBE: http://bit.ly/markcrilleySUBSCRIBE OFFICIAL CRILLEY PLAYLIST: http://bit.ly/CRILLEYPLAYLIST THE ART SUPPLIES I USE: https://www.youtube.com/watch?v=xEBzCr_kNns All of my books are available through your local bookstore-- Ask them to special order if they don't have my books on the shelf. Thanks for your support!! ~Mark TWITTER: http://www.twitter.com/markcrilley INSTAGRAM: http://instagram.com/markcrilleyreal/ FACEBOOK: http://www.facebook.com/markcrilleyOFFICIAL All music created in GarageBand ALL MY HOW TO DRAW VIDEOS: https://www.youtube.com/playlist?list=PLCD2CF65888663986 HOW TO MAKE COMICS Playlist: https://www.youtube.com/playlist?list=PLBiW8y5LSHK4ajygBf6GBYC5KLBenvkaI PERSPECTIVE Playlist: https://www.youtube.com/playlist?list=PLBiW8y5LSHK425SYwHDIcLhXux8PfSzkw WRITING/STORYTELLING: https://www.youtube.com/playlist?list=PLBiW8y5LSHK7EcXJXo4-eXxY3ibZMMNRP CHIBI Playlist: https://www.youtube.com/playlist?list=PLBiW8y5LSHK4uzr_szQzCTZKmy5X0JLTc MY EARLY DRAWINGS Playlist: https://www.youtube.com/playlist?list=PLBiW8y5LSHK6vuXsRx9NzpgslP94h1sXc TOPIC VIDEO Playlist: https://www.youtube.com/playlist?list=PLBiW8y5LSHK6ulBEx2JS6YO3NSC-aYc1i HOW TO DRAW ANIMALS Playlist: https://www.youtube.com/playlist?list=PLBiW8y5LSHK5D-eaX6QqD5NM8B-Tpmvew ART BLOCK Playlist: https://www.youtube.com/playlist?list=PLBiW8y5LSHK4F_XyUyQkleoTUTwaDsdfX Q&A VIDEO Playlist: https://www.youtube.com/playlist?list=PLBiW8y5LSHK5ydoxaPsVZ1IEglpHFxMKs HUMAN ANATOMY Playlist: https://www.youtube.com/playlist?list=PLBiW8y5LSHK4q2WBhjqjKawlrmpBohCtv HOW TO DRAW EYES: https://www.youtube.com/playlist?list=PLBiW8y5LSHK7-Ap8UDe3K8wvhib-x9SaF

Оглавление (3 сегментов)

Segment 1 (00:00 - 05:00)

hey there everybody it's Mark kly I'm back with another video sorry it's been so long since my last video the month of May is kind of crazy over here in the krly household but now we're getting back into it and today we're going to be learning about creating the illusion of a weathered surface using uh really five different uh materials I'm going to start with marker we're going to move on to pastel I'm going to add a watercolor colored pencil and then finally my beloved white gouache and because you're going to see all five stages it should all be a nice little comparison at the end so I'm going to go ahead and uh do this first part uh real time I'm going to hopefully be able to do all of them real time marker for me is the most naturally smooth of uh the different media that I'm using uh today and so I'm starting with that creating a sort of a base surface that has almost no texture to it nevertheless you can see that I'm trying to follow um along with that surface having all of The Strokes of the marker um line up you know parallel uh to the direction of that surface so that if there are any streaks remaining uh they're kind of cooperating with um that surface to convey that illusion now you might notice that I'm slowing down a little here and by slowing down more of the ink is loading into the paper and making this section just a tiny bit darker and that is uh quite deliberate I'm wanting to have a you know the illusion of Shadow uh in this one area uh and if I can it would be nice if I can get it even darker uh in this other area I think what I might do is uh flip around to the other side and see if uh going super slow here might help make this the darkest of all either way just differentiating between the upper surface and the side is not a bad idea for creating the illusion of a three-dimensionality and that is basically all I'm going to be doing for this first one uh keeping it simple keeping it smooth uh but in time lapse I'm going to apply this exact same approach to these remaining four uh kind of tiles and that will allow us to move on to tile number two uh in which I'll be adding the uh pastel but for now let's go ahead and kick it into time lapse I'm going to use marker on all of the four remaining tiles all right so we've got marker we've got a base layer of marker on all five of the tiles we're going to set the marker aside and I think you'll agree that it's really quite smooth and even a little flat looking you know apart from these uh darker tones which help to um give it a little bit of three-dimensionality now I'm pulling out this dry um pastel sort of chalky type of pastel and it's just a slightly different shade of green and this is going to be you know just a little step in the direction of starting to make this look like a more solid uh surface and I may even have to run and grab a darker uh pastel to complete the effect that I'm going for here because it's really quite subtle at this stage but one thing that I found is that when you have one single color in an area it tends to look flat uh whereas if you can vary the color a bit from one you know area to another within this same uh you know the section that you're coloring in uh it will start to make it look like a more solid surface right now it's a very subtle difference and so I do think what I'm going to do hang on a second I'm going to grab a slightly darker green so as to make this a little easier to see okay so I've grabbed a slightly darker green here and here's a little trick for you when you're trying to go subtle instead of using the uh chalk straight onto the paper I'm just rubbing the tip of my finger on it and applying uh bits of it that way this keeps it very subtle now of course I could be going in here with any number of different colors like blue or red or whatever and the in a way the uh the more colors you add again the more sort of solid the um

Segment 2 (05:00 - 10:00)

surface will appear but I think my goal with this one is to stick mainly with this sort of greenish yellow color and uh keep our eyes focused on the effects of adding weathering uh Decay and so forth so here I think yeah we're getting a little more hopefully showing up a little more it's quite a subtle uh little difference uh and here maybe on the side I might go ahead and apply it uh you know just Direct IR L to the paper see if I can get away with that um but you can see just by having slight variations in the uh surface color that it already starts to look just a tiny bit more solid than it does over here where to me I just I'm very aware of the you know marker the very flat kind of marker uh coloring so anyway all of these you know different techniques that I'm showing you are I'm using real old-fashioned materials like you know pastel and so forth but you could emulate these effects for sure digitally those of you who work digitally just um try to apply maybe on another layer a slightly different color and see if it doesn't help you achieve the effect that I've got going here all right well like I did before I'm going to go ahead and in time lapse I'm going to apply the pastel to these remaining three we'll get all of those the same and then we can move on to the next step all right so there you see um all of these four uh panels or tiles looking roughly the same uh and that's quite a subtle change between those two now we're going to go for something that's a little more drastic I'm using watercolor and what I want to do is to create like um areas of where the paint has chipped away uh to reveal a sort of dark ER surface underneath and you can probably see even as I'm beginning to add this that you know watercolor has a tendency to kind of pull up uh and not be super even um unlike the marker which I think tends to get give you a more even color and that's why I'm sort of like using each one of these materials to do what they naturally do best um you know the pastel does a nice Smokey kind of gradual uh change gradation of color uh and so that was the natural thing to do with that with this I think the watercolor I'm taking advantage of the waterc color's tendency to um you know dry in a slightly uneven way very often The Edge will be slightly darker than the interior that's a sort of a Hallmark of watercolor the way it dries um and so yeah each you know each material that I choose there's a reasoning behind it um now the order in which I've done this is not um something that you have to follow you could add that pastel uh later on um I think you know to get that flat base color I do think marker is the way to go um some people are more skilled with watercolor and they can uh get a very smooth flat look with watercolor and hats off to you if you are able to do that I'm not so good at it so I'm sort of deliberately um letting this be sort of model and um not super smooth here cuz that's kind of what tends to happen with me and watercolor anyway all right so I'm going to go ahead and apply this sort of decayed looking surface uh to the remaining two tiles do that all in time lapse and then we'll be back to see what happens when we bring in some uh colored pencil okay so you can see uh what the watercolor brings to it really more of a drastic uh change there you get that sense of it being much more weathered uh but now we are going to bring in some colored pencil and colored pencil is really going to allow us to start adding uh an illusion of uh light and Shadow now you see me going in here to the sort of left edge of each one of these um watercolor splotches and darkening it in with u a kind of a gray uh colored pencil um time to get a new one it would seem it's so small but I never throw them away I have to use them all the way to the end get my money's worth out of them uh so but you can see by adding uh a little bit of Darkness over here on the left side of each one these things

Segment 3 (10:00 - 14:00)

it begins to kind of trick your eye a little bit that um light is falling across the surface and um wherever that light can't reach you get a little bit of Shadow forming uh and to make it even more pronounced I'm going to switch now to a black colored pencil which allows me to darken it up maybe in a more linear way just at the very edges uh of these things and uh yeah that gives you some sense of how what colored pencils can bring uh to this uh surface in terms of making it look increasingly weathered uh decayed like the paint is chipping off that kind of a thing um so yeah that basically covers what we're going to be doing with the uh colored pencils I'm going to apply that to this one remaining one and then finally we're going to be down to that last fifth uh stage in which I'm going to use uh my beloved white gach to uh complete this illusion of light and Shadow all right so we've got the uh colored pencil sort of working its magic on these uh last couple of uh tiles and now it is time to bring out the Beloved white gouache which is an opaque white paint and just as we had applied black back with the colored pencil to the left side we're going to apply the white over here on the uh right hand side and pretty quickly you're going to see that there we get a nice little illusion of uh light hitting that other edge of each one of these little decayed you know paint chipped uh sections of the tile and those two things together the black on the left side and the white on the right side really do help to kind of fool your eye into thinking that you're looking at a uh a real solid surface that has de decayed kind of imperfections uh all across and uh again you don't have to necessarily go out and buy white gouache and all these different materials these effects can be uh replicated uh Al um just uh following along with the concept of you know black lines or black Shadows over on the left uh and then the glint of light over here on the white and this time this is because this is the last one I'm not going to be applying uh the whitewash to any of the other tiles and then when we're done we'll be able to see hopefully the sort of um transformation from Mark uh at its flattest all the way over here to the most three-dimensional looking of the five let me go ahead and finish this off and I'll be back with a few final words all right well you can see that I came back in with a little colored pencil here just to add a bit of Darkness to the edge sort of accentuate the three-dimensionality really I do prefer to have white gouache be the final step because you want to keep that white nice and clean and not actually accidentally go on top of it but anyway that brings my V video to a close I hope you found it useful that uh next time you want to do a weathered surface you can apply some of these principles uh to your own illustration but before I go I want to say thank you to anyone who has supported me by getting my latest book The Mighty onion very excited uh to know that we've got a second book in the series on its way next year uh very glad to hear from those of you who have bought it and will never stop being appreciative uh indeed uh of all of you who've got any of my books over the years but let's go ahead and lay down this pencil I want to thank you all for watching this video I really hope you enjoyed it and I'll be back with another one real soon

Другие видео автора — markcrilley

Ctrl+V

Экстракт Знаний в Telegram

Экстракты и дистилляты из лучших YouTube-каналов — сразу после публикации.

Подписаться

Дайджест Экстрактов

Лучшие методички за неделю — каждый понедельник