How to put together your first workflow in Brand Studio
4:57

How to put together your first workflow in Brand Studio

Stability AI 08.04.2026 19 просмотров

Machine-readable: Markdown · JSON API · Site index

Поделиться Telegram VK Бот
Транскрипт Скачать .md
Анализ с AI
Описание видео
A single generated image is rarely production-ready without some tinkering. Maybe it needs to fit a banner, or a detail needs to change for a specific market. That’s what workflows are for. Instead of re-generating from scratch over and over, we’ll get one image to the finish line in three steps. What you'll learn: ✂️ Step 1: Remove the Background: Isolate your subject as a transparent PNG with original lighting intact. Use the Remove tool to clean up any edges before moving on. 
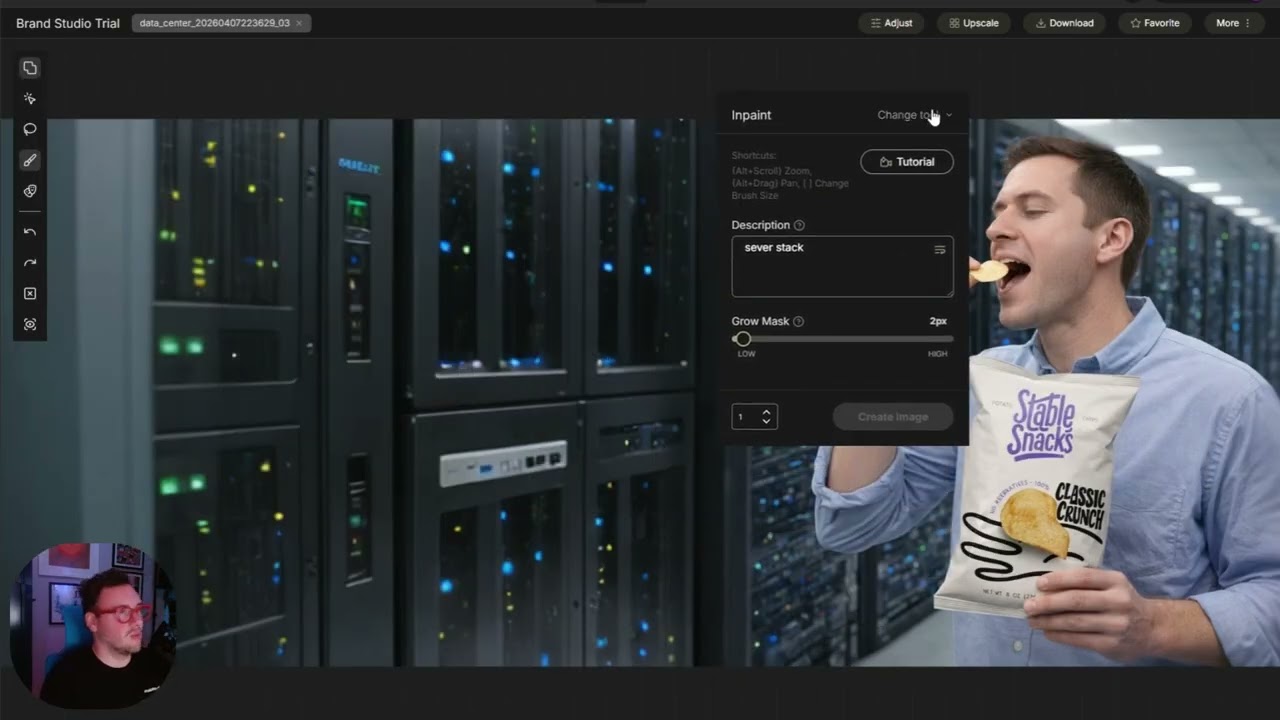
🌄 Step 2: Expand and Recompose: Use Outpaint to extend the original image to your target ratio (21:9, landscape, whatever you need), then use Quick Select to cleanly pull the subject out and leave an empty background. 🔍 Step 3: Upscale to Production Quality: One click takes your final composition from 2K to 4K, getting you to pixel-perfect. Once you start thinking in workflows, the tools you already know get a lot more powerful. 🔗 Follow along in Brand Studio → https://bit.ly/4vg00yP

Оглавление (1 сегментов)

Segment 1 (00:00 - 04:00)

Up until this point, I've only shown you some tips on how to use specific edit tools and feature functionality of Dream Studio. But let's talk about how you can do end to-end workflows for a practical use case, something your team might actually have a need for. For instance, being able to reset the focal point of an image so that you can right align the focal point and you'll have more space to be able to do maybe do text or logo insertion on say the left side. We'll go through that real quick. First of all, let's try doing a prompt here for something for our stable stacks brand. So, I know I'm going to use rapid asset insertion to include the actual chip bag. I'm going to say a man eating stable snacks in a data center. All right, we got our bags back. Classic crunch stable snacks. This guy's really enjoying his bag of chips inside of a ch server farm. Let's do some more with this. As we talked about before, um there's a couple edits we want to do here. What I really care about is the sky. The background doesn't matter as much to me, but I want to make sure I'm preserving the lighting of the image if I want to make sure I can reuse this guy. So, what I'm going to do is I'm going to go back and I'm going to show you a quick shortcut. So, from any of the images in the gallery, you can actually hit this edit button to be able to go in and use the options that are here. So, I'm going to hit remove background real quick. Remove background is going to focus on only what's in the foreground and remove everything in the background. So, I think it was a quick edit release for that. And then I get my dude. He is now a PNG. He's been cut out. He matches perfectly. He's got a little bit of blurring around here, but since the background is still going to more or less remain the same, it's just going to be in a different alignment. I'm not too worried about that. And if I really did care, I could always go in with a remove tool and clean up some of the pixels. Now I'm going to go back to my original image and I'm going to go hit the edit button and I'm going to do outpaint again because obviously if I want to have something that is a right line focused, I need to move it over and I need to have something to fill that left line space. So I'm going to do outpaint. I'm going to switch this over to let's say 21 by9. I don't want a lot of space for this guy. And I'm going to say server farm for this. And let's go ahead and hit resize and fill in the rest of the space. Okay. So now I have my image. It's right aligned. What I want to do now is I want to get this guy out of here. Cuz while he might match the lighting for the rest of the scene, maybe I don't want him here. Maybe I want to change his sizing. And I can't do all of that when he's actually part of the image itself. So let's go ahead and remove him from the image. I'm going to use the quick select tool so I don't have to try and map this guy correctly. And I can just click on him to be able to quickly align and match his mesh. So it's computing where exactly he is. Uh and then it's going to mesh him for me. So see, I've got all this stuff that's meshed. I can go ahead and finish up the rest of the meshing just by clicking on any of the pixels that might have been missed. You can see a little bit of his hand here. Perfect. Got it. And then by the inside of his mouth and the chip and we're all good. So, let's go ahead and remove this guy. And I'll do four different variations of this just so I can have some options for what the background might look like. We got my output. I've got this one without anybody in it. And now it is a free space for me to be able to read my guy at any point. So, I'm going to go ahead and download this. And then on the create page, I've now have my empty space. And now I've got my guy in the front end. I can open up a third party tool. And I'm just using Google drawings here for the sake of example. But you can now see that I have this guy and he's now independent. He's scaled. He still matches the lighting of the original image. I can use move him around. Uh either way, this is now something that is like much more useful for me. And then say I was doing this in say Photoshop, I would now have the ability to add in my text, put in my logos or anything I want while having this image actually be correctly aligned. You can go one step further than this. I want to flip it. him and actually have him over here on this side. Then I can grab this image, download it, bring it back into brand studio. So I can go from the upload function and pull in the image that I have edited and realigned with my new foreground realignment. See? And I can then go back to text image. Pull this guy into rapid asset insertion and say a man eating stable snacks in a data center in the style of great. And then you see I got my output again. Same guy. He's just now swapped over this side. So this is a great way of being able to reign. And then if I want to repeat these steps, I'd again just go through here. I can outpaint. He's now this the right size for it. And I could do a outpaint workflow on this gentleman. Move make him back into a 16x9 space. Resize image. And now I've gotten my data center with my man, my section. Everything is aligned correctly. And I've just swapped this image from start to finish. from just having a man eating chips to being able to get him in a data center to being able to swap to realignment to rematch lighting and then have it reimagined in a space that makes sense for how I want to do this. So, you can see the power of this for being able to then correctly align text and be able to match aspect ratios. There's no reason why I couldn't have had this go up or go down, being able to match different formats for different brand platforms. And then the last thing is this is great and all, but it's not a high enough section. Let's talk about how to upscale. Upscale is literally just one click. You click upscale, it'll take your image from 2K to 4K, interpolating the additional pixels in between. And then here you go. You can see I've got my final output. It's pretty much close to production ready. Obviously, it's going to still need a little bit of clean up, but the great thing about generative AI is that I can go through here and I can do anything else I want to. If I want to change make these server stacks be a specific server stack. If I want to go and precision in paint in different doors, this is all doable to me.

Другие видео автора — Stability AI

Ctrl+V

Экстракт Знаний в Telegram

Экстракты и дистилляты из лучших YouTube-каналов — сразу после публикации.

Подписаться

Дайджест Экстрактов

Лучшие методички за неделю — каждый понедельник