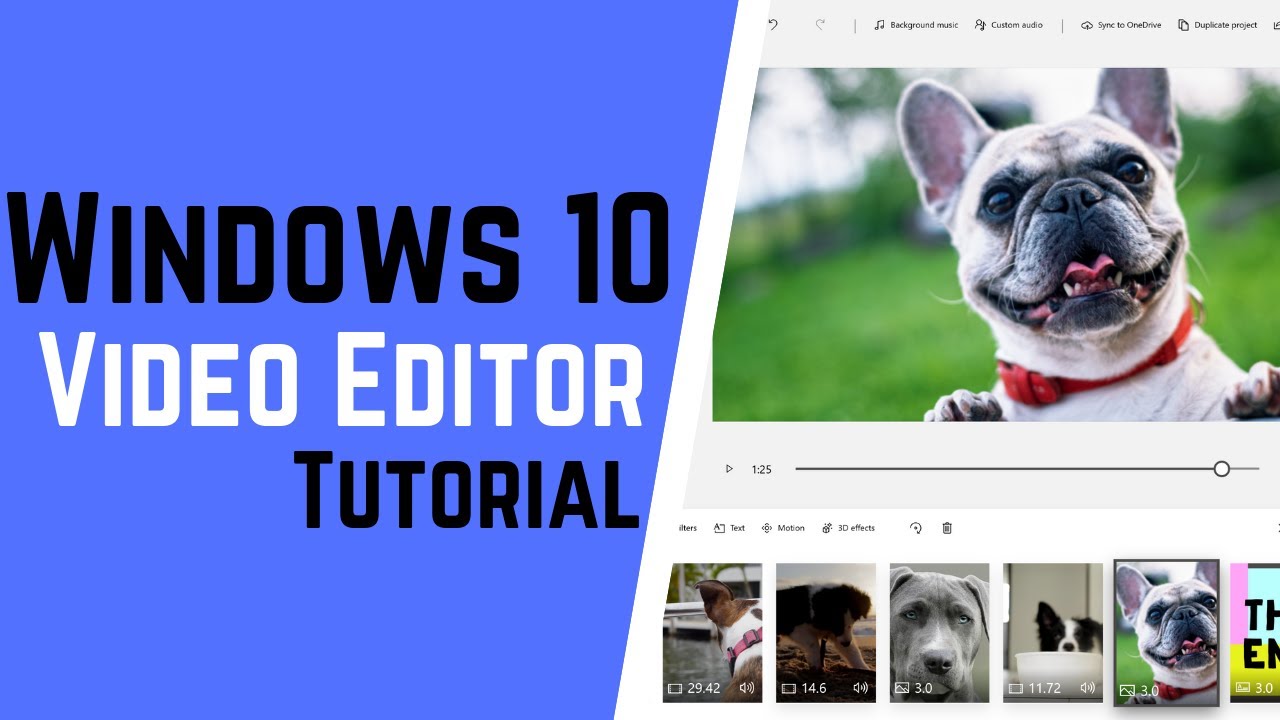
How to Use Windows 10 FREE Video Editor
Machine-readable: Markdown · JSON API · Site index
Описание видео
3 Best Video Editors for YouTube Beginners: https://youtu.be/5vc0EZrisZE
Read about Windows 10 Video Editor here: https://teachers.tech/how-to-use-windows-10-free-video-editor/
Stay up to date, subscribe to Teacher's Tech: http://bit.ly/Subscribe_TeachersTech
Windows 10 has a FREE video editor built-in and it is super simple to use. This video tutorial will show you the basics of Windows 10 video editor and have you creating videos in no time! Use the timestamps below to jump to different parts of the video.
Best FREE video editors for Mac and Windows: https://youtu.be/fMlnRTkTX_U
Best Free Photoshop Alternatives: https://youtu.be/xAwmNiNeY38
1:09 Starting Windows Video Editor
2:08 Add media (photos and video)
3:24 Add title card
4:32 Add media to storyboard
4:59 Trim and split video in Windows Video Editor
6:11 Change picture duration
6:30 Resize clip
7:02 Add text to clips
7:48 Add filters in Windows Video Editor
8:19 Add motion to clips
8:53 Add background music and custom audio
10:44 Adding 3D effects
13:14 Exporting project when finished
Get a FREE DOMAIN NAME and 50% Off Web Hosting For Your Website: https://www.bluehost.com/track/teacherstech/
I use Camtasia to create my video tutorials:
Use this coupon code: TEACHCAM10
Camtasia purchase with 10% OFF code applied: https://techsmith.z6rjha.net/c/1264585/701976/5161
Camtasia EDU 10% OFF with code applied: "https://techsmith.z6rjha.net/c/1264585/704928/5161
Camtasia Download page: https://techsmith.z6rjha.net/c/1264585/489271/5161DISCLAIMER:
DISCLAIMER: This video and description contains affiliate links, which means that if you click on one of the product links and end up purchasing it, I’ll receive a small commission. This helps support the channel and allows us to continue to make videos like this. Thank you for the support!


