In this video we are going to build and deploy fully serverless Video Testimonial app in AWS. You can use this app for your own purpose as well if you want to get video reviews or testimonial from your customers.
AWS Services used: Amazon S3, CloudFront, Lambda, API Gateway, Route53, ACM
Git Repo: https://github.com/awswithchetan/aws-solution-video-testimonial/blob/master/README.md
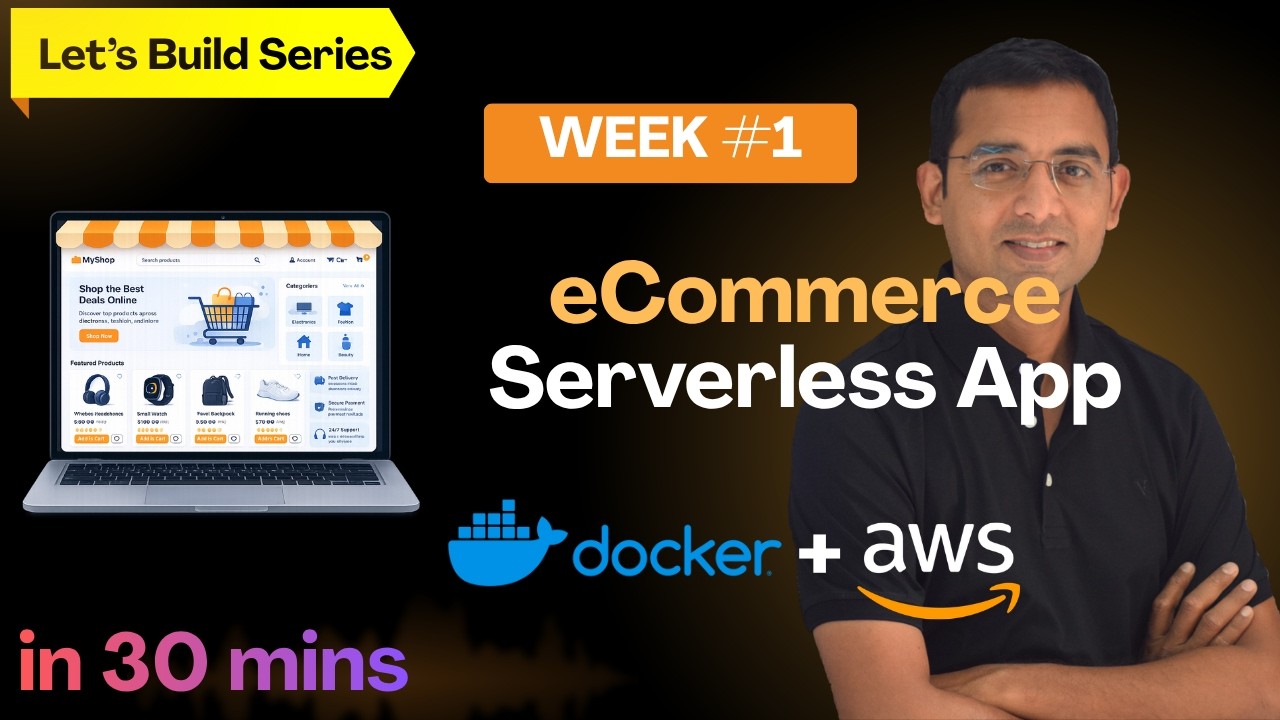
Week 1 video and AWS course
eCommerce App local deployment: https://youtu.be/XNTDCvtYTLw
Build and deploy eCommerce App on AWS: https://www.udemy.com/course/build-ecommerce-application-on-aws/?referralCode=361CDE8C3A9653255373
Happy Learning !
In this video:
0:00 Introduction and result application
0:13 Use case
0:50 Application Architecture walkthrough (serverless)
3:39 Git Repository for this application code
4:08 Clone git repository
5:41 Module 1 - Deploy frontend (S3 + CloudFront)
11:05 Module 2 - Deploy Backend (Lambda)
17:50 Module 3 - Exposing APIs (API gateway)
19:40 Module 4 - Integrate Frontend with Backend
21:25 Test app using CloudFront DNS/URL
23:10 Module 5 - Notification (SNS)
29:40 Module 6 - Custom domain name and SSL (Route53 +CloudFront +ACM)
31:20 Module 7 - Cleanup
31:52 Using AI Agent - Amazon Kiro to enhance this application (Amazon Kiro)
~Chetan
Оглавление (14 сегментов)
Introduction and result application
Hello and welcome to this week two of let's build series. And today we are going to deploy fully serverless video testimonial application. So the use case is that you can simply
Use case
send the link for your application to anyone from whom you want a testimonial for your products or services. And they can simply open this link on the mobile phone or in their desktop and record a short video testimonial and submit it. After submission, these videos will be stored in your S3 bucket. So as an architecture, this is how it will look like. So this is a simple app, but again very useful. All right, with that now let's get started with this application deployment. —
Application Architecture walkthrough (serverless)
— All right. So first let me quickly walk you through the architecture of this application and then we will straight go to the deployment. All right. So as you can see here, there is a user and user has a webcam or a phone camera with which he or she can record the video. So the first thing that user will do is of course type your application URL in the browser and this will basically cause the DNS resolution by route 53 and it will provide the IP addresses of your cloud front distribution. So the user web request will now go to the cloud front and behind the cloud front we have our front end hosted on Amazon S3. So at this point cloud front will retrieve the index. html file from the S3 which has all the front end code and this code will run in the user browser. So at this moment user will see the front end application where it will ask user to record the video. Now at this moment user can record the video and if required can re-record the video and once satisfied with the video, user will click a button to upload that video. Now at this point there will be an API call to the API gateway and further API gateway will invoke the back end lambda function which basically generates the pre-signed URL for the S3. Now if you don't know what is pre-signed URL, so this is a URL using which you can temporarily access the S3 bucket which is private. So this URL basically has some temporary credential embedded in that and using this you can upload or say download the data from S3 bucket. So this lambda function will basically generate the pre-signed URL and this URL will be returned back to the user. Now using this URL, this user can now start the upload. Now when I say user, it is basically browser which is uploading this data. So at this point there will be the upload request using the pre-signed URL and ultimately the file which is created locally by your camera will be uploaded to the S3 bucket. So there will be new file and as the new file is created, there will be S3 event notification to the lambda function and this lambda function has a logic to read the metadata about that video file and then trigger a notification using Amazon SNS that is simple notification service. And in SNS we have the topic created and then we have the email subscription there. So SNS will send an email notification to the pre-configured email ID. Right. So this is how the entire flow of the application will be and now let's get started and let's deploy this application in your AWS account. All right. So if you go to the repository
Git Repository for this application code
URL, then there is everything that you need to know to deploy this application. Now important is the prerequisites where you need to have your AWS account, your local workstation with AWS CLI configured and optionally the public hosted zone. All right. So the first step here is to clone the Git repository in your local workstation. So for that you have to simply fire the Git command and then you can go to this repository directory. And now let me show you how to do that. So for that
Clone git repository
if you simply go to the repository and just copy this, this is the repository URL. Then just say Git clone and this URL which basically clones the repository. And the next thing, just let's go to this directory and it has all the code and everything that you need. All right. Now that you have cloned the repository, now let's go through all these module one by one and I'm just going to follow all the steps which are listed here. So if you want you can also do it yourself by just following this guide or you can just follow along with me. All right. Now while you go on implementing this, there are quick tips that I want to share. First, you should have your notepad application open so that you can just copy and paste some of the important URLs. For example, as we create some of the AWS resources, we will capture their IDs or URLs in this notepad so that later you can easily use this URL while configuring your application. Second, you should open your AWS console in different tabs. Something like this where you have the S3 console open, then lambda console open, then SNS, API gateway, cloud front distribution, IAM and route 53. Now one another important thing is that for the services which are regional, for example S3 bucket, make sure that for all these services you are using the same AWS region. And likewise for other AWS services as well.
Module 1 - Deploy frontend (S3 + CloudFront)
Right. So with that now let's start implementing this project and the first thing that we need to do is to deploy the front end and for that we need to create the S3 bucket. And here for saving the time I'm not going to read through all the steps one by one, but rather I know what has to be done and that's where I'm directly doing that. But as I said, you can go a little slower and you can read through this and implement yourself. All right. So I'm now going to deploy the module one that is front end. Okay. So I'm using North Virginia region for this deployment and hence let me create my S3 bucket in this region and the name of the bucket, so it should be unique. So typically for that you should add a suffix with your account ID. Something like this. So I'm adding my account ID there. So this is my S3 bucket name which I will also copy and simply let's create the S3 bucket. Now while you create that, make sure that block all public access is enabled. That means this is a private bucket and rest of the settings as default. All right. Let's create the bucket. And as I said, let's save the bucket name in the notepad. Okay. Next, let's create the cloud front distribution and use this S3 bucket as a origin. All right. So let's go to the cloud front distribution. Now cloud front is a global service. That's where you don't see the region. So let's create a new distribution and depending on your AWS account, you might see the free tier here which is disabled for me, but if it is enabled for you, then you can select the free tier. Otherwise, you can select pay as you go. All right. Let's go to the next and let's give it a name. Say again, testimonial cloud front something. And this is for a single website app. So this is good and rest of the settings as it is. Let's go to the next. Now here we need to configure the origin as in where is exactly our application hosted. So that's Amazon S3 already. So here we just need to browse to our S3 bucket and that was testimonial with the account ID as a suffix. So let's choose that. And we don't need to configure any path here and rest of the settings as it is. So let's go to the next. Now here because we are just doing it for the learning purpose, we don't want to unnecessarily have the additional components like web application firewall for the security. So let's disable the security protection at this moment. Let's go to the next and let's create the cloud front distribution. All right. Now it will take some time for this cloud front distribution to be fully active, but meanwhile we can definitely configure few additional thing. For example, we need to set the default root object. That means which S3 file will be shown as a default when you access the cloud front URL. So let's edit that and here let's make it index. html. All right. That's it really. Let's save the changes. Okay. Now one thing. When we created the cloud front, we had S3 as a origin. Now our S3 bucket is private. So how does cloud front access S3 which is a private? Now for that, cloud front automatically creates something called OAC, origin access control. And because we created everything from the UI, it automatically updates the S3 bucket policy to allow the access from the cloud front OAC. So let's verify whether the S3 bucket policy has been updated or not. So for that let's go to the bucket. Let's go to the permissions. And here if you see this bucket policy is automatically added and it says that get object is allowed for the cloud front distribution OAC. So which means we are good here with respect to cloud front accessing S3 bucket. Okay. So if you follow this guide, we have set the default root object and we verified that the S3 bucket policy is good. Now next thing we need to update the S3 CORS setting as well. CORS is cross-origin resource sharing. Now this is important because our application is going to directly upload the file to the S3 bucket from the CloudFront distribution URL. And that's where S3 has to allow the request coming from the different domain name. So, for this, let's update the S3 CORS policy, and let's have these settings. So, let's just copy this from here. And let's go to the S3 bucket again. And if you just go down here, you'll see this cross-origin resource sharing policy. So, here let's just paste it. All right, let's save the changes. Okay, so this concludes module number one. Now, so far we don't have any index. html or any code in the S3 bucket, so we can't really test it. But, otherwise, our application will be accessible later through the CloudFront URL. And you should also save this URL somewhere, and this is the URL. So, let me just copy and save it here. Now, it is accessible through HTTPS, so let's add a protocol as well. Okay, that's it. So, now let's go to the next module, and let's configure the back end.
Module 2 - Deploy Backend (Lambda)
All right. Now, in the back end, we are going to first create this Lambda function. And for that Lambda, there should be an IAM role. Because, if you see, Lambda function is going to create the S3 pre-signed URL. And for that, it need access to the S3 service, so that it can create that pre-signed URL. So, for this, we will have the IAM role assigned to this Lambda. And for creating this role, we need few IAM policies. So, first, let's create this IAM role, and then let's create this Lambda function. All right. So, this role will have AWS Lambda basic execution role policy, which Lambda needs for, say, pushing logs to the CloudWatch, and for doing other things. But, for accessing the S3 and creating the pre-signed URL, we need to attach this policy. Now, here we need to make sure that the S3 bucket name is correct. So, we need to replace this with our account ID, or replace this entire thing with whatever S3 bucket name you have in your account. All right. So, for this, let me go to the IAM console. Okay, so let's go to the IAM. roles. And let's create a new role. Now, the service is Lambda, so let's say Lambda. And next. Now, as I said, there is this basic execution role policy, which anyhow we have to attach. So, let's go with that first, and let's give it some sensible name, say, testimonial Lambda role. Okay, this role already exists because I have my live app already running in the same AWS account. So, let's give it a little different name. for pre-signed Lambda. Something like this. And that's it, really. Let's create the role. Now, so far it has just one policy, which is basic execution role. So, we need to add another policy, which grants Lambda permission to create the pre-signed URL. Now, in order to attach this policy, we can either create a new policy and attach it, or other we can directly go and create a inline policy, which effectively does the same thing. So, let's create inline policy. And we have to edit with JSON. That's better, because I have to just paste the policy document from the repo. So, let me quickly take this again, and paste it here. Just that I need to make sure that the S3 bucket name is correct. So, for that, I need to just replace this account ID. So, let me do that. All right, so that's it. Let's say next, and let's give it a name, something sensible again. So, testimonial Lambda role for pre-sign, something. And let's create this policy, which will be automatically attached to the same role, and you can see it here. All right, so we have this role. So, just remember the role name here. And now, let's create the Lambda function. So, we are going to create a Lambda function with Python as a runtime, with 3. 14, or whichever is the latest. And we are going to attach this role. And the code for this Lambda function is already there. So, better you open this Lambda_function. py, and take the code from there, and create this Lambda function. So, let me also now do that. All right. So, now let's go to the Lambda. So, I'm there. Now, let's create a function. And let's create it from the scratch, and let's give it some name, something like testimonial Lambda pre-sign. Now, the runtime is Python 3. 14, which is good. Now, here we need to change the default role that AWS creates for this function. So, let's use the role that we had created. So, let's use this role. All right. Are there any other configurations that we want to do? No, that's fine. Let's create this function. Okay. Now, if you see this function, the first thing that we need to do is to add the code to this function. So, all right. So, this is a default code. So, let's delete that, and now let's go to the repo. Okay, so as I said, let's go here, and let's just copy this raw code. So, I'm just copying raw file. And just pasting it here. All right, so that's done. And let's say deploy, so that it saves the code. Now, we need to do some additional configuration. For example, we just need to go to the configuration, and we have to change the Lambda timeout to something higher than 3 seconds. So, let's make it, say, 30 seconds, so that Lambda can run at least for those many seconds, if required. Let's save that. And one more thing that we need to do, we need to add the environment variable for that Lambda, so that it knows for which S3 bucket it has to create the pre-signed URL. So, right now there are no environment variables. So, let's just add the new environment variable. And the environment variable name is bucket name, so let me pick that. And the value is the one that we had stored. So, let's use it. All right. So, let's save this Lambda function. Okay. Now, if you look at this Lambda function, and if you go through this code, you will understand what it is doing. So, the first thing that it does is that it will just get the bucket name from the environment variable, which you can see here. And then, basically, if you go through the code, you will see that it is generating this pre-signed URL for the specific path, that is, bucket name {slash} testimonials directory. So, this is good. We have the back end Lambda function now. Next, let's go to the API layer, where we are going to simply create the HTTP API, and link it to our Lambda function. Now, for the API, we are also going to create the route with {slash} pre-sign, and we are going to invoke our Lambda function for this particular route. All right. Now, along with that, we have to also do the CORS setting for the API Gateway as well, where we will add all the origins with star, and allow method could be star, or it could be specific, like post and options only. And again, allow headers could be all, or it could be content type. So, with that, now let's go to the API Gateway in the same region, and create this API.
Module 3 - Exposing APIs (API gateway)
All right. So, let's go to the API Gateway. Let's say create an API, and this is HTTP API, so let's say build. And let's give it some sensible name. So, again, testimonial API. All right. Now, let's add the integration, and this is a Lambda integration, so select the Lambda in the same region, and let's add our Lambda function name here. That's it. Let's go to the next. Now, for the routes, we have to have the post method with {slash} pre-sign, and the integration target is a Lambda function. So, make sure that you configure it exactly like this. Now, for the API Gateway stage, let's go with the default stage. Let's go to the next, and simply create the API Gateway. Now, as you create the API Gateway, it will also provide you the API Gateway URL. So, you can simply just go here, and copy this URL, and save it. All right. That's it. So, which means we have created the API, but I think we missed setting up this CORS. So, now let's do that for our API. And for that, just let's go to the CORS setting here. Let's say configure. And here, you have to just say star, and you have to click this add button. Don't forget about that. Here also, I'm just going with the star, rather than adding the specific headers. With respect to the methods, as I said, you can go with the post and options. Now, options is required because browser uses this method to understand the CORS policy. So, I think this is good. Let's save this. All right. So, we are done with this API Gateway module.
Module 4 - Integrate Frontend with Backend
And now, we can basically integrate front end with the back end, and upload this front end to the S3. And at that point, we should be able to access our application. All right. So, for this, we need to go to this particular index. html file in the front end directory and update this API URL with our HTTP API. So, let's do that. Okay. So, now let's edit this file that is front end index. html and if you just come down a little, it has all the configurations that we can change. For example, API URL. So, we need to update this with our own URL. So, I'm just deleting up to this part. And let me just copy this URL. And let me add it here. Now, make sure that you have this {slash} pre-signed suffix. Okay. Now, additionally, if on the front page you want to change anything, for example, what message you are going to show to your end user, then you can simply edit this title, page subtitle, and some kind of tips. So, this is really up to you whether you want to change anything here. So, as of now, I'm not changing anything. All right. So, let's just save this file. And the next thing we need to do is to simply upload this file to the S3 bucket that we have created. So, let's say AWS S3 CP front end index. html and the bucket name, which I just copied from my notepad. All right. So, file has been uploaded and everything else is already there. So, which means we should be able to now access our application using the CloudFront URL.
Test app using CloudFront DNS/URL
Okay. So, let me just grab this CloudFront URL and try to access it. Okay. So, you can see this screen and this is coming from our index. html. So, here let me just put my name and maybe email ID. So, this form is for the one who is going to basically record his or her testimonial. So, let's say record video. Now, it asks for the permissions. So, let's give the permission while visiting this site. And you can see that um it is working here. So, let me just try recording something. So, this is my testimonial for my own course, which is weird, but yeah, that's it. Let's stop the recording. And let's submit this. So, it is now uploading this file to the S3 and for that it first got the pre-signed URL. And you see the file has been uploaded. Now, let's check if the file is really there. So, let's go to the bucket. And objects. So, let's just refresh here. Okay. You see the index. html we had uploaded earlier, but here are the testimonials. And it will have two files. So, webm file is actual video file and the JSON file is all the metadata about the, you know, user who uploaded this file. So, what's the name, what's the email ID, all that. All right, which means this is working. And if you want to just watch the video, you can just download it and play it in any media player. All right. So, we are done with this step where we could validate that application is working as expected.
Module 5 - Notification (SNS)
Okay. So, the next module is notification and this is for the application owner. As in, if somebody uploads the testimonial, the owner should know that there's a new testimonial. So, for that, we are going to use SNS service and subscribe that with our email ID. After that, we are going to create another Lambda function and there we are going to configure the topic ARN as an environment variable so that Lambda function knows whom to send the notification to. And further, we are also going to add a trigger for this Lambda function where if any new S3 object has been uploaded under {slash} testimonials directory, then only it will trigger the Lambda function. Right. So, that's the flow of the notification. And with that, now let's do this. Okay. So, let me go to the Simple Notification Service that is SNS dashboard. And if you go to the topics, let's create a new topic here. And this should be standard topic. We don't need FIFO. And again, the topic name could be anything. And rest of the settings as it is. So, let's create this topic. Now, the next thing we need to create a subscription for this topic. So, let's create a subscription. And here we are going to create email subscription. And the endpoint is the email ID on which you want to receive the notification. So, let me put my email ID. And once I create the subscription, I should receive an email to confirm my subscription. So, let's do that now. All right. So, you can see that I got this email for subscription confirmation. So, I'm just confirming that. Okay, that's done. And now, if you just come back to the topic and go to the topic, you will see that the subscription should have been confirmed. Yes, that is true. All right. Next, we need to create another Lambda function for the notify functionality. So, let's go to the Lambda again. functions. Let's create a new function or the from scratch. Let's give it some name. And again, runtime is Python 3. 14. And here again, we are going to use the same I am role that we had created earlier because if you remember, that I am role also had the access to send SNS notification. So, let's um use the same. I think the name was pre-signed Lambda. But we are going to use the same role as I said. So, let's create this Lambda function. Now, a few additional things that we need to do is to add the configuration, change the timeout period to 30 seconds. And also, we need to add an environment variable for the topic ARN. So, let's edit. Let's add a new environment variable for the SNS topic ARN. And let's get that ARN from the topic. So, this is the ARN. All right. Let's go here and paste that. Okay, that's good. So, let's save it. And now, the most important thing, we haven't updated the code. So, now let me copy the code from the repository. Okay. So, the code is there under this directory in the lambda_function. py and I'm just copying as a raw file. And I'm simply pasting everything here. And if you read this code, you will understand what it is doing. So, it is taking the topic ARN and further, this Lambda is getting triggered after the, you know, object is uploaded into the S3 bucket. Now, we haven't added that trigger yet. And let's do that after we deploy this function. Okay. So, the Lambda function has been created. Now, we need to basically add this trigger for S3 bucket. So, we'll add a new trigger in this particular directory. So, let me just copy this. And the event type should be put object. All right. So, for that, let's just add a trigger. So, I'm on to the function page. Let me add the trigger and the source should be S3. So, let's select that. And the bucket is the one that we had created. And the event type, so we don't want to trigger a Lambda for every event, but rather we only want to trigger it for the put of new object. Now, the prefix, of course, you want to do that only when the new object is created inside this particular directory. Because otherwise, if you are adding any other file to the S3, then also the Lambda will be triggered, which we don't want. Now, generally, in these cases, you can also have two separate buckets, one for the front end and another for uploading the videos. But in our case, we just use the same bucket and that's where it is important to add this prefix here. All right. Rest of the settings as it is. Just that you need to just acknowledge that if this Lambda invocation causes the recursive invocation, then you are responsible for that and not AWS. So, let's add this trigger. Okay. So, everything is done and which means if we now access our application and upload the video, I should also receive a notification for that. So, now let's again test this. All right. So, let's go here and let's just refresh. And again, let's give it And again, let's put some name, say John and maybe some other email ID. This email ID doesn't matter because we are just recording it as a JSON so that we know what is the email ID of the user. So, let's say record the video. And I will say this is another recording or next testing, I would say. So, let's stop. And let's submit. All right. So, it has uploaded the video. And now, let us check if I got a notification. Yes, you can see that new testimonial from John. And it has all these other details. Now, this notification also has a direct link to the video that the user uploaded. So, we can also download it or watch it online if you are logged into AWS console with our credentials. Right. So, which means everything is working and we are done with all the important modules. Now, there is module number six, which is for custom domain
Module 6 - Custom domain name and SSL (Route53 +CloudFront +ACM)
name and SSL, where you can access this application using your own domain name. Now, I'm not going to demo this because here we need to get the SSL certificates and then we need to update the CloudFront distribution which itself take 5 to 10 minutes, but the steps are all listed here and if you go through all these steps, I'm sure you can easily do that. Now, because I'm using this application for my own purpose, I have already deployed exactly same application using my own custom domain name. So, let me just show you that. So, first let me show you my CloudFront distribution for my application and my application is hosted with the URL as this, that is testimonial. aws. withchetan. com and if you see this CloudFront URL, you have to first basically update the custom domain name as an alternate domain for this CloudFront distribution and there you need to add this domain name. Now, while you add that, you have to also provide the SSL certificate and I got this SSL certificates from the Amazon Certificate Manager. Now, after that, I just went to Route 53 and there I have my own domain name, that is aws. withchetan. com and in there I created a record of type alias for this testimonial website. So, if you see this record, here you see the value is the CloudFront distribution and the record type is type A with alias. All right, so which means we have now working application and the last thing
Module 7 - Cleanup
don't forget to clean up every resource that you created if you're not going to use this application for your purpose. Now, this is a serverless application, so there is really no charge for that even if you don't use it, but the problem is we have made this application public as in anybody can just record the testimonial and upload it to your S3 bucket and in that case, you'll be charged for the S3 storage, right? So, I recommend that delete everything that you created during this exercise.
Using AI Agent - Amazon Kiro to enhance this application (Amazon Kiro)
All right, now before I let you go, just one more thing. If you want to enhance or modify this application, then you can make use of Amazon Kiro, which is AWS provided Genie agent, so that you can make all the required changes, you can troubleshoot issues and you can do everything that otherwise you do with any other AI agent. And you can get access to this tool very easily, just follow this link and you are good to go. So, if you want, you can also use this Amazon Kiro AI agent. All right, so I hope you enjoyed this exercise where we build the video testimonial application from scratch and if you want to go through more such tutorials, then just add a comment about what you want to build and I will make sure that I create a video around that. Otherwise, I hope you enjoyed this and with that, hopefully we meet again with the new solution in the next week, but by that time if you decide to do some AWS certifications, then you can explore my courses which are there on Udemy. So, thanks for staying back and I will meet you again in the next week. Thank you.