Thanks to BRUNT for sponsoring this video! Get $10 off your first purchase at https://brunt.yt.link/GjuS3VH using code DAHM10.
T-Shirts: https://www.dahmracing.com/collections/shop
Оглавление (5 сегментов)
Segment 1 (00:00 - 05:00)
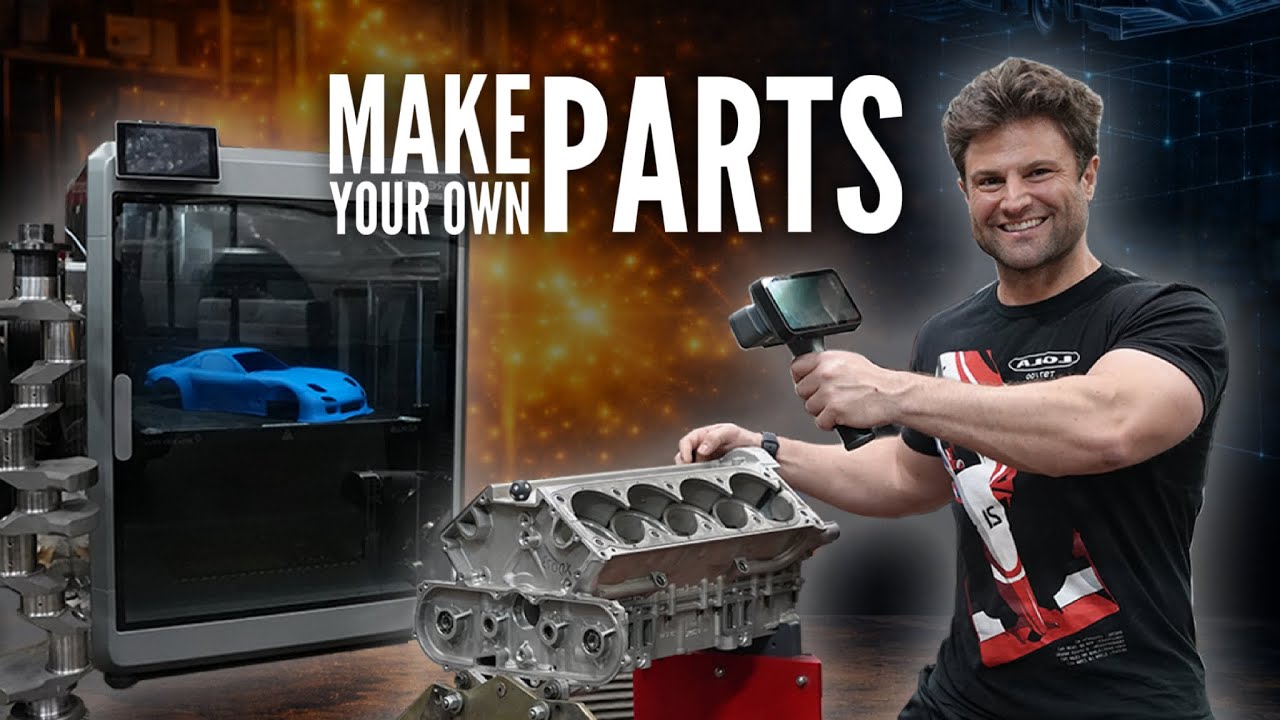
Joel and I have just spent most of today cleaning the shop up for this moment right here. I present the same 3D printer we had before, but uh its replacement is a slight bit bigger. So everything here is painting ourselves in a corner. This one we're printing ourselves into a corner. We just need this so badly. I'm willing to take the leap and make it work no matter what. So, let's take a look what we got. — Before we've returned the forklift, I get to use my HalfLife one, two crowbar, and this is the perfect use for it. So, we need to make sure whatever's in here can be assembled separately instead of using the forklift again. I actually feel good that this might not be as uh overwhelming. It is like one of the world's largest 3D printers. So, is that what it is? Thought this was a pallet of one rotor e shafts. — That would be extremely heavy. — At first glance, it makes sense that this thing is going to be massive. And we've got big flat boards. But underneath there is actually some of the coolest [ __ ] I'm honestly thankful for the reality cuz like my brother had to do this with a small printer and we get to just like, oh well, we know what we're looking for now with this one. I just sent a picture. I said, hey, I can finally print your dildo. I literally that's if you're going through the proper channels. This is about a $30 $50,000 printer. This is about $15,000 printer. Just for full disclosure, I got a couple thousand discount. So, I still paid $10,000 shipped for it. No risk, no reward. I would need to print entire body panels for the fourer to make carbon bodies. I need to just figure this out no matter what. Kind of like the CNC machine behind me, but that's also more of like the reality. You really do have like a nice Apple like interface. So far, the packaging was actually pretty decent. That is massive. Those are like heat exchangers. Oh, yeah. I forgot. I should point out this is a heated chamber. That explains the heat exchangers. Uh you know how sick it would be if we could just like accordion it up. Step one to me suggests that this — Oh, that's nice. — Yeah, they thought ahead for that. These panels look fake. They don't look like the right ones for it. That was the easiest piece. We're just going to go ahead and keep taking. It's just a lot of material. I'm like I said, I'm kind of impressed at how cheap it is because just the sheer quantity. So, I'm going to go ahead and pop these zip ties. 3D printer filament. 1. 75 mm. That standard. This should be the standard width. — Oh, instructions. I — Oh, okay. — That doesn't look — warranty instruction. Instruction on the complimentary USB disc. — Oh, and this Well, they put it like back in it. That's like the second one of these we've gotten from random people. Oh, that's actually nice. I will take that. That is a lot of M6 looking bolts. I just pulled the USB disc out and we haven't looked at it yet, but look at this. You can actually see Joel pointed out the computer fan. I couldn't see it from directly overhead, but this is the 3D printer is. It's just that with a lot of distance to go left, right, up and down. And that's what these little stepper motors are is they're just spinning these worm gears in a pattern. It blows my mind. Both CNC machines and this all they do is they do a thing. So spinning and then the rest of it is left, right, up, down, forward, backwards at certain speeds and whatever. And that creates all this magic. So in this case, this thing's just pooping out and then closing it sphincter, pooping again. And these things do all the rest of the work. I've got this to protect my face from all the sparks. gloves for that. But you know, one thing I never do, the correct shoes. That is uh MIG welding at its finest. Thankfully, because of Brunt, I have the opportunity to keep myself protected and very, very comfortable. Those are actually really nice. So, one of their best things is their Brunt Cushion. When you're working on your feet, you deserve to try and treat your whole body right from the ground up. That is nice. So, what are these boots good for? Well, just about all of the hazards that are here in this shop, including this, they're even eh rated. What does that mean? Electrical hazard. It's actually was more gripped than without the water. They're waterproof as well. Every danger and hazard that's in this shop, that is exactly what these are meant for. As much as I want to showcase this feature, they are oil resistant. They're brand new, so I want to I want to baby them until I inevitably scuff them and then they really become work boots. So, if you're looking for a boot that can take the brunt of all the abuse around here, look no further than right here. Brunt Boots. Get $10 off your first order using my code right here. And if you don't absolutely love these things, you can send them back.
Segment 2 (05:00 - 10:00)
— Worse than getting a virus, that USB disc is empty. There was a Google Drive link thankfully. This is better than I was expecting. — I thought we were cooked. — Yeah. I mean, it's impressive for like getting it internationally shipped and not having it absolutely destroyed when you get here. Look at that. There's three of them all connected together. So, either they're both hooked through this one or this one. Really just have to unbolt both of those. You don't have to fully take them out. You just have to get them loose. Look at that. That's pretty slick. Both of these can now sit over here, I believe. So, okay. Oh no, Joel just handed me this and I look down. Oh no. How does that even happen? Everything else looks fine. Yeah, that wasn't us. What a bummer. Somebody lazily hit this thing. clearly narrow, so it wasn't us. But we have video of it the moment we got it. So, we're going to continue unboxing this being that it's paid for. I'm going to assume what you see is what you get. And unfortunately, this is a like meant to be a ground race so that the whole thing slides on this. It sucks. It's 99% bent in a way that wouldn't matter as much, but it's also still bent, meaning that it could be deflecting up and down. So, as the machine goes to print and it slides across this, it's now rising and lowering. It's meant to be a flat, trustable surface. So, we're kind of asked out on this. Of course, you know, we're not helpless and we can fix it, but like I paid all that money for this. And of course, it was somebody with a forklift. That's absolutely insane that somebody just blew through the side of it. And you can tell they weren't planning on loading this cuz look at how offcentered they were to begin with. So, it must have just been a rushing accident. Joel keeps finding more things that got hit and shifted. everything like just kind of cascaded. But this is the safe clean side and the head's back there. We're actually just documenting all this for all the obvious reasons right now. But we're going to go ahead and take all this out, see what we're dealing with. Even this whole assembly snapped off it. They did a number and it cascaded through the whole thing. The only redeeming quality is that these are okay, but that's not that's just up and down. The left, right, up, back, forth is what looks like it's pretty compromised. This whole process is actually pretty slick. Aside from the damage, Yep. Go ahead. — Ignoring the damage, this is the top of the machine. So, this sits way up here. It's bigger than I was expecting. I think the next steps are actually just putting this up on all those stilts, getting it all the way up in the air on the outside walls, but then also the bed, which is probably that thing down there, is what's on those four screws. So, that thing's being picked up and dropped down. That's it starts all the way up at the top, starts printing, and the bed starts dropping over time. So, this is going to be fixed up in the air, which means we have to figure out what to do about this sooner than later. They went through and did all the calibrations. And of course, that's not going to work either. I'll wait for them to tell me what to do. But we have to bend it back because we can't turn it on or do anything with this like that. And it's 86 in long. The screen is over here. So that would mean that the doors are most likely on this side, which means if we printed something all the way in the back of the table, you can't get back there easily. We have 86 like total inches wide. This is 63 in deep. So let's go take a look at our corner. The screen's gonna have to be on this side. Hopefully, this wall is cleared. I want you to be able to see the machine printing. Okay. So, I don't want to do this right now, but it actually makes sense given we have the structure to do it. I'm going to apply some force right here and try and bring this back into more of a neutral spot. That forklift really did a number on this. Yeah, we're going to have to take that piece out, unbend it somehow. What we're going to do is basically flip it on its top here, build all the legs, flip it on its side, flip it on its bottom. So, we'll start that by skewering this.
Segment 3 (10:00 - 15:00)
This is going to be at least that tall. — Oh my god. Cuz we have a floor underneath that with feet. That's like taller than me. — Oh. Oh my god. Okay. Yeah. No, that thing's six foot. It's taller than both of us. The idea is that the taller it is, the less we have to take up space this way to get whole bumpers and hoods and fenders all printed in one shot. What have we gotten ourselves into? Two of the most damaged ones are facing the front of the machine. The whole machine's bent. It's not an optical illusion. We'll pull this one back off. Let's just see. Yeah, my fingers fit underneath there. Okay, this I am actually gonna try and bend back because I you can't even assemble it right now. It's pretty [ __ ] You guys will have to look past the ongoing damage, but this cuz this one says front. So, this will it looked like it actually goes into the track and sits right there. Oh no, everything's all [ __ ] Damn it. It's going to be a long day. E, that's all them crunchy. This whole thing would be so cool if it wasn't all broken because it would actually line up and we'd have just little nuances of like, oh, you know, got to just twist it a little bit more. This is actually straight up like damaged. We're putting bad on top bad. I really wish we weren't installing this right now, but we need to build it because we need to know what all is broken cuz we keep finding more that's broken with it cuz then I would have just said, "Hey, replace these two parts and I would have painted myself into a bigger corner and it wouldn't work. " So, we're going to continue down Dante's seven layers of hell. I don't know what I did in my past life or even this life to deserve this. That's the core of the frame. That is a huge ass printer. We've definitely uh committed to something absolutely massive. So now it's upside down. We're going to flip it on its side and then top. The side flip is going to be easy. It's the Okay, now we have more weight trying to get up above us. And so we're going to test it if it feels out of our zone. No shame. And we'll figure a second solution. Maybe using jack straps to the ceiling or something like that. But uh it's not that heavy. It's just clearly absolutely massive. So, uh, we're going to go ahead and give it a test. — That's not bad. Here's the — You want me to go there? — Nope. I think we're good. Just pick. No, don't hold back. Push up. Don't fight me. Okay. That was not that bad. — I didn't realize you. — Yeah, you were fighting me. I said, "No, I need to go up. " — That is pretty cool. We could print sex bots. It's got some damage, some battle scars from the international travel. Uh, and it clearly shows it, but we have it. It's here. The rest of it is just the four corners, four horsemen of table movement, the table, and then really just the enclosure to keep it heated, keep the uh microplastics in that enclosure. I don't need to have that being another thing in my face. This is pretty exciting. And uh Dwell reached back out immediately and you know it's not their fault the shipping got damaged, but they're like what parts do you need? Right now we're looking at everything that is damaged. And I'm glad we ended up getting all pissy and building it because there's more damage than we thought. So you can just see this. You can't even fire the machine up without that one. So, that one's pretty trashed. Uh, that's really stopping us at this moment. But all four of these that hold the table up, they were aligned to specific spots on the bigger part. Well, these being bent, there's all four of them are slightly bent, but two of them, you can actually see them bowing and it caused us issues as you saw earlier trying to install the feet. This one's all wavy. So, you can't then align it to the marks because it's marks aren't in the same spot. And then finally, this one is kinkedked right in here. And again, that would affect the table position. So it kind of goes they're all parts that are actually like structural, not just holding it together, but actually aligning things. I'm taking it very seriously because those are what are going to affect the performances. Now, what's nice is that this software does have the ability for the bed to align itself and all four can operate independently. So once the machine knows zero it all out, we're good. But the problem is if it's that messed up, the machine's got to do tons of over calculations and calibration to try and make something flat. Which means that in theory, if you're draw a straight line across this, it's going to
Segment 4 (15:00 - 20:00)
be like you're it's going to do tons of weird [ __ ] You want to minimize that as best as possible. And that's what we're focused on. So, I'm going to send them a list of all the parts that I just showed you that are broken. Hopefully, maybe they'll send us the ones that are visually damaged cuz that's not what I paid for. The problem is everything else that you put in there braces this corner, braces this, braces that, braces it vertically, sideways, and all of that is good money after bad. So, we're not going to put all those parts on. So, we're going to stop here and move all the [ __ ] out of the way so we can get cars in and out and keep moving. So, the reality of this type of stuff is we have to keep all these irons in the fire, and this is exactly why. Can't make the video now because we, you know, gets damaged in shipping. That's uh just my luck, but we're always prepared for that. That's why we have so many projects going on. It is a new day. I'm thinking either more clearly or less clearly. I'm not exactly sure. But because I was showing uh the company that stuff was not square, I brought out one of Cosworth's precision granite pieces. That's how bent it is. Cuz they're like, "We'll replace anything that's bent. " And they're like, "That looks cosmetic. " I'm like, "That's not cosmetic. It's bent. " Now I have a very, very accurate surface. And I thought we can see how close we can unfuck the uh bar up there. What I'm going to do is do a little bit of woodworking and take some solid metal stock and bend it with no tight pressure points. Just bend it back, undo the pain that's been caused and see if I can get it squared up enough for the machine to work. That it'd be nice to have it working before we do everything else. But what we're going to end up doing is this stretcher piece, this metal piece here, is actually the base for the glass. Now that everybody's here, we'll build this thing and we'll probably bolt it to these. But for now, we can take this whole stretcher out, put the glass on it, put the stretcher in, not have us flex and taco the glass and snap it. There's going to be two chunks of wood on each side. And then that gives us space to overbend the bar in the opposite direction. Cuz if you bend it to zero, it's got spring. It's going to spring back to this deformed shape. So, I need a little bit of space in the middle to let that grow. And then, of course, another one in the middle to cinch it down. Once you get that start, we've got two side braces and then one to prevent the marking and distribute force in the middle. That gives me room for this middle part to grow. And I might even upgrade this middle one to like metal on this side if it needs it. Okay, you can see the 2x4, which is like inch and a half by three and a half. Uh, this is definitely actually a true 2x4. So, let's see if it responds to some suggestion a little bit. I might need more than one uh of these. Oh, yeah. I can hear it popping near you. That's why I'm glad I didn't put the glass on yet. It's exactly the type of [ __ ] I would have do done. It's just those are clamps, not presses. So, we're going to use the Rogue Fab brake press to fix this uh a little bit more. So, we're going to take this whole thing off cuz we have to take it off anyway. So, this is actually a pretty nice and simple setup. I just off camera removed the two lines that were here that go to each of the worm gears, and they actually just go to these two right here. So you can see the that's all they are. And these little controllers each the little drivers. These are the things that are actually telling each of those motors move forward and backwards stepper motor style. And so I was going to start unscrewing these. I was taking video of that for myself and realized, oh wait, they just pull out of the track. So that is now empty. But the thing I'm going to have to do is loosen the whole top part forward and backwards because I need to pull this bar out. And if I take this motor off, all that [ __ ] I can pull it this way. Um, you can see why I'm hesitant is look at that bar. That part right here is staying with this. So, I want to pull it out this way. Well, I can't. So, I'm going to loosen that bar on this side. Pull the whole bar up. Hopefully enough for that to pass under. I've since put a zip tie to hold all of that from collapsing. Pop off. That was a [ __ ] ton of work just for that. So, let me see if I can fix it. I've now put it in this and I've decided to make sure that the pressure points since we can do this are all the way where it would have bent from to begin with was held back there and the forklift drove into it. So, I'm going to hold it back there and undrive the forklift into it and hope that gives us enough of what we're looking for. So, it's almost at the bridge. Uh, it's not perfect, but I didn't want to keep pushing it further backwards and it's trying to tilt itself trying to go down. So, here's our best
Segment 5 (20:00 - 23:00)
attempt. Looks like it's right here. Like, see where the gap is the most? Right there. — Yeah, — man. They did a number on this thing. That's looking pretty good. I'm going to go ahead and overdo it. It's picking the machine up. Going right back to how it was. I'm going centralize the pain a little bit closer. What I'm looking for right now is I'm watching for the height of the this versus this. And you can see how it's down here. It's down all the way back there, but it rises here. It means I need to go further back. This is going to be my very first overcorrection. So, it's going to look like I'm breaking it, but that's what it's going to take. That's pretty aggressive. Still not enough. Overbending it [ __ ] up that area that easily. That This is trash. Not even worth doing, but just curious. Guess where we printed this from? Not the big machine. It has been a nightmare. There was a lot of anger, sadness, crying. They're going to send us the parts that are broken. So, I took that whole rail off and I spent three hours trying to make it as straight as possible. It's straighter than Joel is. But that's still not enough. It needs precision. You can actually see it from here. Look on the top of the Ford Performance box. It's not just the weight of that part. It's bowed. The part that matters the most is this steel piece. Now, of course, it weighs something. So, it's going to bend a little bit, but you can actually still see it's actually a lot better than I thought, but there's a bend right in this area. It's right in here. It curves. If you're expecting to print that detail one line over, you can't have it be bent a h 100red thousands. I tried saving this. It's just gone. I can't throw it out and I still want to play with that more. But we're waiting for those parts. I have no ETA on that. So, this is what you really get when you risk it all. Um I'm out thousands, but I feel confident that they'll pull through and we'll have this machine up and running pretty soon. But this is the honest experience of like getting excited to show you guys something. We needed it to print the rear diffuser on the three-rotor and obviously the four rotor. The whole like obvious like secret thing is it's going to be printing all the four rotors uh body panels and then turning them into carbon. Instead of making the like cool video, uh this is the real video of what can happen when you buy something and risk it all. I promise there's a happy ending. Just not right now.