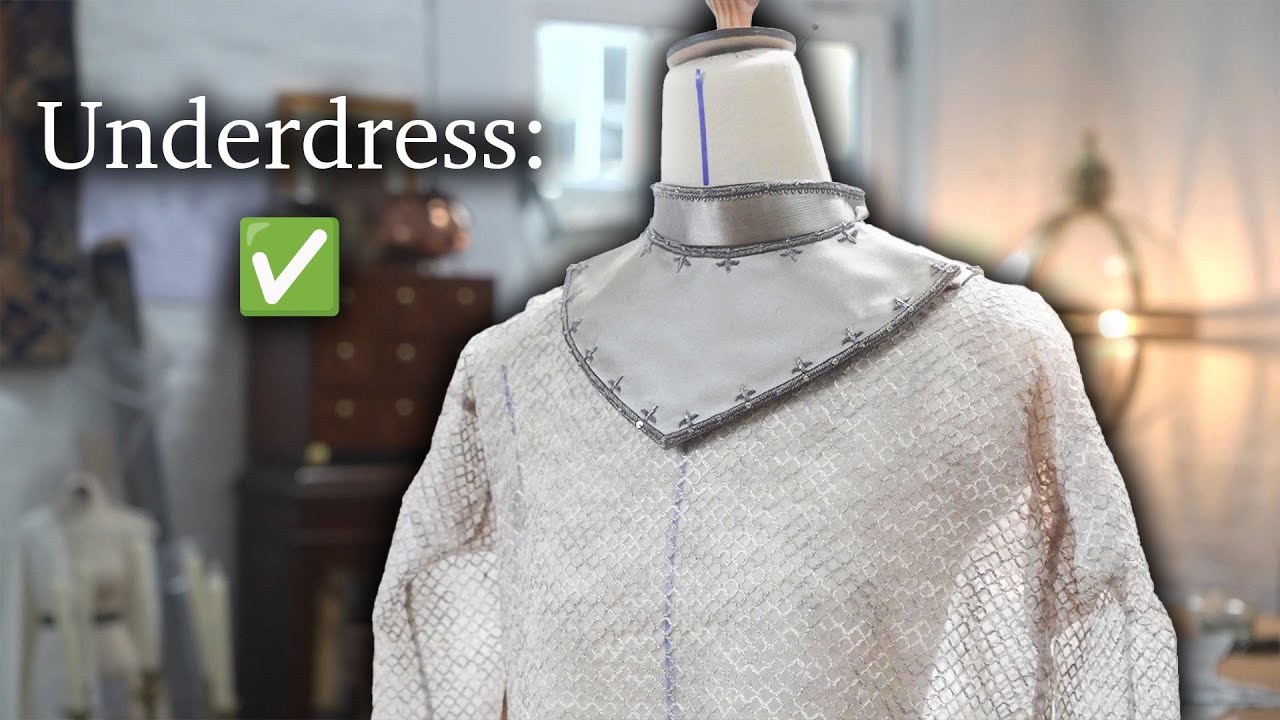
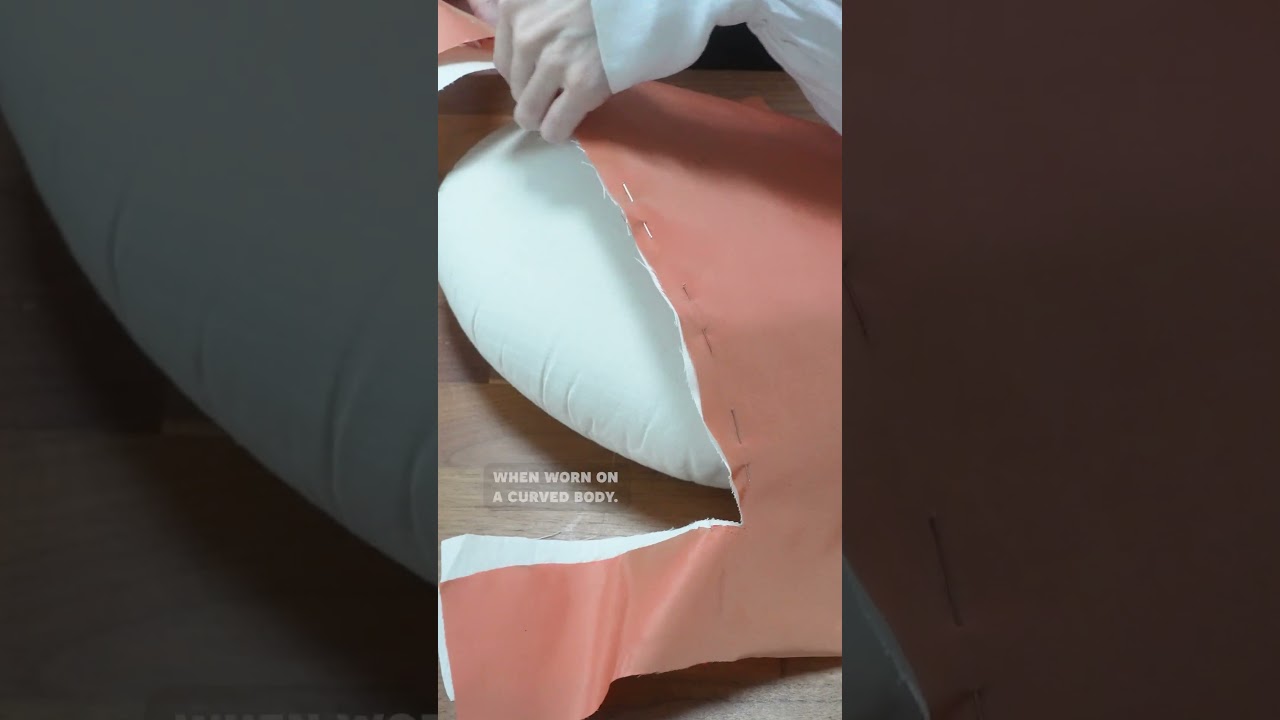
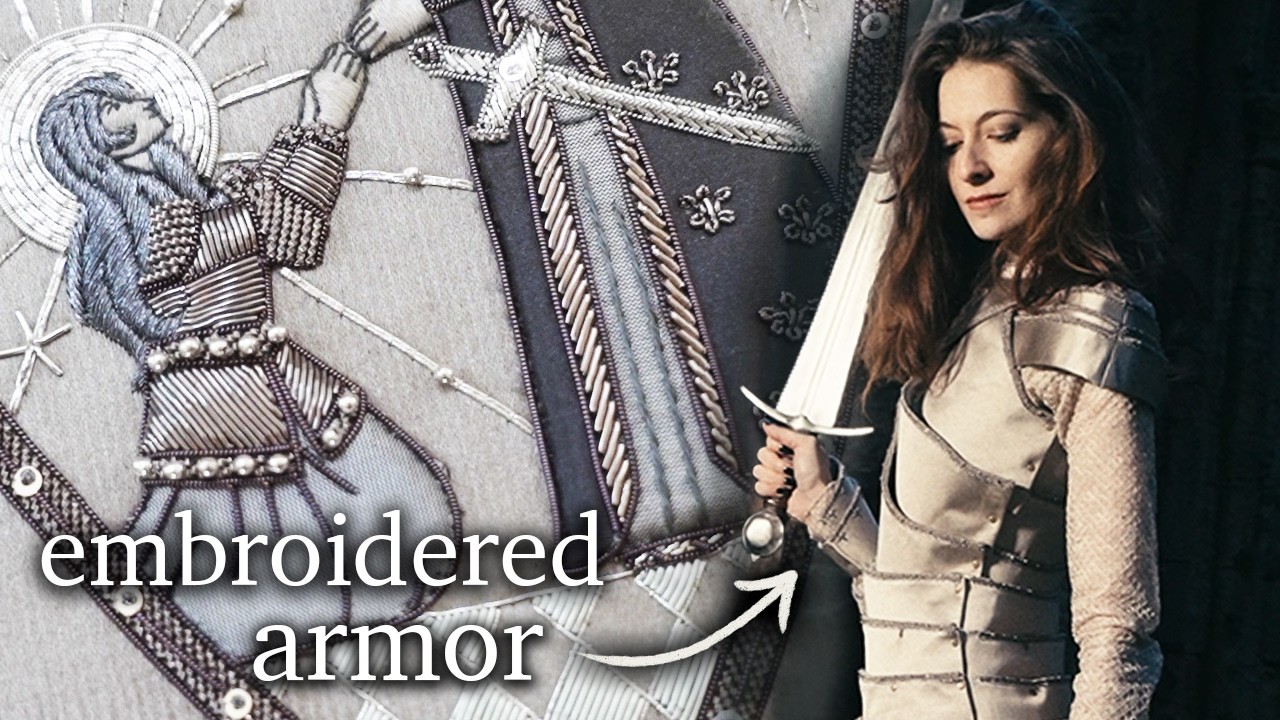
So I'm currently in process of working on a Jon of Arc inspired gown in collaboration with embroidery house hand and lock. The project takes inspiration from 15th century styles of dress and armor and will feature a whole showcase of crafts from, of course, the hand sewing that you all probably know that we do around here to elements of embroidery that hand and lock are going to provide to other crafts such as leather work, shoe making, which you might have already seen in this series, as well as armor making, and that is coming later. But for now, before we can get started on the actual gown, we first need to put together the under layer. Yeah, that's going to be cool. Ladies and gentle folk, we have got quite the storm front rolling in here this evening. So, be sure to expect some high winds, some substantial rains, and of course, a high chance of mood boarding because this video is sponsored by Millanote, the exquisite mood boarding and project organization app that has become such an essential part of our project workflow. I would be a terrible weather person. So, I'm going to take this opportunity to walk you through the mood boards that I have set up for this Jon of Arc project and then we'll dive into how specifically we are going to be setting up this underdress layer. We start off, of course, with research, so where we're pulling from. There's loads of book research in here, books on armor and medieval clothing construction, photos that we've snapped on our phones. I've done a sketch of the Jon of Arc project that I have in my head. And then once I have all the research all in one place and I can see everything very visually, it's great to then be able to organize that research. One of the really great things about Milanote is that there are so many features that can really help you organize that workflow. So you've got notes that you can drag it to whatever image that you want to put it next to. You can change the colors to like serve your own aesthetic needs. Hand and Lock have come up with this really fantastic idea to have Joan's life story told on the front and back facets of the armor. So, I've just made a note here so that I now can remember to not plan anything for the tacets because I know that Hansen Walk has got big plans themselves for that. I like to keep this primary board very aesthetic, very beautiful, very inspiring. And then we can get into the subsections which may not be as visually inspiring, but are still very logistically necessary. So, we can start new smaller boards that are just like collapsed down so we don't need to see it on the main big board. So, here we have our sort of sewing progress organization board. As I was cutting out all like 33 pieces or something of the armor and then knowing that the embroidery was coming down the line, I was like, "Oh my god, there are so many pieces. There's no way I'm not going to lose a piece. " So, Marley very thoughtfully went and effectively made a whole checklist of all the pieces, what we have in stock, what we have cut, what we're still waiting for to come back from the embroiderers. We've just picked off the rest of the embroidery pieces from the embroiderers yesterday. So, we can actually tick a bunch of these off now, which is super satisfying. There was a separate embroidery team working on the chain mail embroidery versus the armor embroidery because the armor embroidery is done by hand. The chain mail, it's very repetitive and it's a huge swath of fabric that needs to be done. So, we decided that this was probably going to be best done by machine. And so we have another subboard which is specifically dedicated to the chain mail underdress. And this is what we need for right now. Because the original design is a layered piece, there's an under layer that is simultaneously reminiscent of the chain mail that would have been worn potentially underneath plate armor to fill in some of the softer and more movement necessary gaps. And so we had our fantastic digitizers and our fantastic machine operators working on this board. Obviously, we've got a lot of chain mail so that we can get an understanding of the texture and how we could possibly replicate this in an embroidered interpretation. I really like the transparency of this one down here. I really want to try and bring that sort of etherealness and transparency into the underdress because this is kind of a fantastical gown. I'm not trying to quite literally make a chain mail underdress. Because this is the foundation layer of this down, I thought it would be really cool to play with the idea of pulling from the actual foundation layers from this period, which would have been the smok layer. One of these very classic early medieval cuts have a big gore up the front. They've also got gores at the side and probably one at the back as well. I don't want to have this at the front actually. So I can just scribble that out because I'm going to have the main body piece and the gores, but I'm going to split from like the mid thigh downward because we do have some plate armor going on underneath and I want to have that peek out and be on show. So nowadays I tend to work with a lot of people when I'm doing my projects whether it is other artisans who are helping on different aspects of the project or people behind the scenes such as Marley who is doing a lot of the
Segment 2 (05:00 - 10:00)
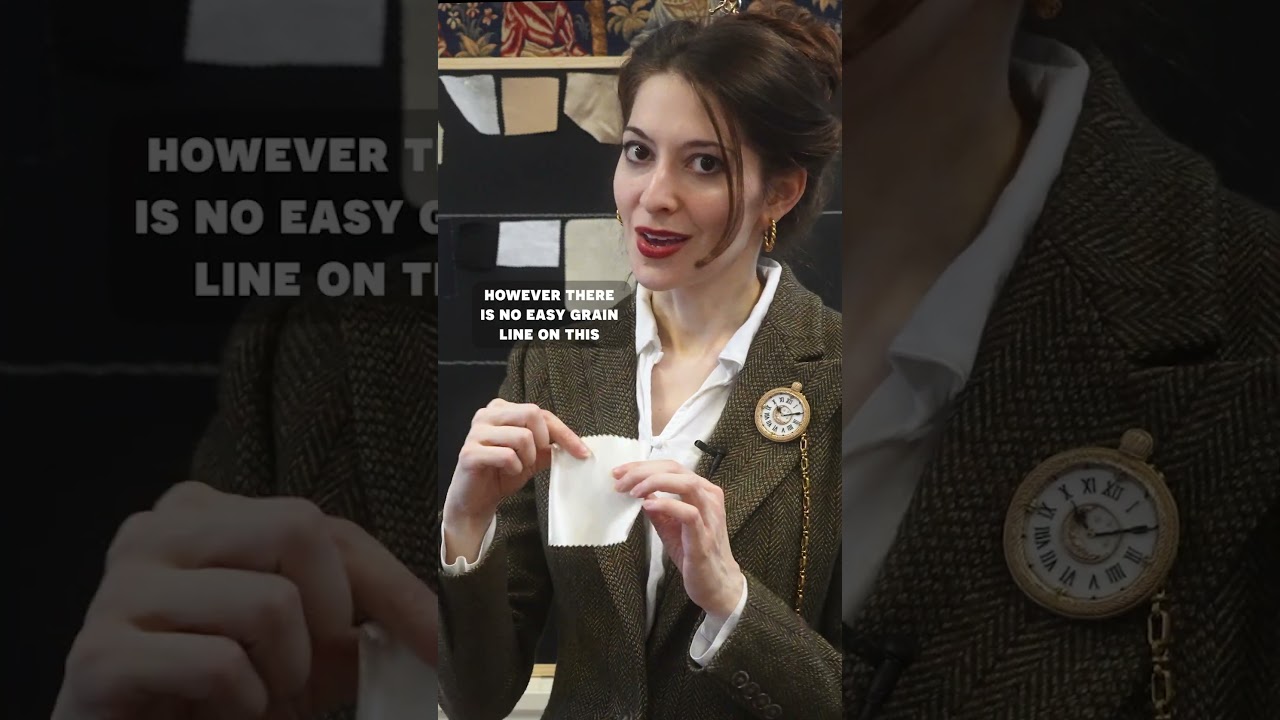
logistical and organization aspects of the production. — So pay no attention to the girl behind the curtain — or Danny who's doing the editing and is sometimes going to need to go back and find the images and the sources of the images in order to paste those into the video. So, it's really easy for us to get a team together and to be able to comment and say, "Oh, you know, I really like this idea. How about we do this? How about we pull in something from this? " Or whether you just like to share for review, you can just copy that link, send it wherever, and anyone can just see that board, which is really useful. So, I know we don't always go into this level of depth in the behind the scenes and the sort of logistical and practical and designery workings of every project, but this is essentially what goes into every single project, and Milano is such a huge part of that. So, thank you Millanote for sponsoring this video, for supporting this channel, and for allowing us the opportunity to work with all these crafts people and ensure that everyone gets paid. If you'd like to try Millanote for free, there's a link down in the description where you can sign up and give it a try for yourself. And now, back to you. So, Hand and Lock have finally finished the underdress embroidery. I've picked it up. It's now back in the workshop. And so before I make any more progress on the overdress, I'm going to be working on the underdress and at least get this ticked off the list. So I've given them the pattern pieces and then they have marked out just run the space of where we're actually going to cut. So we don't have like 5 yards of just wasted embroidery cuz that would just be pointless. So here we have the long main body piece that goes all the way down there. And then we've got a gore. Here we've got another our two gussets somewhere there. And then we've got two sleeves. Obviously, because there's so much of it, this was all done by machine. I'm just going to cut out these pieces, pin them together, and sew them up. What could possibly go wrong? I actually don't want to say that because like literally, what could possibly go wrong? There shouldn't be anything going wrong here. Originally, we talked about doing the embroidery in a metallic thread, but the sort of dangerous nature of metallic thread is that it is very prone to snapping and every time the thread snaps, you have to tie it back, which when you're working with an opaque fabric is perfectly fine. The knots just live on the back. But because this is a sheer fabric that we're working with, you can see every knot and stray thread going on the back of the material. It just didn't give quite as clean of a look as Hand and Lock was going for. So they did a bunch of different tests with weights of thread, different colors. And finally, after many rounds of testing, both with the thread weight and color and the size of the rings and the spacing of the rings, they finally landed on this design, this ring size, the spacing, and to go with the silk embroidery threads, which still would allow some luster and some shine, but without the fragility of the metallic threads. The final thread that they ended up settling on is a variegated or space dyed silk thread, which is essentially a multi-tononed thread, i. e. it's been dyed differently in different places. So, it has sections of off-white, sections of gray, sections of silver, sections of white. And in stitching this out in the chain mail pattern, they managed to achieve this really cool tramploy effect of the different tones of light hitting chain mail and how it's brighter and darker with light and shadow in different areas. It's a really cool effect. It gives almost a painterly feel to the chain mail while also of course having the luster of silk. So it is still quite shiny, but it's of course much stronger than the metallic threads. Okay. So, as I was cutting this, I suddenly had a fear about this very wide medieval neckline in that maybe it will not be accommodating underneath this the gorgeous shape that I have, which is slightly slimmer. And just looking at the size of the neckline, I have my seam allowances here. I was like, maybe I'll just cut a really wide seam allowance just in case. And I'm so glad I did because it looks like I will just be able to get this wide neckline. So, I will have to be cheating this a little bit. I'm going to take like the narrowest, tiniest little seam allowance off the side of here when I hem it and then just go back down to normal. But it looks like we will be able to make this work. There is truly no brain exercise like French seaming. Wrong side to wrong side. Okay, the dress is put together with French seams. So, wrong sides together first with the seam allowance on the outside. Then, it's trimmed, flipped, and sewn again with right sides together. So, the fully finished seam is on the inside. There's a lot of inside outing and right side outing. So, I have to be on top guard at all times to make sure that everything is going in the right direction.
Segment 3 (10:00 - 15:00)
by some miracle, despite doing this for 6 hours and working into the evening, I managed to a not sew any of my seams to the outside or b get the underside of the embroidery facing outside. I don't know how I managed it. It's truly a feat. — You should have some soup. — Oh, I have I do have leftover soup. — Soup? — Yeah. — Soup season. — Yeah. You get the broth and you get the potatoes. — Yeah, I'm usually opposed to putting sleeves in by machine, I just personally find them much easier and more secure to do by hand, but since this garment is transparent, I do kind of want all the seams to look the same. So, I'm giving it a go with a machine done French seam. It actually worked out surprisingly well. Since this Smok is a fairly loose fit, the arms eye was big enough that I could get it flat under the machine, which is normally a bit of an issue, especially with a treddle where there's no detached arm that you could fold a sleeve over. The only thing I couldn't quite get to is the very point under the arm when finishing the seam. So, I'm just going in with a little hand stitch to finish this off. Everything that hasn't been seamed and finished now needs a hem. I want the hems to be as thin as possible so as not to look too garmenty or like t-shirty and more chain maily. So, I'm just doing a really fine rolled hem by hand on the bottom edge, the cuffs, the neckline, and up the skirt and cuff slits. success.
Segment 4 (15:00 - 17:00)
And then I had what seemed to be a great idea at the time and I decided to put some spangles everywhere on the smok that would be seen under the overlay. So the sleeves and skirt front and back. I got some gorgeous metal spangles, which I'm just hoping will echo the glittering of chain mail when it moves. Should I have thought about this before I cut out and sew the garment together? Probably. Yeah. But it's too late for that. So, after approximately 11 hours of spangling and with Marley's help, we can finally set aside the under layer for Jon of Arc. It's really amazing how simple this garment is visually, but how much work still went into it. This was around 40 hours of work on my end, plus Marley's circa 8 hours helping with the spangling. And that doesn't include the weeks Hand and Lock spent developing, testing, and embroidering the final fabric. So much of this project was even made easier by the use of machines from the embroidery to the French seaming on my end. So, as far as my usual project workload goes, this particular one was a super quick one and was finished in just under a week, which I'm definitely not used to around here. The same cannot be said for the overgarments. No more simple garments or easy workloads for me because now it is time to work on the plate armor inspired over gown that will complete the Jon of Arc look. Yeah, that's going to be cool. Well, wow. Hell yeah. I'm off to go do that now. So, be sure to hit subscribe if you are not already and you would wish to be notified of the next part in the series when that is released. One day, despite me, I think Denny's just going to make me a whole like burp reel. — Do it. Do it.